Server Configuration
In this document you will discover how to manage a Server supporting Collaborative Modeling features.
1. cdo-server.xml File
The main configuration file used by the Team for Capella Server is the cdo-server.xml file.
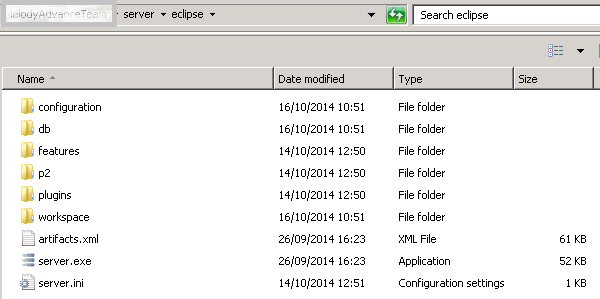
The Team for Capella Server bundle comes as a standard Eclipse application. In the installed package, locate the Configuration folder and open it.
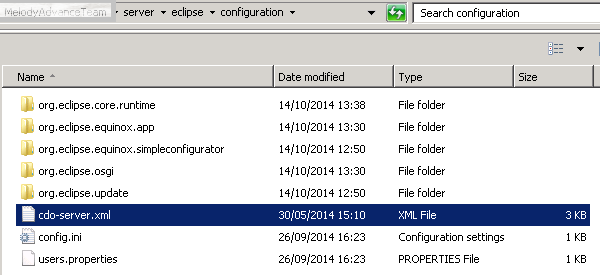
In this folder, locate the cdo-server.xml file and open it.
Here is a commented extract of the ''‹cdo-server.xml›'' delivered with Team for Capella:
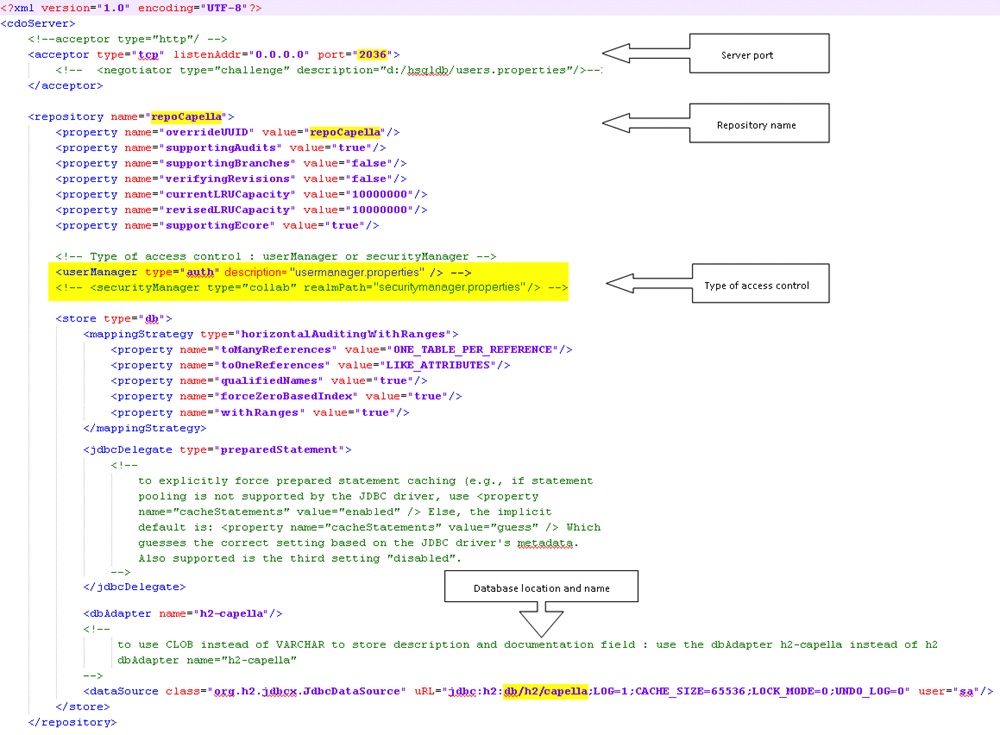
Highlighted elements can be changed to customize the Team for Capella Server.
|
Note that many repository configuration options can not be changed anymore after the repository has been started the first time or if some data have been exported once to the server. If you need to change something in this configuration afterwards, you should then first delete the database files (files with db extension). A typical example is changing the name of the repository. The only elements you can change in the configuration file afterwards are Type of access control : userManager, securityManager, ldap or none and the acceptor. |
2. Authentication
2.1. Authenticated Configuration
To activate the authenticated server you have to set the line below in the cdo-server.xml file before the <store > tag.
<userManager type="auth" description="usermanager-config.properties"/>
usermanager.properties is a path to the authenticated server configuration file. The path can be absolute or relative to the cdo-server.xml file.
users.file.path=users.properties

# ===================================================================
# LDAP Authenticator
# ===================================================================

#auth.type=ldap
#auth.ldap.url=ldap://127.0.0.1:10389
#auth.ldap.dn.pattern=cn={user},ou=people,o=sevenSeas
#auth.ldap.filter=
#auth.ldap.tls.enabled=false
#auth.ldap.truststore.path=
#auth.ldap.truststore.passphrase=

# ===================================================================
# OpenID Connect Authenticator
# ===================================================================

#auth.type=openidconnect

# -------------------------------------------------------------------
# Core Settings
# -------------------------------------------------------------------

#auth.openIDConnect.discoveryURL=https://login.microsoftonline.com/{tenant}/v2.0/.well-known/openid-configuration
#auth.openIDConnect.tenant=yyyyyyyy-yyyy-yyyy-yyyy-yyyyyyyyyyyy
#auth.openIDConnect.clientID=xxxxxxxx-xxxx-xxxx-xxxx-xxxxxxxxxxxx
#auth.openIDConnect.technicalUsers.file.path=technicalUsers.properties

# -------------------------------------------------------------------
# Flow Selection
# -------------------------------------------------------------------
# Choose ONE responseType below. This choice determines which section to use next.

# [RECOMMENDED] Authentication Code Flow with PKCE
# Use this for all new installations.
#auth.openIDConnect.responseType=code

# [LEGACY, DEFAULT] Implicit Flow
# Only use this for backward compatibility with older Identity Providers or installations.
#auth.openIDConnect.responseType=id_token+token

# -------------------------------------------------------------------
# Flow-specific Parameters
# -------------------------------------------------------------------

# --- Authentication Code Flow - if using responseType=code ---

#auth.openIDConnect.login.timeout.ms=10000
#auth.openIDConnect.loopback.server.name=localhost
#auth.openIDConnect.loopback.server.port=-1
# In case of opaque tokens only:
#auth.openIDConnect.introspectClientID=
#auth.openIDConnect.introspectClientSecret=

# --- Legacy Implicit Flow - if using responseType=id_token+token ---

#auth.openIDConnect.state=

# NOTE: Use the property below ONLY if your server is behind a reverse proxy
# and the redirect URL cannot be automatically detected.
# Default: (Auto-computed)
#auth.openIDConnect.webServerURL=https://localhost:8443

# -------------------------------------------------------------------
# Shared Authentication Request Customization
# -------------------------------------------------------------------

#auth.openIDConnect.scope=openid+profile+email
#auth.openIDConnect.acrValues=
#auth.openIDConnect.complement=

# -------------------------------------------------------------------
# Authentication Result Processing
# -------------------------------------------------------------------
# Payload sources: userInfoEndpoint, access_token or id_token

#auth.openIDConnect.userInfoPayload=userInfoEndpoint
#auth.openIDConnect.userInfoMatchClaim=name
#auth.openIDConnect.repositoryFilterPayload=
#auth.openIDConnect.repositoryFilterPayload.checkScope=true
#auth.openIDConnect.repositoryFilterMatchClaim=t4c_repository
#auth.openIDConnect.repositoryFilterMatchPrefix=
#auth.openIDConnect.repositoryFilterMatchValue=
#auth.openIDConnect.accessTokenAudience=
where:
-
users.file.pathis the name of the file containing the users. This file has to be copied into the root server installation folder. You can add new users by modifying theusers.propertiesfile. -
auth.xxxcorresponds to the LDAP configuration or the OpenID Connect configuration. The properties are prefixed by auth. Beware to uncomment at most the LDAP or the OpenID Connect configuration.
The file users.properties contains entries which keys are the logins and values are the passwords. Note that space must be escaped with \ else it will be considered as a key-value separator.
Examples:
admin=admin
John\ Doe=secret
|
This is the default mode, when Team for Capella is installed the server is set with a file authentication configuration. It is recommended to switch to a secured authentication provider like OIDC or LDAP in order to not expose passwords in the 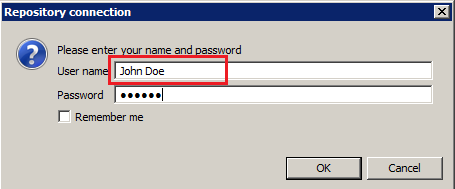
|
As access control modes are exclusive, other modes must be commented in the cdo-server.xml file:
<!-- <securityManager type="collab" .../> -->
<!-- <authenticator type="ldap" .../> -->
The server must be restarted to take into account the modifications done in the cdo-server.xml file.
On Client side, use the User Management view available in all Team for Capella clients. When using this view, the server does not need to be restarted after changes in the user accounts
2.2. User Profiles Configuration
To activate the user profile server you have to set the line below in the cdo-server.xml file before the <store > tag. The user profiles model is created at the first server launch.
Once activated, you must see this during the Team for Capella Server starting:
_html_m4619544b.png)
<securityManager type="collab" realmPath="userprofile-config.properties" />
userprofile-config.properties is a path to the user profile configuration file. The path can be absolute or relative to the cdo-server.xml file.
realm.users.path=users.userprofile
administrators.file.path=administrators.properties
permissions.role.semantic.file.extensions=capella,afm

# ===================================================================
# LDAP Authenticator
# ===================================================================

#auth.type=ldap
#auth.ldap.url=ldap://127.0.0.1:10389
#auth.ldap.dn.pattern=cn={user},ou=people,o=sevenSeas
#auth.ldap.filter=
#auth.ldap.tls.enabled=false
#auth.ldap.truststore.path=
#auth.ldap.truststore.passphrase=

# ===================================================================
# OpenID Connect Authenticator
# ===================================================================

#auth.type=openidconnect

# -------------------------------------------------------------------
# Core Settings
# -------------------------------------------------------------------

#auth.openIDConnect.discoveryURL=https://login.microsoftonline.com/{tenant}/v2.0/.well-known/openid-configuration
#auth.openIDConnect.tenant=yyyyyyyy-yyyy-yyyy-yyyy-yyyyyyyyyyyy
#auth.openIDConnect.clientID=xxxxxxxx-xxxx-xxxx-xxxx-xxxxxxxxxxxx
#auth.openIDConnect.technicalUsers.file.path=technicalUsers.properties

# -------------------------------------------------------------------
# Flow Selection
# -------------------------------------------------------------------
# Choose ONE responseType below. This choice determines which section to use next.

# [RECOMMENDED] Authentication Code Flow with PKCE
# Use this for all new installations.
#auth.openIDConnect.responseType=code

# [LEGACY, DEFAULT] Implicit Flow
# Only use this for backward compatibility with older Identity Providers or installations.
#auth.openIDConnect.responseType=id_token+token

# -------------------------------------------------------------------
# Flow-specific Parameters
# -------------------------------------------------------------------

# --- Authentication Code Flow - if using responseType=code ---

#auth.openIDConnect.login.timeout.ms=10000
#auth.openIDConnect.loopback.server.name=localhost
#auth.openIDConnect.loopback.server.port=-1
# In case of opaque tokens only:
#auth.openIDConnect.introspectClientID=
#auth.openIDConnect.introspectClientSecret=

# --- Legacy Implicit Flow - if using responseType=id_token+token ---

#auth.openIDConnect.state=

# NOTE: Use the property below ONLY if your server is behind a reverse proxy
# and the redirect URL cannot be automatically detected.
# Default: (Auto-computed)
#auth.openIDConnect.webServerURL=https://localhost:8443

# -------------------------------------------------------------------
# Shared Authentication Request Customization
# -------------------------------------------------------------------

#auth.openIDConnect.scope=openid+profile+email
#auth.openIDConnect.acrValues=
#auth.openIDConnect.complement=

# -------------------------------------------------------------------
# Authentication Result Processing
# -------------------------------------------------------------------
# Payload sources: userInfoEndpoint, access_token or id_token

#auth.openIDConnect.userInfoPayload=userInfoEndpoint
#auth.openIDConnect.userInfoMatchClaim=name
#auth.openIDConnect.repositoryFilterPayload=
#auth.openIDConnect.repositoryFilterPayload.checkScope=true
#auth.openIDConnect.repositoryFilterMatchClaim=t4c_repository
#auth.openIDConnect.repositoryFilterMatchPrefix=
#auth.openIDConnect.repositoryFilterMatchValue=
#auth.openIDConnect.accessTokenAudience=
where:
-
realm.users.pathis the name of the resource that contains the user profile model. -
administrators.file.pathis a path to the administrators file. The path can be absolute or relative to the cdo-server.xml file. This file is only used to initialize administrators in the user profile model during the first start of the repository with the User Profile mode enabled (repository creation for example). It is mandatory because the definition of the user profile can only be done by an administrator. -
auth.xxxcorresponds to the LDAP configuration or the OpenID Connect configuration. The properties are prefixed by auth. Beware to uncomment at most the LDAP or the OpenID Connect configuration.
Be aware that once the server has been launched with the User Profile mode enabled, modifications on this file will have no effect. If you want to manage the list of administrators, please have a look at User Pofiles documentation and especially at the Promote a User to Super User section if you want to promote an existing user to administrator. On the other hand, you can also make backups (shared projects and User Profiles model), stop the server, delete the database, modify the administrators files, restart the server and re-export your data.
As access control modes are exclusive, other modes must be commented in the cdo-server.xml file:
<!-- <userManager type="auth" .../> -->
<!-- <authenticator type="ldap" .../> -->
The server must be restarted to take into account the modifications done in the cdo-server.xml file.
2.3. Not Authenticated Configuration
This configuration allows to work with a CDO server without authenticating from a client.
Just comment securityManager, userManager and authenticator tags in the cdo-server.xml file:
<!-- <securityManager type="collab" .../> -->
<!-- <userManager type="auth" .../> -->
<!-- <authenticator type="ldap" .../> -->
The server must be restarted to take into account the modifications done in the cdo-server.xml file.
2.4. Activate LDAP authentication
2.4.1. Activate LDAP authenticator
You can activate LDAP authentication in three different ways:
-
As an authenticator, the user must only be declared in the LDAP directory.
-
In combination with authenticated server. In that case, the authentication requires that the user is declared in the user file and is authenticated with the LDAP directory.
-
In combination with user profile server. In that case, the authentication requires that the user is defined in the user profile model and is authenticated with the LDAP directory.
The server must be restarted to take into account the modifications done in the cdo-server.xml file.
These ways are excluding themselves.
To activate LDAP authentication, as exclusive authenticator, the following authenticator tag must be added to the repository configuration in cdo-server.xml.
<authenticator type="ldap" description="ldap-config.properties" />
ldap-config.properties is a path to a properties file containing the LDAP authenticator configuration. This path may be relative to the CDO server configuration file or absolute.
As access control modes are exclusive, other modes must be commented in the cdo-server.xml file:
<!-- <userManager type="auth" .../> -->
<!-- <securityManager type="collab" .../> -->
2.4.2. Configure LDAP authenticator
The LDAP authenticator’s configuration file is a properties file whose content could look like the following one:
ldap.url=ldap://127.0.0.1:10389
#ldap.url=ldaps://127.0.0.1:10389
ldap.dn.pattern=cn={user},ou=people,o=sevenSeas
ldap.filter=
ldap.tls.enabled=true
ldap.truststore.path=trusted.ks
ldap.truststore.passphrase=<TRUSTSTORE_PASSWORD>
where :
-
ldap.url is the URL of the LDAP server, typically in the form
<ldap or ldaps>://<IP_address or domain_name>:<port> -
ldap.dn.pattern is the pattern to define the LDAP query used to bind a user. It must contain a
{user}part which will be replaced with the login provided by the user. -
ldap.filter is the LDAP query used to filter users by checking some attributes (optional). Different patterns are available to define this filter. For instance with the Apache DS sample (To download it, you can save the target of this link), to grant access to users having an email, the ldap filter pattern would be: mail=*. As another example, to filter user (from a directory named «Users») members of a group named «grp1» in the domain «MyCompany.com» the filter to declare will be : memberOf=CN=grp1,CN=Users,DC=MyCompany,DC=com.
-
ldap.tls.enabled is used for TLS enabling : true to enable TLS, false otherwise (non-SSL mode or use of deprecated LDAPS protocol). The default value is true.
-
ldap.truststore.path is the absolute path to a certificate truststore (useful for self-signed certificates)
-
ldap.truststore.passphrase is the truststore’s passphrase (useful for self-signed certificates)
|
The property |
When the LDAP authenticator is used in User Profile or Authenticated configurations, those properties property keys must be prefixed by the auth. and the auth.type=ldap is needed to activate the LDAP authentication.
| Unlike the other two configuration ways (with «user profile server» and «authenticated server»), in the «exclusive authenticator configuration», the properties are not prefixed by auth. |
If the LDAP certificate has been signed by an official Certificate Authority it is not required to set the trust store path as the JVM already trusts the CA.
If you need to generate a self-signed certificate or need to create a trust store from an existing certificate please refer to the following section.
Use a self-signed or non CA-authentified certificate
In case the certificate is self-signed or the CA used in your certificate is not managed by the jvm, you will need to generate a truststore and reference this truststore from the configuration file.
Follow the Export and TrustStore creation steps to create the trust store.
Example of LDAP using multiple patterns
# ldap configuration
ldap.url=ldap://ldap.myCompany.com:389
ldap.dn.pattern=uid={user},ou=group1,o=orga1,dc=mycompany,dc=fr
ldap.dn.pattern.1=uid={user},ou=group2,o=orga1,dc=mycompany,dc=fr
ldap.dn.pattern.2=uid={user},ou=groupN,o=orgaM,dc=mycompany,dc=fr

ldap.tls.enabled=false
2.4.3. Configure LDAP with a manager
Some LDAP does not support anonymous binding (if your LDAP server doesn’t even allow a query without authentication), then Capella would have to first authenticate itself against the LDAP server, and Capella does that by sending the «manager» DN and password. Using this specific connection, the user credentials (given by the user in the authentication popup) can be looked for in the LDAP tree.
This manager credentials needs to be provided in the properties file as it will not be asked to the user. These credentials are provided with the following properties:
-
ldap.manager.dn : The login of the manager.
-
ldap.manager.password : The password of the manager.
|
The properties |
The search for the user himself in the LDAP is provided with the following properties:
-
ldap.user.search.base : search pattern working like the ldap.dn.pattern field.
-
ldap.user.search.filter : search filter working like the ldap.filter filed.
Example of LDAP configuration with a manager
# ldap configuration
ldap.url=ldap://ldap.myCompany.com:389
ldap.user.search.base=dc=myCompany,dc=com
ldap.user.search.filter=(&(objectClass=account)(cn={user}))

# The manager credentials are useful for LDAP requiring authentication to run search filters
ldap.manager.dn=uid=manager,ou=People,dc=myCompany,dc=com
ldap.manager.password=DerfOcDoocs6

ldap.tls.enabled=false
2.4.4. Configure LDAP with Active Directory
An LDAP using Active Directory provides a field sAMAccountName that is usually used as a key (like the "cn" field). Users can be identified using this field associated with a domain name after an "@" as separator. This leads to this pattern: sAMAccountName@DomainName. As the user identifies himself by providing only his identifier, not the domain name, the corresponding pattern is: {user}@DomainName.
Example of LDAP configuration with Active Directory
For instance, if the domain name is "MyCompanyDomain" then the LDAP pattern will be: ldap.dn.pattern={user}@MyCompanyDomain
# ldap configuration
ldap.url=ldap://ldap.myCompany.com:389
ldap.dn.pattern={user}@MyCompanyDomain

ldap.tls.enabled=false
Example of LDAP configuration with a manager and Active Directory
# ldap configuration
ldap.url=ldap://ldap.myCompany.com:389
ldap.user.search.base=dc=myCompany,dc=com
ldap.user.search.filter=(&(objectClass=organizationalPerson)(name={user}))

# The manager credentials are useful for LDAP requiring authentication to run search filters
ldap.manager.dn=manager@myCompany.com
ldap.manager.password=managerPassword

ldap.tls.enabled=false
Additional information
Sometimes, the structure of an Active Directory is not trivial and the exact path of a user in the Active Directory tree is not obvious. Here are some usefull command to get information about the Active Directory structure to reach the user "testUser" (testUser@myCompany.com)
dsquery * -filter "samaccountname=testUser" -attr *dsquery group -name "groupname"dsquery * -filter "samaccountname=testGroup" -attr *
dsquery * -filter "cn=testGroup" -attr *How to complete the filter with the group
(& (objectClass=organizationalPerson)(sAMAccountName={user}) (memberOf=CN=grp1,CN=Users,DC=MyCompany,DC=com))Usefull links:
2.5. Activate OpenID Connect authentication
When the server is configured for OpenID Connect (OIDC) authentication, users authenticate via the interface provided by your organization’s Identity Provider (IdP).
Instead of the standard login/password dialog, the system uses a browser-based authentication process. The technical behavior of this process depends on the configured authentication flow.
|
Authentication delegation through OpenID Connect is currently supported and tested towards Microsoft Entra ID and Keycloak. It follows standard OIDC protocols and has been successfully deployed with a variety of identity providers, but not limited to: Microsoft Entra ID, Keycloak, Authentik, OpenAM, PingFederate, WALLIX Trustelem. For consistency, the following sections use Microsoft Entra ID terminology and concepts for all configuration examples. |
|
Technical views such as CDO views or Administration views still authenticate with basic login/password credentials. They cannot be used in this mode. |
2.5.1. Security and Lifecycle Management
Since authentication is delegated, the OpenID Connect platform is responsible for the identity lifecycle and security policies:
-
Multi-Factor Authentication (MFA): Handling of SMS, Authenticator apps, or hardware keys.
-
Credential Management: Password complexity, expiration, and self-service renewals.
-
Conditional Access: Restrictions based on network location or device compliance.
2.5.2. Authorization and Permissions
While identity is verified by the Identity Provider, access rights (authorizations) can be managed through three complementary methods:
-
Identity Provider Claims: Using the repositoryFilter properties, the application can grant or deny access based on specific claims (e.g., group membership) sent by the Identity Provider.
-
Local User Management: Administrators can use the internal User Manager or User Profiles to define access and/or permissions.
-
Hybrid Model: A combination of both, where OIDC validates the user’s existence and broad group belonging, while local profiles determine specific technical roles within the application.
2.5.3. Supported Authentication Flows
Two different OpenId Connect interaction patterns are supported, each providing a distinct user experience:
-
Authentication Code Flow with PKCE (Recommended): This modern security standard triggers the external default system browser (e.g., Chrome, Firefox, Edge). A new tab is opened to handle the interaction with the OpenID Connect platform. This is the most secure method as it keeps credentials entirely isolated from the application environment.
-
Implicit Flow (Legacy, Default) This flow opens an embedded popup dialog containing an internal web browser view. This is provided primarily for backward compatibility with older OpenID Connect installations or specific restricted environments.
|
The Authentication Code Flow is highly recommended for all new installations to ensure compatibility with modern security policies. |
When a user initiates a connection or clicks a Test Connection button, the authentication interface of the configured OpenID Connect is displayed.
|
|
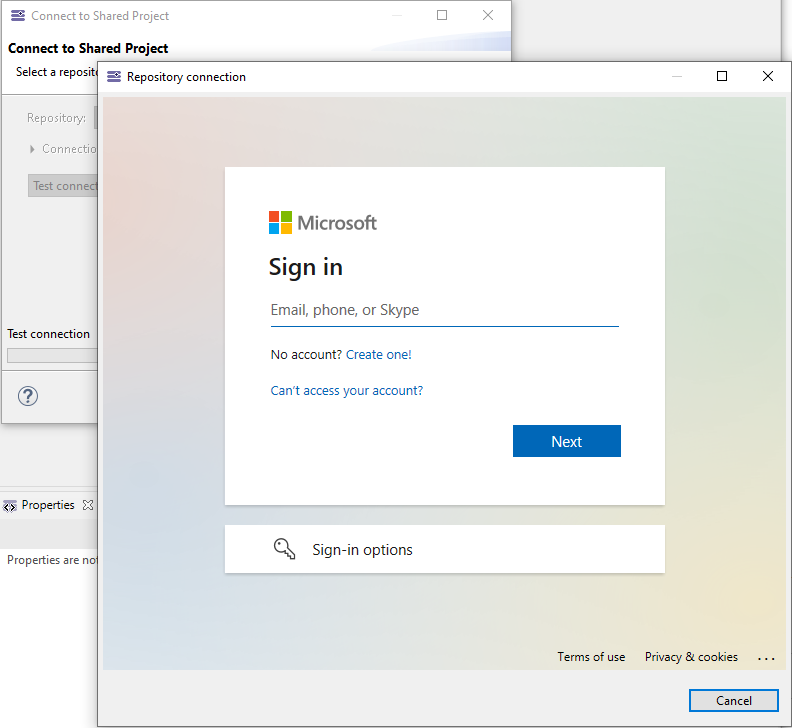
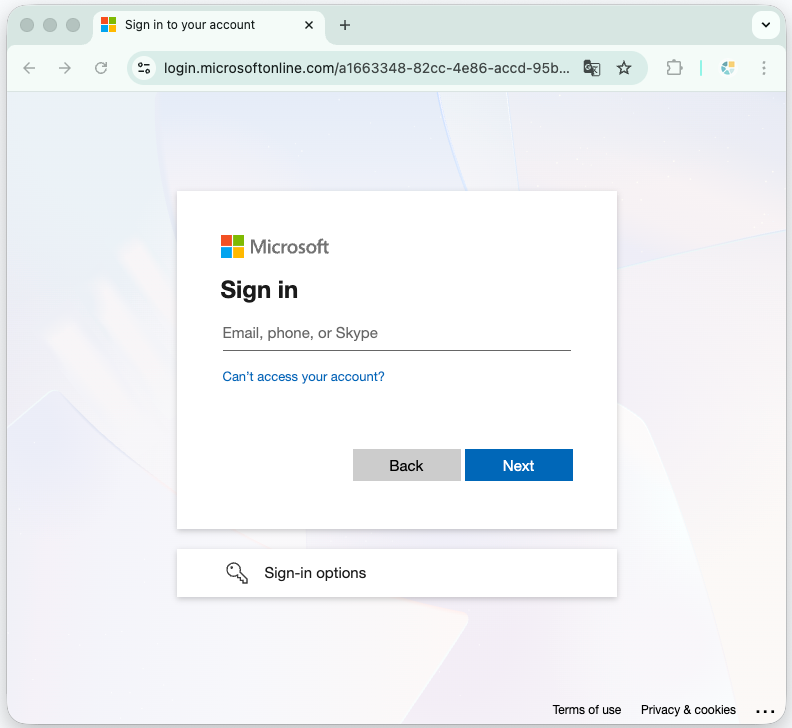
2.5.4. Finalizing Authentication
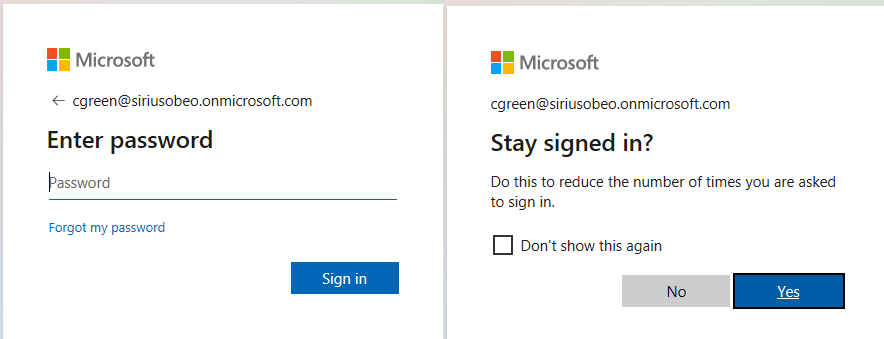
Then, the user follows the authentication process through the different web pages provided by the OpenID Connect platform depending on how it is configured.
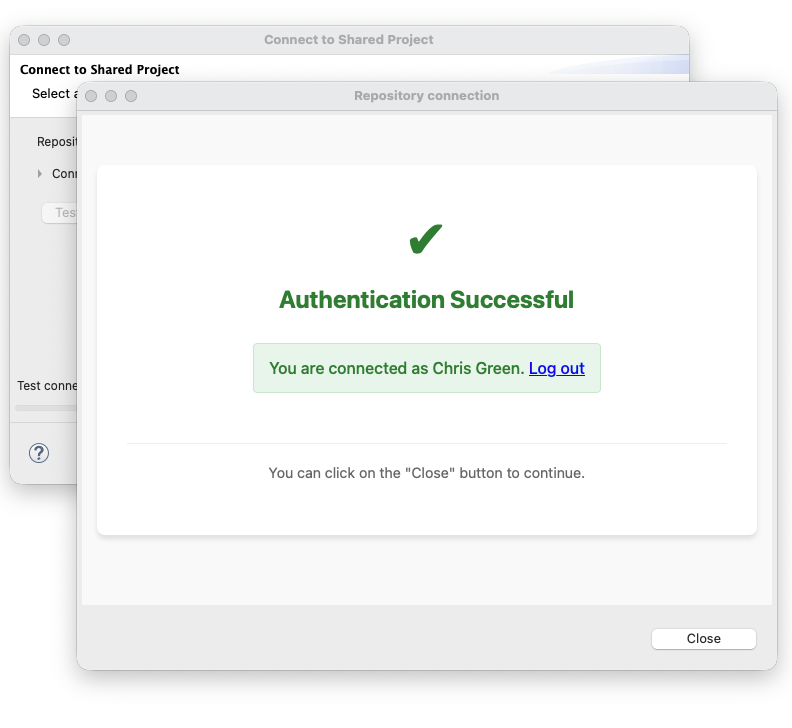
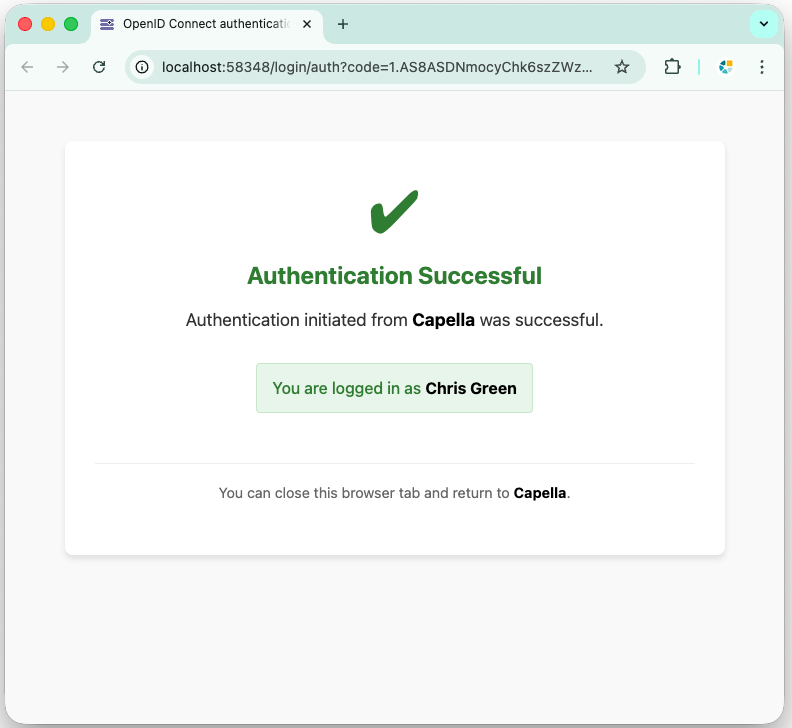
Once the credentials are validated by the provider, a web page indicates if the authentication was successful. The user can then close the browser or dialog and continue as usual.
|
|
2.5.5. Configure Team for Capella server
Activate OpenID Connect authenticator
You can activate the OpenID Connect authentication:
-
As an authenticator, the user must only be declared on the OpenID Connect platform.
-
In combination with user profile server. In that case, the authentication requires that the user is defined in the user profile model and is authenticated with the OpenID Connect server.
-
In combination with authenticated server. In that case, the authentication requires that the user is declared in the user file and is authenticated with the OpenID Connect server.
| For the combination with both "user profile server" and "authenticated server", the user name to configure must correspond to the attribute specified with the userInfoMatchClaim property of the OpenID Connect authenticator. By default it corresponds to the "name" attribute of the user in the OpenID Connect authentication platform. |
The server must be restarted to take into account the modifications done in the cdo-server.xml file.
To activate the OpenID Connect authentication, as exclusive authenticator, the following authenticator tag must be added to the repository configuration in cdo-server.xml. Make sure the other tags are commented.
<authenticator type="openidconnect" description="openid-config.properties" />openid-config.properties is a path to a properties file containing the OpenID Connect authenticator configuration. This path may be relative to the CDO server configuration file or absolute.
As access control modes are exclusive, other modes must be commented in the cdo-server.xml file:
<!-- <userManager type="auth" .../> -->
<!-- <securityManager type="collab" .../> -->
Finally, the OpenID Connect authentication requires a web server in order to securely communicate with the OpenID Connect platform. If the CDO server is configured with the OpenID Connect authentication mode, then it will require to activate the embedded web server for this secure communication.
Configure OpenID Connect authenticator
<installation folder>/server/configuration/openid-config.properties is the OpenID Connect authenticator’s configuration file. It is a properties file whose content could look like the following one:
# ===================================================================
# OpenID Connect Authenticator
# ===================================================================

# -------------------------------------------------------------------
# Core Settings
# -------------------------------------------------------------------

openIDConnect.discoveryURL=https://login.microsoftonline.com/{tenant}/v2.0/.well-known/openid-configuration
openIDConnect.tenant=yyyyyyyy-yyyy-yyyy-yyyy-yyyyyyyyyyyy
openIDConnect.clientID=xxxxxxxx-xxxx-xxxx-xxxx-xxxxxxxxxxxx
openIDConnect.technicalUsers.file.path=technicalUsers.properties

# -------------------------------------------------------------------
# Flow Selection
# -------------------------------------------------------------------
# Choose ONE responseType below. This choice determines which section to use next.

# [RECOMMENDED] Authentication Code Flow with PKCE
# Use this for all new installations.
#openIDConnect.responseType=code

# [LEGACY, DEFAULT] Implicit Flow
# Only use this for backward compatibility with older Identity Providers or installations.
#openIDConnect.responseType=id_token+token

# -------------------------------------------------------------------
# Flow-specific Parameters
# -------------------------------------------------------------------

# --- Authentication Code Flow - if using responseType=code ---

#openIDConnect.login.timeout.ms=10000
#openIDConnect.loopback.server.name=localhost
#openIDConnect.loopback.server.port=-1
# In case of opaque tokens only:
#openIDConnect.introspectClientID=
#openIDConnect.introspectClientSecret=

# --- Legacy Implicit Flow - if using responseType=id_token+token ---

#openIDConnect.state=

# NOTE: Use the property below ONLY if your server is behind a reverse proxy
# and the redirect URL cannot be automatically detected.
# Default: (Auto-computed)
#openIDConnect.webServerURL=https://localhost:8443

# -------------------------------------------------------------------
# Shared Authentication Request Customization
# -------------------------------------------------------------------

#openIDConnect.scope=openid+profile+email
#openIDConnect.acrValues=
#openIDConnect.complement=

# -------------------------------------------------------------------
# Authentication Result Processing
# -------------------------------------------------------------------
# Payload sources: userInfoEndpoint, access_token or id_token

#openIDConnect.userInfoPayload=userInfoEndpoint
#openIDConnect.userInfoMatchClaim=name
#openIDConnect.repositoryFilterPayload=
#openIDConnect.repositoryFilterPayload.checkScope=true
#openIDConnect.repositoryFilterMatchClaim=t4c_repository
#openIDConnect.repositoryFilterMatchPrefix=
#openIDConnect.repositoryFilterMatchValue=
#openIDConnect.accessTokenAudience=
where :
-
Core Settings
-
openIDConnect.discoveryURL: The URL of the OpenID Connect metadata document (RFC 8414). This JSON file contains the endpoints and cryptographic keys required for the authentication handshake.
-
If the URL contains
{tenant}, it is automatically replaced with the value of the openIDConnect.tenant property.
-
-
openIDConnect.tenant: Controls the directory or profile allowed to authenticate.
-
Note: For Microsoft Entra ID,
-
Specify the Directory (tenant) ID or the tenant name (e.g.,
common,organizations). -
The values
commonandorganizationsare not supported if openIDConnect.userInfoPayload or openIDConnect.repositoryFilterPayload are set toaccess_token. A specific Tenant ID must be used for Access Token validation.
-
-
-
openIDConnect.clientID: The unique application ID assigned by your OIDC platform (e.g., the Application ID in the Entra ID registration).
-
openIDConnect.technicalUsers.file.path: A relative path to a properties file containing credentials (login/password) used for system-level views, such as CDO or Administration views.
-
-
Flow Selection
-
You must choose exactly one response type. This choice determines which subsequent configuration sections are relevant.
-
openIDConnect.responseType=code [RECOMMENDED]
-
Enables the Authentication Code Flow with PKCE. This is the modern, secure standard for all new installations.
-
-
openIDConnect.responseType=id_token+token [LEGACY, DEFAULT]
-
Enables the Implicit Flow. Use this only for backward compatibility with older Identity Providers or legacy installations.
-
-
-
-
Flow-specific Parameters
-
Authentication Code Flow (PKCE)
-
openIDConnect.login.timeout.ms: Maximum time in milliseconds for a user to complete the browser-based login before the request expires. Default:
10000. -
openIDConnect.loopback.server.name: The hostname for the local loopback server. Default:
localhost. -
openIDConnect.loopback.server.port: The TCP port for the loopback server. Set to
-1to let the system choose a random available port.-
Note: If using a random port with Microsoft Entra ID, register the Redirect URI as
http://localhost/login/authin the "Mobile and desktop applications" platform.
-
-
openIDConnect.introspectClientID: The unique identifier used for access token introspection assigned to your application by the provider.
-
openIDConnect.introspectClientSecret: The secret used to call the instrospect API. Mandatory if introspectClientID is set. As
introspectClientIDis private, a introspectClientSecret must be used to call the identity provider introspect API.
-
-
Implicit Flow (Legacy)
-
openIDConnect.state: An opaque value used to maintain state between the request and the callback for CSRF protection.
-
openIDConnect.webServerURL: The public URL of the web server.
-
Note: Use this ONLY if the server is behind a reverse proxy and the redirect URL cannot be automatically detected.
-
-
-
-
Shared Authentication Request Customization
-
openIDConnect.scope: The list of scopes to request. Default:
openid+profile+email. -
openIDConnect.acrValues: Requests specific Authentication Context Class Reference values (e.g., for MFA).
-
Note: Automatically mapped to the standard
acr_valuesURI parameter. Use+to separate multiple values (e.g.,mfa+pwd).
-
-
openIDConnect.complement: Allows appending any additional custom URI parameters to the request.
-
Example:
&prompt=login&login_hint=user@domain.com.
-
-
-
Authentication Result Processing
-
These properties define how the server extracts user information and validates repository access from the authentication response.
-
openIDConnect.userInfoPayload: Defines which part of the OIDC response is used to retrieve user details. Options:
userInfoEndpoint(default),access_token, orid_token. -
openIDConnect.userInfoMatchClaim: The attribute in the user profile used to identify the user within the system’s access control modes. Default:
name. -
openIDConnect.repositoryFilterPayload: Enables repository access checking. Access is granted if the chosen payload contains the repository name. Options:
userInfoEndpoint,access_token,id_token, or leave empty for no filtering. -
openIDConnect.repositoryFilterPayload.checkScope: Toggles the cross-verification between the access_token and the OpenID Connect scopes if the chosen payload if the access_token. When enabled, the server ensures the name of the claim defined in
repositoryFilterMatchClaimis explicitly listed within thescopeclaim of the token. Default:true.-
Note: For Microsoft Entra ID, this verification must be disabled as it does not provide the
scopeattribute.
-
-
openIDConnect.repositoryFilterMatchClaim: The claim name within the payload to check for repository authorization. Default:
t4c_repository. -
openIDConnect.repositoryFilterMatchPrefix: Optional prefix required before the repository name in the claim value.
-
openIDConnect.repositoryFilterMatchValue: Optional specific value required in the claim to grant access.
-
openIDConnect.accessTokenAudience: The expected
aud(audience) claim in the access token.
-
|
All parameters above become optional if they have been defined via system properties in the server.ini configuration file. Values provided here will be overridden by the server.ini values.
To build the system property corresponding to one of the OpenID Connect configuration property, replace A global configuration can provide two main benefits:
|
Configure embedded web server for OpenID Connect authentication - Legacy Implicit Flow
As presented before, the OpenID Connect Authentication requires a web server if the chosen flow is the legacy Implicit Flow. This is the same web server as the one providing the web services (REST API) for repository management. See in the dedicated section how to configure this feature.
To activate the OpenID Connect legacy Implicit Flow support, you need then to set the value of the admin.server.jetty.auth.openidconnect.enabled property to true in <installation folder>/server/configuration/fr.obeo.dsl.viewpoint.collab.server.admin/admin-server.properties.
The embedded web server uses HTTPS by default, including when the server and client are installed on the same machine. Keep HTTPS enabled for the legacy OpenID Connect flow and configure its redirect URL with the HTTPS endpoint.
Check the following settings in <installation folder>/server/configuration/fr.obeo.dsl.viewpoint.collab.server.admin/admin-server.properties:
# Jetty configuration
admin.server.jetty.https.enabled=true

# The next four properties will be needed if the 'admin.server.jetty.https.enabled' option is set to true. The fifth one is optional and depend on your key.
# The properties `admin.server.jetty.ssl.keystore.passphrase` and `admin.server.jetty.ssl.keypassword` can be passed with the system property or environment variable
admin.server.jetty.ssl.host=0.0.0.0
admin.server.jetty.ssl.port=8443
admin.server.jetty.ssl.keystore.path=${currentDir}/<keystoreFile>
admin.server.jetty.ssl.keystore.passphrase=<password>
#admin.server.jetty.ssl.keypassword=<keyPassword>

#
# OpenID Connect
#

# The property 'admin.server.jetty.auth.openidconnect.enabled' allows to enable the servlets related to Open ID Connect Implicit Flow.
admin.server.jetty.auth.openidconnect.enabled=true-
admin.server.jetty.ssl.host: let it as it is
-
admin.server.jetty.ssl.port is the port to use for the redirect url in the configuration of the OpenID Connect authentication platform
-
admin.server.jetty.ssl.keystore.path must lead to a PKCS#12 keystore file. See Managing the WSS/HTTPS certificate for the corresponding procedure.
-
admin.server.jetty.ssl.keystore.passphrase is the password used for the keystore.
-
admin.server.jetty.ssl.keypassword is the password used for the key.
|
The properties |
2.5.6. Configure the application on the OpenID Connect platform
Redirect URI Configuration
On the OpenID Connect platform, there is one property that requires to be properly set: the Redirect URI must be precisely configured to match the authentication flow you have selected.
The Redirect URI is the destination where the Identity Provider sends the user after a successful login.
-
For Authentication Code Flow with PKCE [RECOMMENDED]
-
The redirect is handled by the client’s local loopback server.
-
Register the following URI:
http://localhost/login/auth -
In Microsoft Entra ID, this must be added under the "Mobile and desktop applications" platform to allow for dynamic port matching.
-
If you have manually configured a fixed port (openIDConnect.loopback.server.port) or a specific hostname (openIDConnect.loopback.server.name), the Redirect URI registered on the platform must be updated to include these values (e.g.,
http://my-workstation:9090/login/auth). -
If you want to use opaque access token, you need to define a private client application with its associated password.
-
-
For Legacy Implicit Flow
-
The redirect is handled by the Administration Server’s web engine.
-
The URI must point to the
/auth/redirectendpoint of your Administration Server:-
Remote:
https://<admin-server-host>:8443/auth/redirect, or the public HTTPS reverse proxy URL
-
If your server is behind a reverse proxy, this URI must match the public-facing URL defined in the openIDConnect.webServerURL property.
-
Access Token Audience Validation
If the server is configured to process user information or repository filters from an access_token, the Audience (aud) claim must be validated to ensure the token was issued specifically for this application.
The expected value of the audience claim depends on your Identity Provider (IdP) configuration:
-
Microsoft Entra ID (Azure AD)
-
In Entra ID, the Audience is derived from the Scope requested by the client.
-
Entra ID uses a fully qualified URI for scopes. When your client requests a scope, it specifies the Resource (Audience) and the Permission (Scope) in one string:
-
Scope format:
api://[Application ID URI]/[ScopeName]
-
-
You must set openIDConnect.accessTokenAudience to match this Application ID URI.
-
Example: If your scope is
api://my-capella-server/access_as_user,-
the resulting Audience (
aud) in the token will bemy-capella-serverand the resulting scope (scp) will beaccess_as_user
-
-
The authenticator should be configured with
-
openIDConnect.scope=`openid+profile+email+api%3A%2F%2Fmy-capella-server/access_as_user -
openIDConnect.accessTokenAudience=my-capella-server
-
-
-
Keycloak
-
Keycloak usually defaults the audience to the Client ID.
-
If you have a dedicated "Audience" protocol mapper configured in Keycloak, use the specific string value defined in that mapper.
-
Issuer Validation and Microsoft Entra ID Particularities
The server validates the Issuer (iss) claim to ensure the token comes from a trusted authority.
-
Standard Providers (Keycloak, OpenAM, etc.): The issuer is a static URL. The server requires an exact string match between the token’s
issfield and the issuer declared in the Discovery metadata. -
Microsoft Entra ID:
-
Specific Tenant: Using a fixed Tenant ID (GUID) results in a stable issuer (e.g.,
https://login.microsoftonline.com/<tenant-id>/). -
Multi-Tenant Restriction: Using
commonororganizationsendpoints results in a templated issuer. Access Token validation will fail in this configuration. To useaccess_tokenpayloads with Entra ID, a specific Tenant ID must be configured.
-
|
Ensure the Entra ID endpoint version matches your Discovery URL. V1.0 tokens typically use |
2.5.7. Configure the client for OpenIdConnect - Legacy Implicit Flow
When the legacy Implicit Flow is configured, the authentication process relies entirely on the embedded browser. Once authentication with the OpenID Connect provider succeeds, the browser is redirected back to the Administration Server. This flow is highly dependent on the browser’s environment and on the operating system’s native web renderer (e.g., Internet Explorer/Edge legacy on Windows). This can lead to rendering issues with modern Identity Provider login pages or conflicts with advanced Multi-Factor Authentication (MFA) methods.
The provider passes the authentication tokens via the URL fragment, which the server then processes and stores in HTTP cookies. For the authentication to be successful:
-
Trust: The client browser must trust the Administration Server URL (ensure it is added to "Trusted Sites" if necessary in restricted environments).
-
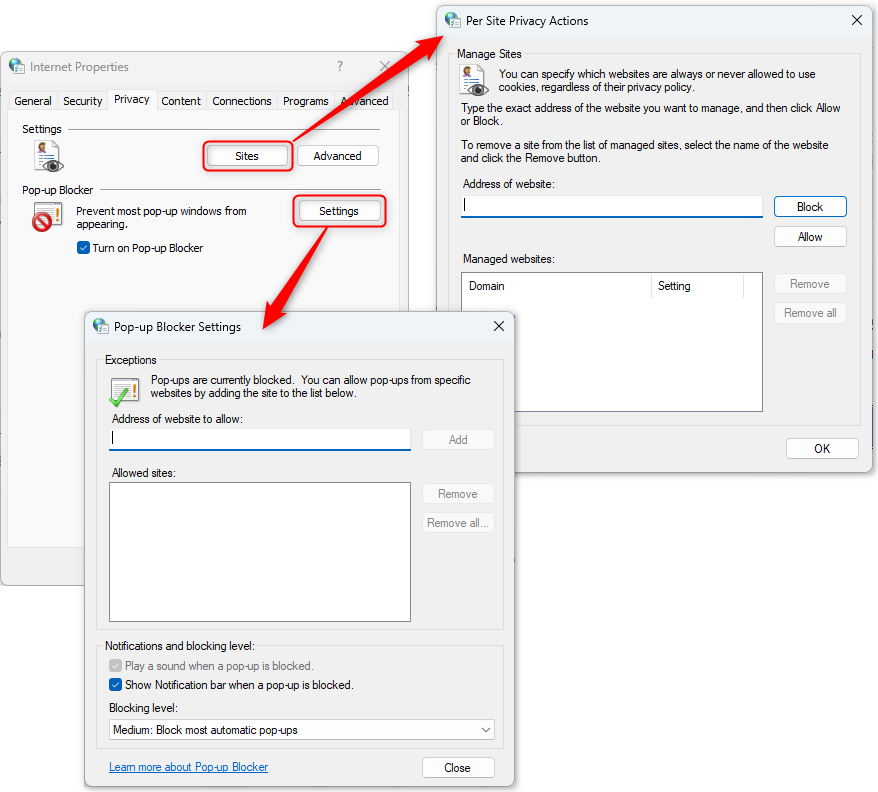
Cookies: The browser must be configured to authorize cookies for the server’s domain. If cookies are blocked or stripped by a proxy, the session cannot be established.
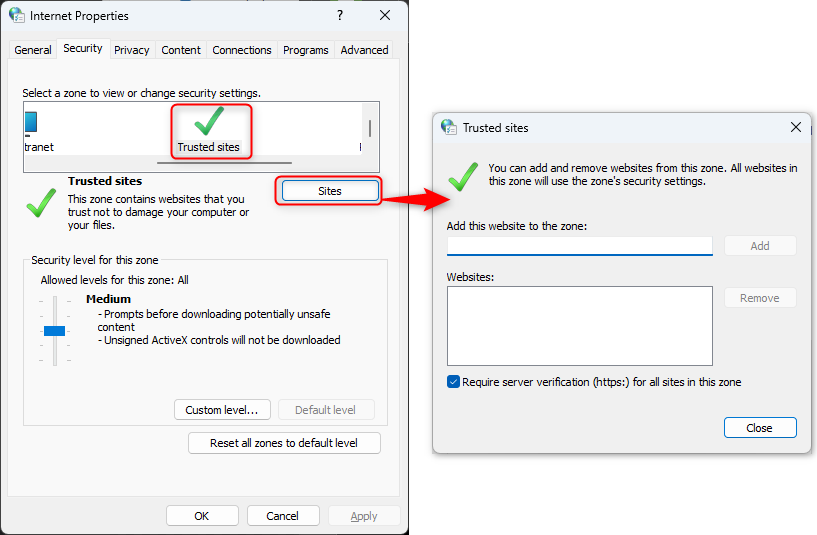
On Windows, the configuration is done in Internet properties.
-
Open
Internet properties -
Select Security tab
-
Select Trusted sites then Sites button
-
Add the admin server URL for example
https://yourDNS
-
Select Privacy tab
-
Click Sites button
-
Allow the admin server URL for example
https://yourDNS -
Click Settings button
-
Allow the admin server URL for example
https://yourDNS
2.5.8. Configure OpenID Connect authenticator with Microsoft Entra ID
Microsoft Entra ID Portal Configuration
If your OpenID Connect platform is Microsoft Entra ID, here is a quick way to find how to configure the OpenID Connect authenticator for your CDO server.
First, the openIDConnect.discoveryURL is provided by the OpenID Connect platform itself, not by your application. For Microsoft Entra ID, this protocol is presented in the online documentation. On the same page, there is a list of the different values the openIDConnect.tenant.
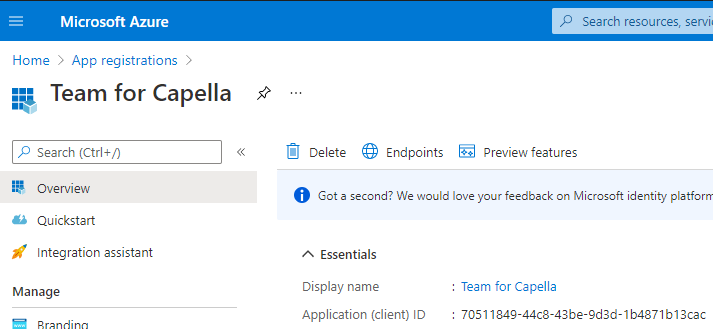
For the openIDConnect.clientID, you will need to look for it in the application you created in Microsoft Entra ID in order to use it for authentication. From the Microsoft Entra ID home page, you can select App registration. Select your application for Sirius collaborative mode. From the overview, you can see the Application ID.
The required configuration in the Microsoft Entra ID portal depends on the authentication flow selected in your server properties:
-
For Authentication Code Flow (PKCE) [RECOMMENDED]
-
Navigate to Authentication > Add a platform > Mobile and desktop applications.
-
Register the Redirect URI:
http://localhost/login/authfor the default OpendID authenticator configuration. -
Under Implicit grant and hybrid flows, ensure that both checkboxes (Access tokens and ID tokens) are UNCHECKED. The Code Flow handles token exchange securely in the background.
-
-
For Legacy Implicit Flow
-
Navigate to Authentication > Add a platform > Web.
-
Register the exact Redirect URI (e.g.,
https://<admin-server-host>:<port>/auth/redirect).-
Port matching is not supported for the Web platform. The URI in your configuration must be an exact string match with the one registered in the portal.
-
-
Under Implicit grant and hybrid flows, you MUST check both:
-
Access tokens (used for Implicit Flow)
-
ID tokens (used for Implicit Flow)
-
-
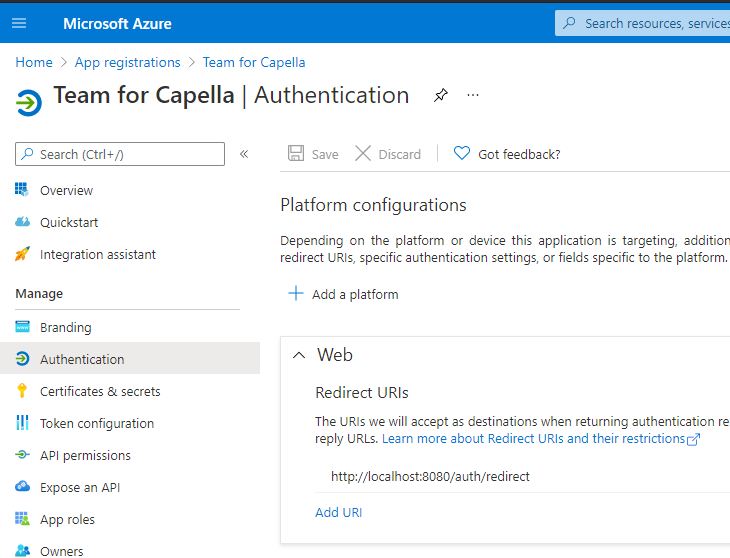
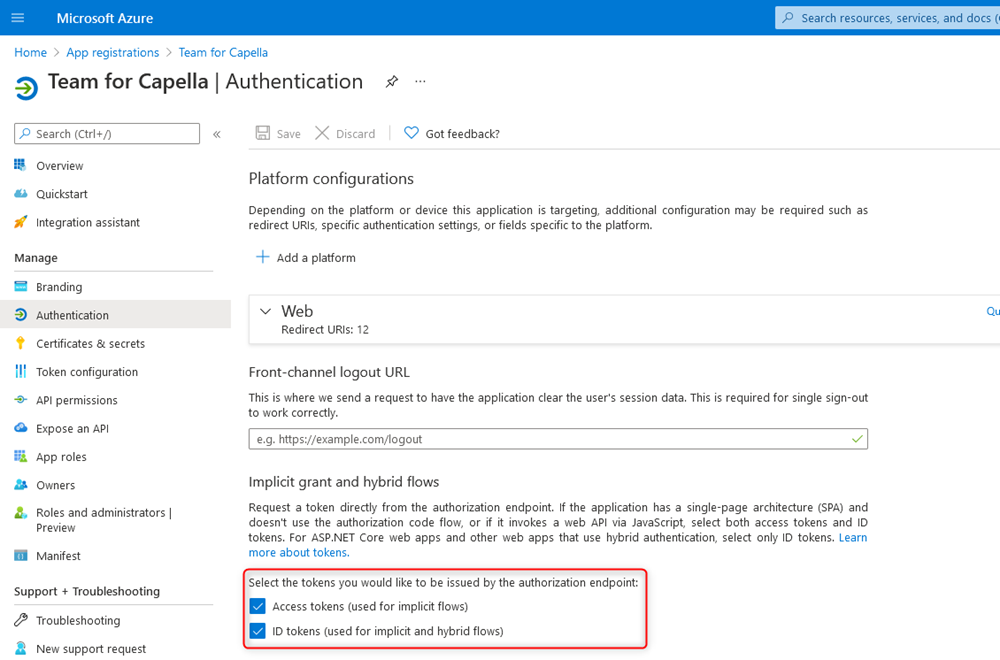
The last property, openIDConnect.domainURL, depends on the location/address of the web server and is not linked with the OpenID Connect configuration.
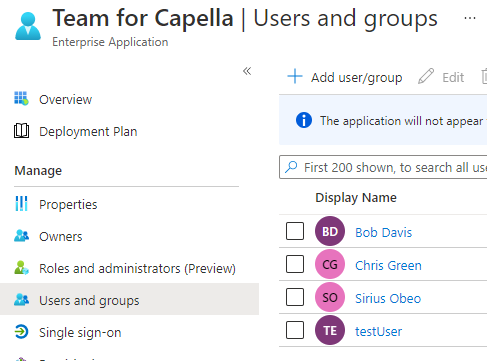
On your application, do not forget to add the users that will be able to authenticate to the application:
It is also recommended to create a conditional access policy (Security/Conditional Access), so you can set a timeout to the session once users are authenticated. You can also define how users are grant access (for instance with multi-factor authentication).
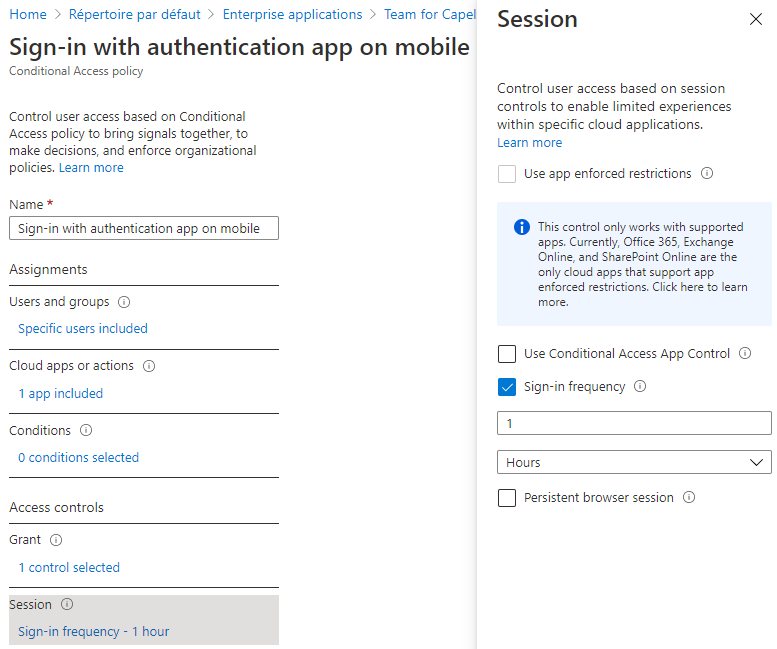
Note that to be able to add conditional access policies, you need to disable the security defaults.
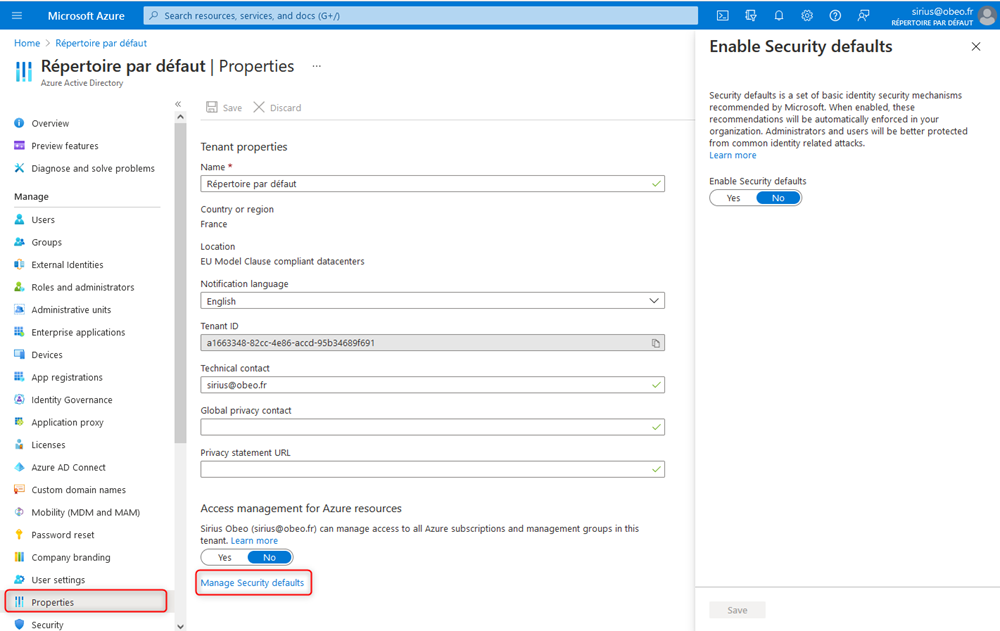
OpenID Connect authenticator sample configuration (REST API)
The following json snippets can be adapted and use to create repositories with OpenID Connect delegation to Microsoft Entra ID via the REST API:
-
For Authentication Code Flow (PKCE) [RECOMMENDED]:
{
  "repositoryName": "myRepo",
  "authenticationType": "OPENIDC",
  "authenticationData": {
    "discoveryURL": "https://login.microsoftonline.com/{tenant}/v2.0/.well-known/openid-configuration",
    "tenant": "yyyyyyyy-yyyy-yyyy-yyyy-yyyyyyyyyyyy",
    "clientID": "xxxxxxxx-xxxx-xxxx-xxxx-xxxxxxxxxxxx",
    "responseType": "code",
    "scope": "openid+profile+email+api%3A%2F%2Fzzzzzzzz-zzzz-zzzz-zzzz-zzzzzzzzzzzz%2Frepo_access_scope",
    "accessTokenAudience": "zzzzzzzz-zzzz-zzzz-zzzz-zzzzzzzzzzzz",
    "userInfoPayload": "id_token",
    "userInfoMatchClaim": "name",
    "repositoryFilterPayload": "access_token",
    "repositoryFilterPayload.checkScope": "false",
    "repositoryFilterMatchClaim": "scp",
    "repositoryFilterMatchValue": "repo_access_scope"
  },
  "datasourceType": "H2_EMBEDDED"
}
-
For Legacy Implicit Flow, with no repository check and user info endpoint use:
{
  "repositoryName": "myRepo",
  "authenticationType": "OPENIDC",
  "authenticationData": {
    "discoveryURL": "https://login.microsoftonline.com/{tenant}/v2.0/.well-known/openid-configuration",
    "tenant": "yyyyyyyy-yyyy-yyyy-yyyy-yyyyyyyyyyyy",
    "clientID": "xxxxxxxx-xxxx-xxxx-xxxx-xxxxxxxxxxxx"
  },
  "datasourceType": "H2_EMBEDDED"
}
3. Audit Mode and Logs
3.1. Audit mode
The Audit mode aims to configure the server so it keeps tracks of all versions of each object in the CDO Server database. It is required for comparing different versions of the model for example. There are two different auditing configurations: Audit and Audit with ranges.
This Audit with ranges mode has been the default mode between Team for Capella 1.3.0 and Team for Capella 5.0.0.
The Audit mode is the default mode since Team for Capelle 5.1.0 to improve user-side performances (export, export with override, semantic browser refresh, …)
The difference between the two modes is in the storage of lists: when the with ranges variant is used, the database stores only the delta between each versions of lists. This implies to load all preceding revisions of a list to compute a given state. But for some situations, it can slow the growth of the database. An analysis of the project can lead to a recommendation to switch to this mode.
When using the auditing modes, the size of the database might need to be monitored. If the database size grows bigger than 4 GB, the user might need to clear it if he encounters performance issues. That is to say, importing the models from the server, clearing the database and then importing the models back in the new database. Be aware that after doing this operation he will not be able to compare new commits against the commits done before the clearance. Some benchmarks have been done, after 10 000 commits modifying semantic and graphical elements this size have never been reached. In this context, modification and saving model times increase slightly compared to a server that does not have audit mode enabled. However both operations still feel smooth for the user.
Be aware that it is not possible to switch between «Audit», «Audit with ranges» or "non «Audit» modes on a CDO server that holds models. The switch has to be done on a empty CDO server database.
In order to disable the Audit mode you have to change cdo-server.xml to:
-
Set the audit mode property to false (default value is true).
<property name="supportingAudits" value="true"/>
-
Change the mapping strategy to horizontalNonAuditing (default value is horizontalAuditing).
<mappingStrategy type="horizontalNonAuditing">
-
Remove or comment the property withRanges in the mapping strategy properties.
<mappingStrategy type="horizontalNonAuditing">
	...
	<!-- property name="withRanges" value="false"/ -->
</mappingStrategy>
In order to (re-)activate the Audit mode you have to change cdo-server.xml to:
-
Set the audit mode property to true (default value is true).
<property name="supportingAudits" value="true"/>
-
Change the mapping strategy to horizontalAuditing (default value is horizontalAuditing).
<mappingStrategy type="horizontalAuditing">
-
Add the property withRanges in the mapping strategy properties.
<mappingStrategy type="horizontalAuditing">
	...
	<property name="withRanges" value="false"/>
</mappingStrategy>
In order to activate the Audit with ranges mode you have to change cdo-server.xml to:
-
Set the audit mode property to true (default value is true).
<property name="supportingAudits" value="true"/>
-
Change the mapping strategy to horizontalAuditingWithRanges (default value is horizontalAuditing).
<mappingStrategy type="horizontalAuditing">
-
Add or modify the property withRanges in the mapping strategy properties.
<mappingStrategy type="horizontalAuditing">
	...
	<property name="withRanges" value="false"/>
</mappingStrategy>
3.2. Server logging
The server produces several log files by default:
-
standard output is logged in a file created at each server launch <TeamForCapella installation folder>/server/configuration/<timestamp>.log
-
exploitation logs are logged in a file created <TeamForCapella installation folder>/server/logs/server.log. A rolling strategy is in place and file put archived and compressed logs in the archived subfolder.
The standard output log can be modified via several properties:
-
osgi.logfile: if not set, default log file will be created in <TeamForCapella installation folder>/server/configuration/<timestamp>.log. If the value is a relative path, the parent path will be the configuration folder. -
eclipse.consoleLog: if "true", any log output is also sent to Java’s System.out (typically back to the command shell if any). Handy when combined with -debug. (-consoleLogon the command line is equivalent toeclipse.consoleLog=truein config.ini or-Declipse.consoleLogin-vmargssection or server.ini. -
eclipse.log.enabled: "true" by default, setting it to "false" will disable eclipse built-in log writer. -
eclipse.log.level: sets the level used when logging messages to the eclipse log.-
ERROR- enables logging onlyERRORmessages. -
WARNING- enables logging ofERRORand `WARNING `messages. -
INFO- enables logging ofERROR,WARNINGandINFOmessages. -
ALL- enables logging of all messages (default value)
-
-
eclipse.log.backup.max: the max number of backup log files to allow. The oldest backup log file will be deleted after the max number of backup log files is reached as a result of rotating the log file. The default value is "10". A negative or zero value will cause the default value to be used. -
eclipse.log.size.max: the max size in Kb that the log file is allowed to grow. The log file is rotated when the file size exceeds the max size. The default value is "1000". A negative value will cause the default value to be used. A zero value indicates no max log size. -
osgi.framework.useSystemProperties: can be put in-vmargssection to indicate to look for previous properties in the-vmargssection and not inconfig.inifile. -
usage:
-
use -DpropName=propValue as a VM argument to the Java VM
-
set the desired property in the config.ini file in the appropriate configuration area
-
Regarding the exploitation log, the server can log actions through its parent logger "fr.obeo.dsl.viewpoint.collab.server" or using a collection of specialized loggers (listed below) to limit by nature the processes that should be logged.
This logging feature is activated and configured in a logback.xml file that is referenced by the server argument:
-Dlogback.configurationFile="path_to_logback.xml"In this configuration file can be declared loggers that log different kind of information. Here is a list of log IDs that are in use:
-
fr.obeo.dsl.viewpoint.collab.server.operation.app: operations on the server application (start, stop…) -
fr.obeo.dsl.viewpoint.collab.server.operation.rest.admin.repo: operations on repositories (list, creation, deletion…) -
fr.obeo.dsl.viewpoint.collab.server.operation.rest.admin.user: operations on users (list, creation, deletion…) -
fr.obeo.dsl.viewpoint.collab.server.operation.rest.admin.others: miscellaneous operations on the server (tasks, monitoring…) -
fr.obeo.dsl.viewpoint.collab.server.security.net4j: authentications with the server (FileManager, LDAP, OIDC, UserProfile) -
fr.obeo.dsl.viewpoint.collab.server.security.rest.admin: authentications with the REST API -
fr.obeo.dsl.viewpoint.collab.server.net4j.session: operations on shared session (opening, closing…) -
fr.obeo.dsl.viewpoint.collab.server.net4j.commit: commit operations on shared session -
org.eclipse.jetty.server.RequestLog: requests received on the Jetty Web Server (set tooffby default)
The server will log at the ERROR level for errors, INFO level for operation start and TRACE level for operation success.
The proposed configuration, pattern, and appenders can be modified in the logback.xml file.
By default, those logs are appended to the console output and added to <TeamForCapella installation folder>/server/logs/server.log.
By default, only the exploitation loggers are enabled. All other loggers are disabled due to the the root logger level set to "off". It is possible to activate all logs or to add more specific loggers. Team for Capella contains a bridge mechanism that redirect JUL and Eclipse/OSGI logs to SLF4j.
* com.thalesgroup.mde.melody.collab.log.bridge: receives logs from Eclipse/OSGI log service redirected to logback (set to off by default). This logger is also present in Team for Capella client.
4. Connection and Security
4.1. Default secure connections: WSS and HTTPS
Team for Capella is configured to use secure connections by default:
| Channel | Default protocol | Default port | Consumers |
|---|---|---|---|
CDO repository transport |
WSS |
8443 |
Team for Capella clients, importer, exporter, maintenance and command tools |
REST Admin Server |
HTTPS |
8443 |
Administration tools, Jenkins jobs and REST API clients |
TCP on port 2036 and HTTP on port 8080 are not enabled by default. They can be enabled whenever required, including in parallel with WSS and HTTPS, but are not recommended for production. See Unsecured connection modes — not recommended for production.
4.1.1. Server configuration
Before the first server start, provide a PKCS#12 keystore (.p12 or .pfx) containing the server private key and its complete certificate chain. A certificate issued by a trusted private certificate authority is recommended. Its Subject Alternative Name (SAN) must contain both the FQDN used by remote Team for Capella clients and DNS:localhost, which is used by importer and exporter processes running on the server host.
Configure <TeamForCapella installation folder>/server/configuration/fr.obeo.dsl.viewpoint.collab.server.admin/admin-server.properties:
admin.server.jetty.http.enabled=false
admin.server.jetty.https.enabled=true
admin.server.jetty.ssl.host=0.0.0.0
admin.server.jetty.ssl.port=8443
admin.server.jetty.ssl.keystore.path=${currentDir}/<server-keystore.p12>
admin.server.jetty.ssl.keystore.passphrase=<keystore-password>
admin.server.jetty.net4j.enabled=true
The keystore passphrase and optional key password can be supplied through system properties or environment variables instead of being stored in clear text. See Passing parameter using system property or environment variable.
The delivered cdo-server.xml contains the WebSocket acceptors required by the WSS transport. The HTTPS Jetty connector provides the encrypted endpoint. Although a WS acceptor is present, it cannot be reached while HTTP remains disabled.
4.1.2. Client configuration
Use the following repository parameters:
-
Repository Host: the FQDN contained in the server certificate SAN,
-
Port Number: 8443, or the HTTPS reverse proxy port,
-
Repository Name:
repoCapella, -
Connection type: WSS.
The default client preferences can be customized in capella/pluginCustomization.ini:
fr.obeo.dsl.viewpoint.collab/PREF_DEFAULT_REPOSITORY_LOCATION=<T4C_SERVER_FQDN>
fr.obeo.dsl.viewpoint.collab/PREF_DEFAULT_REPOSITORY_PORT=8443
fr.obeo.dsl.viewpoint.collab/PREF_DEFAULT_CONNECTION_TYPE=WSS
4.1.3. Tools and Jenkins jobs configuration
Packaged CLI tools and Jenkins jobs are already configured to use localhost, port 8443, connection type wss, and httpsConnection=true. Keep these settings when the tools run on the server host and the certificate SAN contains DNS:localhost. Remote clients use the server FQDN. Importer and exporter processes started by the REST Admin Server also call back to https://localhost:8443 by default.
Do not use an IP address when the server certificate only contains DNS names. If a certificate cannot contain DNS:localhost, keep port 8443, connection type wss, and httpsConnection=true, but replace the repository host and REST httpHost used by the CLI tools and Jenkins jobs with the server FQDN contained in the SAN. For importer and exporter processes started by the REST Admin Server, also set admin.server.api.project.get.impl.config.httpHost and admin.server.api.project.post.impl.config.httpHost to that FQDN.
4.1.4. Managing the WSS/HTTPS certificate
Use a certificate issued by a trusted authority
The recommended keystore is a PKCS#12 file containing the private key, the server certificate, and the complete intermediate certificate chain. Do not copy this keystore to client computers because it contains the server private key.
If a reverse proxy or Web Application Firewall terminates TLS, clients must trust the certificate chain presented by that component, which may differ from the certificate installed on the Team for Capella server.
Generate a self-signed PKCS#12 keystore for testing
For a test installation, the following command is also provided as a commented example in admin-server.properties. Run the keytool embedded in Capella and replace every placeholder:
<T4C_SERVER>\capella\jre\bin\keytool.exe -genkeypair -noprompt -alias <ALIAS> -keyalg RSA -keysize 2048 -sigalg SHA256withRSA -dname "CN=<FQDN>,OU=<T4C_TEAM_OR_SERVICE>,O=<COMPANY>,L=<CITY>,ST=<STATE>,C=<COUNTRYCODE>" -validity 365 -keystore <server-keystore.p12> -storepass <password> -storetype pkcs12 -ext "SAN=dns:<FQDN>,dns:localhost"Keep DNS:localhost because the local importer and exporter callbacks use it by default, and keep the server FQDN for remote clients. Append ,ip:127.0.0.1 to the SAN value only when a connection explicitly uses that address. Add other IP addresses or DNS names only when required. A self-signed certificate is intended for test environments only.
Verify the generated keystore:
<T4C_SERVER>\capella\jre\bin\keytool.exe -list -v -keystore <server-keystore.p12> -storetype PKCS12 -alias <ALIAS>Export the public certificate
Export only the public certificate; never distribute the PKCS#12 keystore or private key to clients:
<T4C_SERVER>\capella\jre\bin\keytool.exe -exportcert -rfc -alias <ALIAS> -keystore <server-keystore.p12> -storetype PKCS12 -file <t4c-server.cer>Trust the WSS certificate in the Capella Java runtime
WSS is provided through the Jetty WebSocket transport. The certificate or issuing CA chain must therefore be trusted by the Java runtime that actually launches the Capella client or Capella-based tool. By default, that runtime is <CAPELLA_HOME>\jre.
When TLS is terminated by a reverse proxy or Web Application Firewall, import the certificate or issuing CA chain presented by that component rather than assuming that it is the same as the certificate installed on the Team for Capella server.
-
Stop Capella.
-
Back up
<CAPELLA_HOME>\jre\lib\security\cacerts. -
Import the public certificate or each missing certificate from the issuing CA chain using a unique, descriptive alias. Use the
keytool.exefrom the same Java runtime:<CAPELLA_HOME>\jre\bin\keytool.exe -importcert -trustcacerts -alias <t4c-FQDN-or-CA> -file <certificate.cer> -cacertsThe initial
cacertspassword is commonlychangeitunless it has been changed by the administrator. -
Verify the imported certificate:
<CAPELLA_HOME>\jre\bin\keytool.exe -list -cacerts -alias <t4c-FQDN-or-CA> -
Restart the Capella client or Capella-based tool and test a WSS connection to
<FQDN>:8443, or to the public host and port of the TLS-terminating reverse proxy.
Repeat the import after replacing the embedded Java runtime or reinstalling Capella if the customized cacerts file is not preserved.
|
|
4.1.5. Optional configuration
Here is a list of optional settings which will impact both server and clients configurations:
-
change the acceptor name to be specific to your product: from
wss://server.example.com:8443/net4j/@defaulttowss://server.example.com:8443/net4j/@YourAcceptorName-
server: change the acceptor tag in the cdo-server.xml to be
<acceptor type="ws" name="YourAcceptorName" /> -
client:
-Dfr.obeo.dsl.viewpoint.collab.net4j.ws.acceptor=YourAcceptorName(same value than name attribute of the acceptor tag used on the server side).
-
-
change the WebSocket endpoint from the default value (
/net4j) to the path of your choice: fromwss://server.example.com:8443/net4j/towss://server.example.com:8443/your/path/-
server: set
admin.server.jetty.net4j.path=your/path -
client:
-Dfr.obeo.dsl.viewpoint.collab.net4j.ws.path=your/path
-
-
have basic authentication on the Net4J servlet (same credentials than the one used for the other servlets, see
openapi/):-
for tests purpose only: login passwords might be available from the installation details of the eclipse platform and in the executable companion .ini file.
-
server:
admin.server.jetty.net4j.remove.public.constraint=true -
client:
-
declare the login:
-Dorg.eclipse.net4j.internal.ws.WSClientConnector.clientBasicAuth.login=sampleuser -
declare the password:
-Dorg.eclipse.net4j.internal.ws.WSClientConnector.clientBasicAuth.password=samplepassword
-
-
4.2. Direct SSL connection alternative
It is possible to activate a SSL connection between the client and the CDO server.
Both client and server have to be configured accordingly.
On the server side, a dedicated keystore must be configured and, on the client side, a truststore containing its public certificate must be provided. This direct Net4J SSL transport is an alternative to the default WSS transport. See Managing certificates for direct SSL and LDAP to generate the server keystore and the client truststore used by this transport.
4.2.1. Client configuration
Add the following lines in the client capella.ini file:
-Dorg.eclipse.net4j.tcp.ssl.passphrase=<TRUSTSTORE_PASSWORD>
-Dorg.eclipse.net4j.tcp.ssl.trust=file:///<trusted.ks absolute path>
4.2.2. Tools configuration
When SSL is activated on the server, the importer and other tools must be configured accordingly to be successful. Add the following lines in the script files (importer.bat, maintenance.bat, exporter.bat):
-Dorg.eclipse.net4j.tcp.ssl.passphrase=<TRUSTSTORE_PASSWORD> ^
-Dorg.eclipse.net4j.tcp.ssl.trust=file:///<trusted.ks absolute path> ^
4.2.3. Server configuration
In the cdo-server.xml configuration file the acceptor has to be configured to accept SSL connections
<acceptor type="ssl" listenAddr="0.0.0.0" port="2036"/>
Set the acceptor type to ssl.
Add the following lines in the server ini file:
-Dorg.eclipse.net4j.tcp.ssl.passphrase=<KEYSTORE_PASSWORD>
-Dorg.eclipse.net4j.tcp.ssl.key=file:///<server.ks absolute path>
4.3. Managing certificates for direct SSL and LDAP
This section describes the JKS keystore and truststore used by the direct Net4J SSL transport and by LDAP configurations that explicitly reference a truststore file. It does not apply to the default WSS transport, which uses Jetty and the cacerts of the Java runtime that launches Capella as described in Managing the WSS/HTTPS certificate.
Use the Java 17 keytool provided by the T4C/Capella runtime in <CAPELLA_HOME>\jre\bin. It is compatible with OpenJDK and Eclipse Temurin 17. The commands below omit passwords so that keytool prompts for them instead of exposing them on the command line.
4.3.1. Generate a JKS keystore
The server keystore contains the private key and its certificate chain. Replace every placeholder and use SAN entries that match the address actually used by the direct SSL or LDAP connection:
<CAPELLA_HOME>\jre\bin\keytool.exe -genkeypair -alias <SERVER_KEY_ALIAS> -keyalg RSA -keysize 4096 -sigalg SHA256withRSA -dname "CN=<SERVER_HOST>,OU=<UNIT>,O=<ORGANIZATION>,L=<CITY>,ST=<STATE>,C=<COUNTRY_CODE>" -validity <DAYS> -ext "SAN=DNS:<SERVER_HOST>" -keystore <server.ks> -storetype JKSFor direct Net4J SSL, <SERVER_HOST> is the CDO server name used by clients. For LDAP, it is the LDAP server name used by the T4C server. Use SAN=IP:<SERVER_IP> only when the connection actually uses an IP address; combine the required DNS and IP entries when both are used.
Verify the generated key entry and SAN:
<CAPELLA_HOME>\jre\bin\keytool.exe -list -v -alias <SERVER_KEY_ALIAS> -keystore <server.ks> -storetype JKS4.3.2. Sign the certificate with a certificate authority (optional)
Generate a certificate signing request and submit <server.csr> to the certificate authority:
<CAPELLA_HOME>\jre\bin\keytool.exe -certreq -alias <SERVER_KEY_ALIAS> -file <server.csr> -keystore <server.ks> -storetype JKSImport the root and intermediate CA certificates returned by the authority, using a unique alias for each certificate:
<CAPELLA_HOME>\jre\bin\keytool.exe -importcert -trustcacerts -alias <ROOT_CA_ALIAS> -file <root-ca.cer> -keystore <server.ks> -storetype JKS
<CAPELLA_HOME>\jre\bin\keytool.exe -importcert -trustcacerts -alias <INTERMEDIATE_CA_ALIAS> -file <intermediate-ca.cer> -keystore <server.ks> -storetype JKS
Import the signed certificate or certificate chain as the reply to the existing private-key entry. The alias must be the same <SERVER_KEY_ALIAS> used to generate the key pair and CSR:
<CAPELLA_HOME>\jre\bin\keytool.exe -importcert -trustcacerts -alias <SERVER_KEY_ALIAS> -file <server-reply.cer> -keystore <server.ks> -storetype JKSVerify that the key entry now contains the expected certificate chain:
<CAPELLA_HOME>\jre\bin\keytool.exe -list -v -alias <SERVER_KEY_ALIAS> -keystore <server.ks> -storetype JKS4.3.3. Export a certificate from the keystore
Export only the public certificate; do not distribute the server keystore or its private key:
<CAPELLA_HOME>\jre\bin\keytool.exe -exportcert -rfc -alias <SERVER_KEY_ALIAS> -keystore <server.ks> -storetype JKS -file <server.cer>4.3.4. Create a dedicated JKS truststore
Import the public server certificate or the required CA certificates into a dedicated truststore. Use a unique alias for every imported certificate:
<CAPELLA_HOME>\jre\bin\keytool.exe -importcert -trustcacerts -alias <SERVER_OR_CA_ALIAS> -file <server-or-ca.cer> -keystore <trusted.ks> -storetype JKSVerify the truststore contents:
<CAPELLA_HOME>\jre\bin\keytool.exe -list -v -keystore <trusted.ks> -storetype JKSThe resulting <trusted.ks> contains public certificates only and can be deployed to the systems that require it. Direct Net4J SSL clients and tools reference it with org.eclipse.net4j.tcp.ssl.trust; LDAP configurations reference it with ldap.truststore.path or the corresponding prefixed property. This dedicated truststore is not used by WSS.
4.4. Unsecured connection modes — not recommended for production
|
TCP, HTTP, and WS do not encrypt traffic. Credentials and model data may be exposed. These protocols are not recommended for production or use on an untrusted network. Bind them to a dedicated private interface and restrict access with the host and network firewalls. |
The unsecured endpoints can be enabled whenever required, either independently or in parallel with WSS/HTTPS, so that only selected clients or tools use them.
4.4.1. Enable TCP repository access
In cdo-server.xml, uncomment or add a TCP acceptor. Replace the placeholder with the address of a private server interface; do not use 0.0.0.0 unless every interface is intentionally exposed:
<acceptor type="tcp" listenAddr="<PRIVATE_INTERFACE_IP>" port="2036"/>Restart the Team for Capella server. Configure only the required clients and tools with connection type TCP, host <PRIVATE_INTERFACE_IP>, and port 2036.
4.4.2. Enable HTTP and unsecured WebSocket access
In admin-server.properties, enable HTTP and bind it to the same private interface:
admin.server.jetty.http.enabled=true
admin.server.jetty.http.host=<PRIVATE_INTERFACE_IP>
admin.server.jetty.port=8080
Keep admin.server.jetty.https.enabled=true to leave the secure endpoint available in parallel.
|
Because the delivered |
Configure affected tools and jobs to use the private endpoint:
-hostname <PRIVATE_INTERFACE_IP> ^
-port 2036 ^
-connectionType tcp ^
-httpHost <PRIVATE_INTERFACE_IP> ^
-httpPort 8080 ^
-httpsConnection false ^
To run without any secure endpoint, additionally set admin.server.jetty.https.enabled=false. This makes WSS and HTTPS unavailable and is not recommended.
4.4.3. Return to secure-only operation
-
Move remote clients back to WSS on the server FQDN and port 8443. Restore local CLI tools and Jenkins jobs to
localhost, port 8443, WSS, and HTTPS when the certificate SAN containsDNS:localhost; otherwise use the server FQDN for their repository host and RESThttpHostvalues. -
Set
admin.server.jetty.http.enabled=false. -
Remove or comment the TCP acceptor in
cdo-server.xml. -
Restart the server.
-
Verify that ports 2036 and 8080 are closed and test WSS and HTTPS on port 8443.
5. Management of Capella Capabilities Verification
The capabilities are checked during the connection, the import or the export process.
There is two mode: the lax mode and the strict mode. By default, the lax mode is used, but it is not recommended for production environment.
The required add-ons are configured via the API http(s)://<admin server IP>:<admin server port>/api/v1.0/specific/configuration/<repository>. You can see the API documentation in detail on the server (see REST Admin API).
5.1. Lax mode
The lax mode is the default mode after installation. To switch to lax mode if you are in the strict mode, run DELETE /api/v1.0/specific/configuration/<repository> to completely remove the configuration of the strict mode (all configured capabilities will be removed) or run PUT /specific/configuration/{repositoryId}/strict-mode with false value to disable strict mode.
The lax mode performs more limited checks on the installed capabilities. The checks are performed only on the current project, and it does not impose strict requirements on add-on versions.
5.2. Strict mode
In the strict mode, the required capabilities are described in detail as capabilities. To switch to the strict mode, you just need to add a required capability. If there is an existing configuration for the strict mode, but you are in the lax mode (i.e. { "strictMode": false, requiredCapabilities: { … } }), you can switch to the strict mode PUT /specific/configuration/{repositoryId}/strict-mode with true value to enable the strict mode.
To add a capability (or many), run POST /api/v1.0/specific/configuration/<repository>/required-capabilities. This endpoint takes a json structure as a parameter:
{
  "<add-on-id-1>": {
    "name": "<addon-name>",
    "kitalphaViewpoints": {
      "<kitalpha-viewpoint-id>": "<version-pattern>"
    },
    "siriusViewpoints": {
      "<sirius-viewpoint-id>": "<version-pattern>"
    }
  },
  "<add-on-id-2>": {
    "name": "<addon-name>",
    "siriusViewpoints": {
      "<sirius-viewpoint-id>": "<version-pattern>"
    }
  }
}
This JSON is structured as a map of object with the following attributes :
-
As key of the map, a unique identifier of the capability. This identifier is used to reference the capability in particular to remove a capability from the configuration. This identifier can only contain alphanumeric characters, '_' and '-' and must start with a letter or '_'.
-
name: The display name of the capability, it is used for the error messages during the check of the capabilities. It is recommended that you specify the version of the Capability in the name itself. -
kitalphaViewpoints: The map of the Kitalpha viewpoints of the capability with the id of the viewpoint as key and the version pattern of the viewpoint as value. -
siriusViewpoints: The map of the Sirius viewpoints of the capability with the URI of the viewpoint as key and the version pattern of the plugin of the viewpoint as value.
|
The version pattern is specified like this:
|
{
  "diagram-styler": {
    "name": "Diagram Styler (v70.3.2)",
    "siriusViewpoints": {
      "/com.thalesgroup.mde.capella.diagramstyler/Diagram Styler": "70.3.2"
    }
  },
  "basic-mass": {
    "name": "Basic Mass (v7.0.x)",
    "kitalphaViewpoints": {
      "org.polarsys.capella.vp.mass": "7.0"
    },
    "siriusViewpoints": {
      "/org.polarsys.capella.vp.mass.design/Mass_ID": "7.0"
    }
  }
}
To remove a capability from the configuration, run DELETE /api/v1.0/specific/configuration/<repository>/required-capabilities/<capability-id>, with <capability-id> is the specified identifier of the capability.
|
If you are in strict mode, you need to add Capella as capability: |
|
Be careful not to confuse strict mode without capability and lax mode.
if you want to switch to lax mode and remove the configuration of the capabilities, you need to run delete on |
5.3. How to know how to configure the capapbilities according to the Capella add-on you want
To know how to configure the capabilities, you can install the targeted Capella add-ons on your Team for Capella Client (and so the targeted Sirius and Capella viewpoint), then call the importer application with -generateCapabilitiesConfiguration true parameter that will display the json content in the console output. Then you can configure the capabilities on the server.
You may optionally use `-capabilitiesConfigurationOutputFile <path to your file>` to create a json file. The path is either absolute or relative to the server executable.
6. Team for Capella Server: the REST Admin Server
The Team For Capella server is composed of the CDO repositories server and an embedded Jetty server.
By default, the Jetty admin server is automatically started with the CDO server in HTTPS mode on port 8443. HTTP on port 8080 is disabled. The admin server is used :
-
to manage repositories with the REST Admin API
-
by applications (importer, maintenance application, console application) to execute code on server
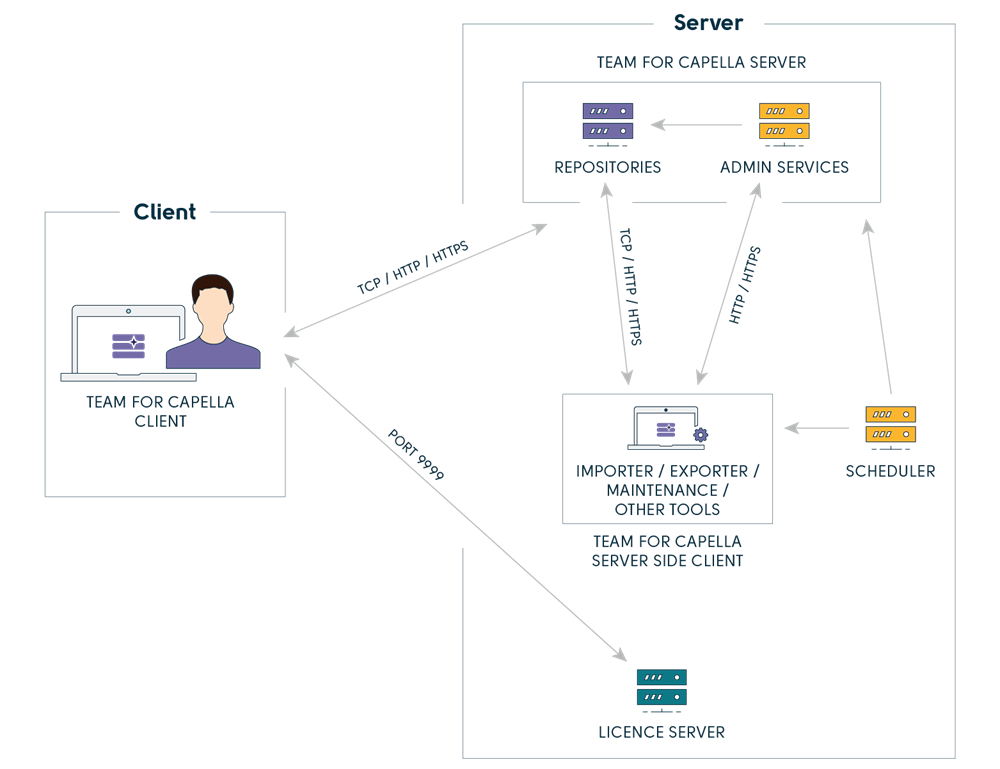
You can find more information in the file <TeamForCapella installation folder>/server/configuration/fr.obeo.dsl.viewpoint.collab.server.admin/admin-server.properties : it contains all the admin server configuration information.
6.1. REST Admin API
The REST Admin Server provides a whole set of services to manage the projects, the models and the users.
The documentation is available by default at https://<admin server FQDN>:8443/doc.
A swagger documentation is available by default at https://<admin server FQDN>:8443/openapi. It can be enabled or disabled with the admin.server.jetty.servlets.admin.docandopenapi.enabled property.
6.2. Credentials Management
The first time the server is launched, a default «admin» user and its associated default token are created in the Eclipse secure-storage of the user that started the CDO server. The «admin» credentials are stored in a dedicated node used by the server. The token is hashed and encrypted. A secret.txt file, containing the token, is created in the same folder than admin-server.properties file. It can be used in third party application to authenticated with the admin server. Do not forget to remove this file as soon as you can.
Moreover, the admin credentials are also added in the secure storage for the application needs (importer, exporter, etc) in a dedicated node. The credentials are encrypted.
This way once the server has been started the first time, there is no additional step. The applications can automatically be used, being authenticated with the admin server with the «admin» user.
Nevertheless, it is possible to manage the user and the user token with the Credentials application
By default, the secure storage is created or retrieved from the home of the system user currently executing the application:
-
Windows:
-
%USERPROFILE%\.eclipse\org.eclipse.equinox.security\secure_storage -
C:\Users\someUser\.eclipse\org.eclipse.equinox.security\secure_storage -
Specific case when Jenkins service is launched as Local System (not recommended):
C:\Windows\System32\config\systemprofile\.eclipse\org.eclipse.equinox.security\secure_storage
-
-
Linux:
-
~/.eclipse/org.eclipse.equinox.security/secure_storage -
/home/someUser/.eclipse/org.eclipse.equinox.security/secure_storage
-
-
macOS:
-
~/.eclipse/org.eclipse.equinox.security/secure_storage -
/Users/someUser/.eclipse/org.eclipse.equinox.security/secure_storage -
Location can depend from the configuration of your operating system.
-
It is also possible to change the location of the secure storage with the use of the -eclipse.keyring program argument in both TeamForCapella/server/server.ini and TeamForCapella/capella/capella.ini. The secure storage must be shared between server-side client, tools and server in order to be able to use it from the Scheduler jobs. For example to use a fixed secure storage located in TeamforCapella/.eclipse/secure_storage:
-eclipse.keyring
../.eclipse/secure_storage
The -eclipse.password option can be used with -eclipse.keyring, it allows to use the content of the specified file as the default password instead of saving the password in the secure storage.
On Linux, this helps to overcomes issues related to passwords management by secure storage and the use of the default PasswordProvider.
-eclipse.password
../.eclipse/password
7. Team for Capella Server Installation Types
7.1. Quick Installation (1 Server, 1 Repository)
Installation process and details are described in the Installation Guide for Team for Capella.
Ask to viewpoint providers whether their viewpoint is compatible with Team for Capella. If the viewpoint is compatible with Team for Capella, deploy the viewpoint on every Team for Capella client and the importer used by server. Clean and export models again after a viewpoint installation.
-
Drawbacks:
-
When the only repository is stopped, no project is available. This can happen when one model is detected as corrupted by the "Projects – Import – repoCapella" job which has the
-stopRepositoryOnFailure trueparameter in its default command. -
User accounts are linked to a repository instance (if an user has an account on the repository, he can connect to all models of the single repository).
-
7.2. Configuration with 1 Server, n Repositories, N Models
7.2.1. Introduction
This is the recommended configuration to work with several projects.
-
Advantages:
-
Only one instance of the Team for Capella Server (RAM consumption is limited),
-
Configuration/Management is easier than with n servers,
-
This configuration looks like the one used for DOORS and Git,
-
Repositories are independent: a repository can be removed without impact on the other repository(ies) (requires to stop the server for static repositories, can be done from the REST API for dynamic repositories),
-
-
Drawbacks:
-
Admin / REST API accounts are linked to a server instance, an administrator can perform operation on all repositories of the server instance.
-
When the only server is stopped, no project is available, for example, during a maintenance operation. This can also happen when one model is detected as corrupted by the "Projects – Import – repoX" job if the
-closeServerOnFailure trueparameter is used, -
Some configuration must be done (unlike the default configuration).
-
7.2.2. How to Add a New Repository
|
This section presents how to add a static repository: it is defined in There is a second of repositories: dynamic repositories. They can be created with the use of the REST Admin Server and its REST API. |
Hypothesis: the repository is added to a just installed version.
Add a new repository to the Team for Capella Server:
-
Open TeamForCapella\server\configuration\cdo-server.xml:
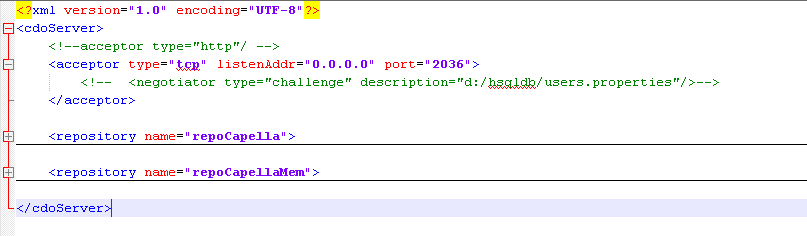
Note the 2 default repositories (content is collapsed in this screenshot),
-
"repoCapella", this repository is stored in a data base(h2),
-
"repoCapellaMem", this repository is stored in memory (it is only an example, this repository should not be used and can be deleted).
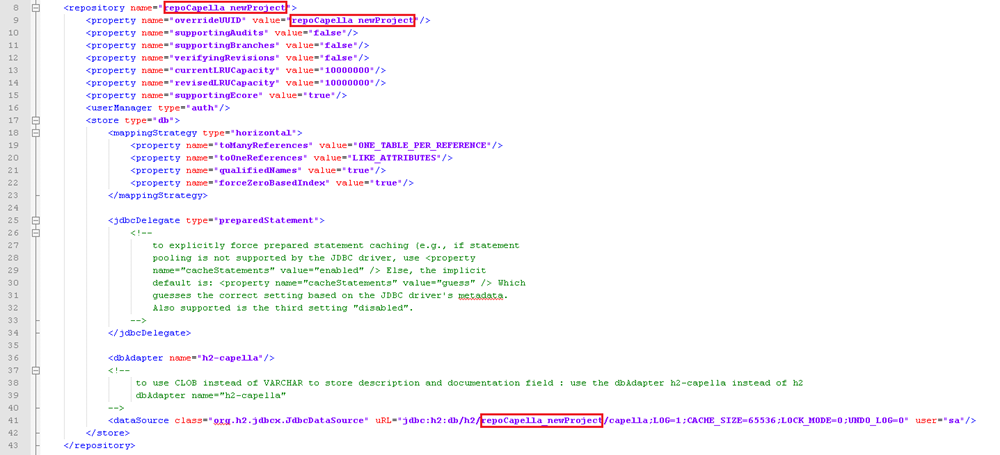
|
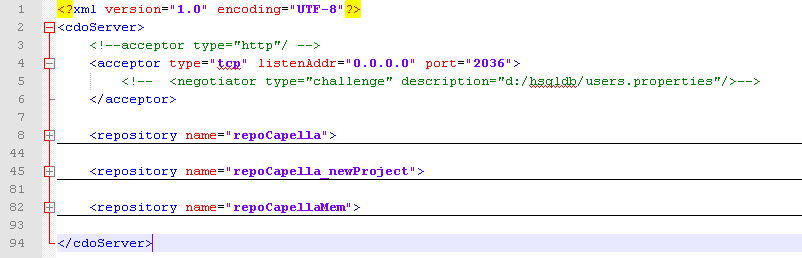
Add a new job to Team for Capella Scheduler (Jenkins) to manage the new repository:
-
Open the Scheduler (available by default at http://localhost:8036 , see Jenkins Configuration section for more details)
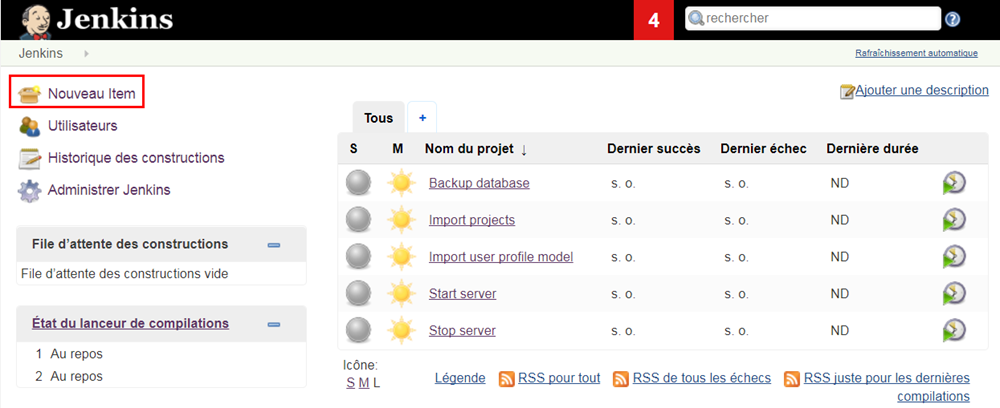
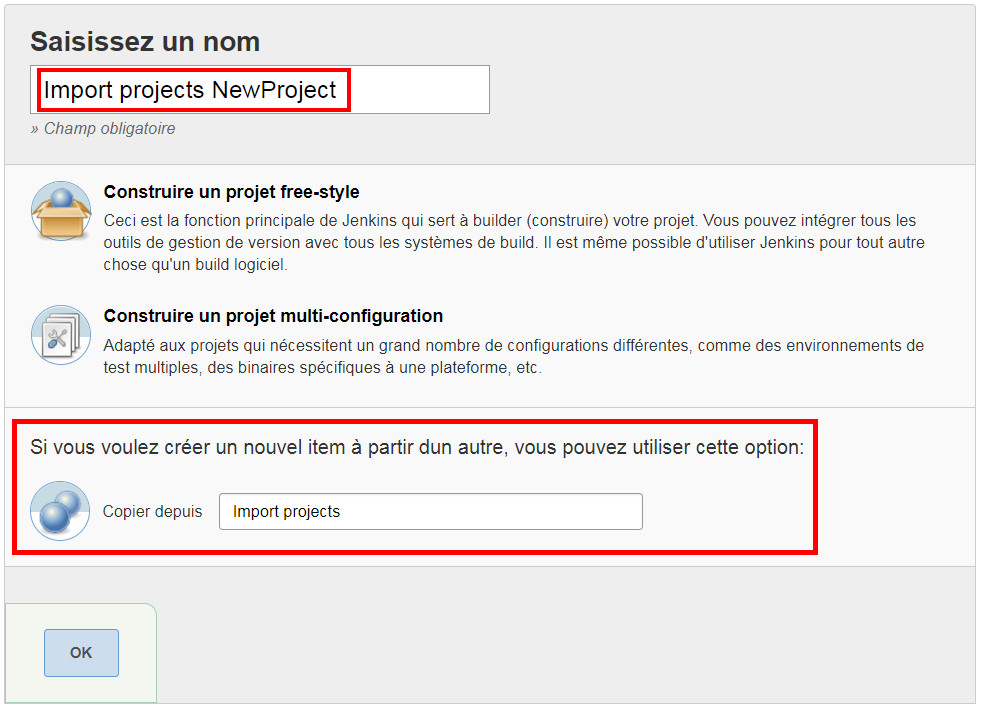
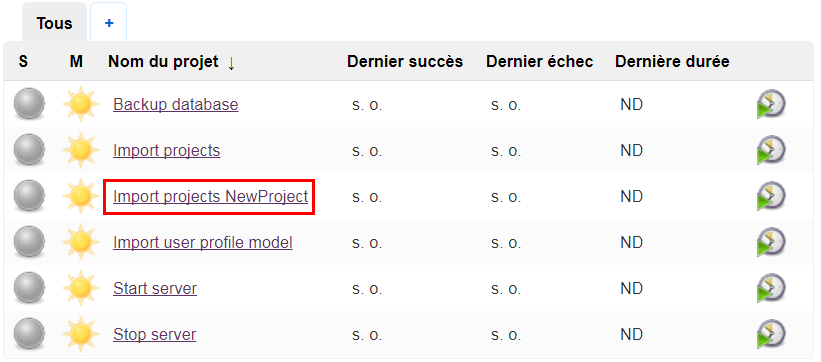
Check the configuration is working: Start the Team for Capella Server using the "Server – Start"job (click on  )and open the TeamForCapella\server\ folder
db and workspace folders should have been created:
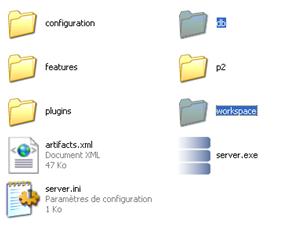
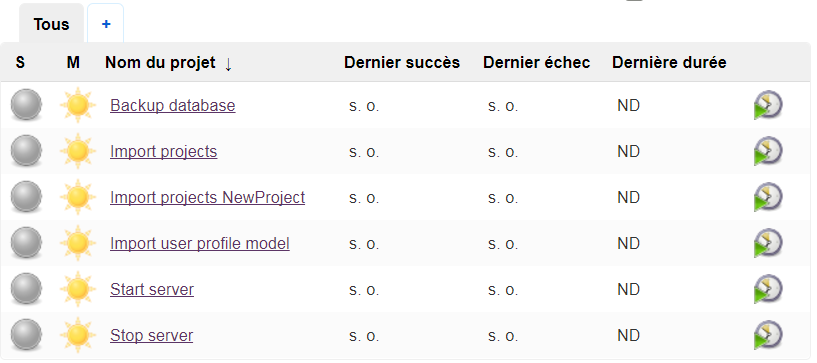
7.3. Configuration with N Servers, N Repositories, N Models (1 Scheduler)
7.3.1. Introduction
-
Advantages:
-
If a server is stopped (for example if a database corruption occurs, and
-closeServerOnFailure true), only projects stored on this server are unavailable, -
Admin / REST API accounts can be different between server instances,
-
-
Drawbacks:
-
Several instances of the Team for Capella Server (RAM consumption depends on the number on the number of servers used),
-
Configuration/Management is more complex than with only one server: duplication of ports, certificates,
-
7.3.2. How to Add a New Server
Hypothesis: the server is added to a just installed version, by default it will only contain the default repository "repoCapella".
-
Create a new Team for Capella server instance,
-
Do a copy of the TeamForCapella\server folder to newServer (for example),
-
Change the cdo server port in the TeamForCapella\newServer\configuration\cdo-server.xml(for example 2037):

-
Change the http server port in the TeamForCapella\newServer\configuration\admin-server.properties(for example admin.server.jetty.port=8081):
-
-
Add new jobs to Team for Capella Scheduler (Jenkins),
-
Launch Jenkins,
-
Using a web browser, connect to "http://localhost:8036",
-
Duplicate all the jobs you need. (In Jenkins use «New item» button and fill «Copy from» field.)
-
For every job, in the build part of the job, add -httpPort <admin server port> parameter to refer to the right instance of the admin server. (for example -httpPort 8081)
-
For «Server - Run» job, in the build part of the job, change the path of the server
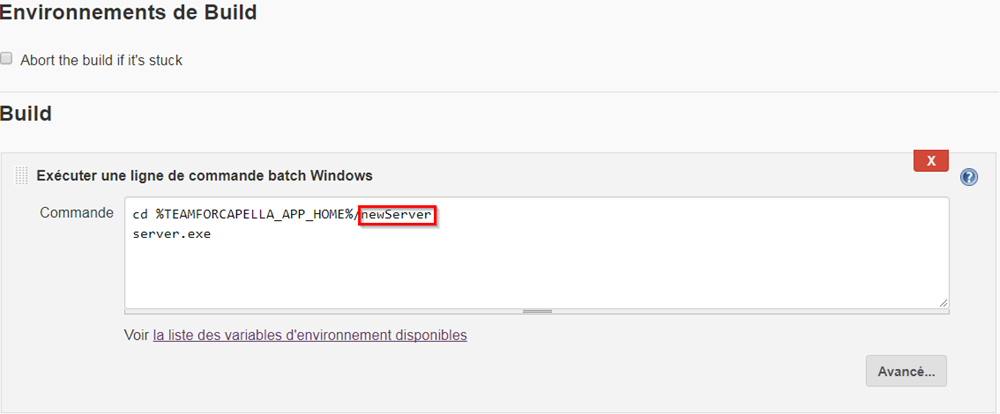
-
«Backup and restore» and «Diagnostic and repair» jobs, in the build part of the job, add -port <cdo repository port> parameter to refer to the right instance of the cdo server(for example -port 2037)
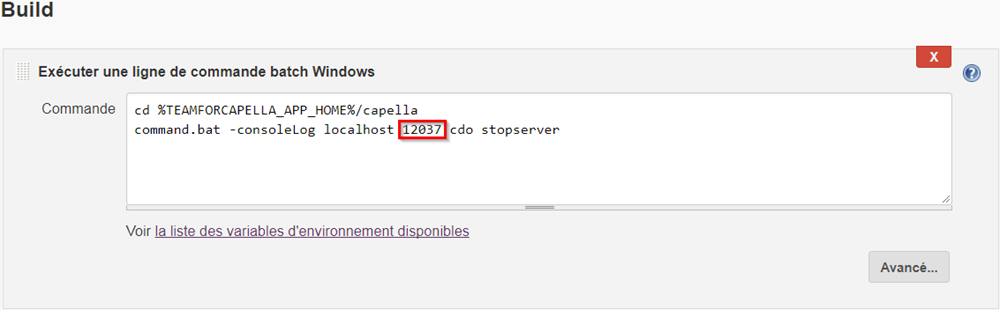
-
8. How To…
8.1. How to stop the server
The main methods to close the server are the following:
-
Launch the dedicated Scheduler job: Server – Stop (recommended method)
-
directly command.bat -command cdo -commandParams stopserver
|
To avoid database corruptions, the server must in no way be closed these ways:
|
8.2. How to reset the server
To restart with a clean server or after a database corruption, it can be useful to reset the server:
-
Stop the server using the Scheduler,
-
Remove the folder workspace from the server folder,
-
Remove the folder db-auditing from the server folder (value for the default repository, check the dataSource elements of your cdo-server.xml file).
-
Start the server,
-
Export the needed models from a Team for Capella Client (using the “Import Job” result artifacts for example).
|
It is also possible to restore the database from the result artifacts of the Database – Backup job, refer to the Capella client Help Contents in chapter Team for Capella Guide > System Administrator Guide > Server Configuration > Reinitialize database. |
|
The REST API |
8.3. How to Improve Export Performances
The following line is used to configure the database (in cdo-server.xm):
To improve performances when exporting big models to the repository, change LOG=1 by LOG=0. When exports are done, return to the original value (LOG=1 is useful to avoid database corruptions when the server process is killed).
8.4. Manage h2 database password
The initial password is the one given the first time the repository is started(when the h2 database file is not yet created).
8.4.1. How to provide the password
The password can be provided :
-
by adding
passwordproperty indatasourcetag incdo-server.xmlfor static repository<dataSource class="org.h2.jdbcx.JdbcDataSource" uRL="jdbc:h2:db-auditing/h2/repoCapella;LOG=1;CACHE_SIZE=65536;LOCK_MODE=0;UNDO_LOG=0;DB_CLOSE_ON_EXIT=FALSE" user="sa" password="pwd"/>When creating dynamic repository using REST API, the password is blank by default. -
by passing the password using the
t4c.database.h2.passwordsystem property or else thet4c.database.h2.passwordenvironment variable (Refer to Passing parameter using system property or environment variable).
8.4.2. How to change the password
It is possible to change the password with two ways.
Using H2 Console:
-
Open a CLI and move to
<TeamForCapella installation folder>\capella\plugins -
Type
java -cp org.h2_<currentTimeStamp>.jar org.h2.tools.ConsolereplacingcurrentTimeStampby the right valuethis start a micro-server and opens an URL in the default browser
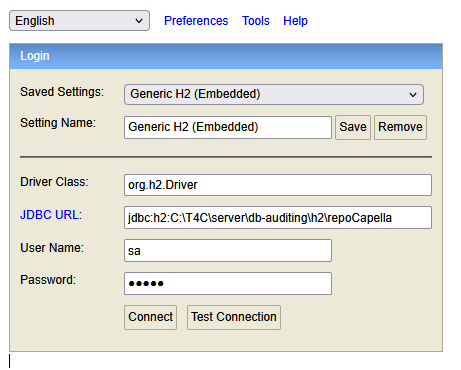
-
set JDBC driver to
org.h2.Driver -
set URL to
jdbc:<path/to/db/folder/<repositoryName>> -
set user name and password and click
Connect -
then execute the followinf script
ALTER USER <userName> SET PASSWORD '<newPassword>';replacing<userName>and<newPassword>by the current database user and the new password
-
Using H2 Shell in command line:
-
Open a CLI and move to
<TeamForCapella installation folder>\capella\plugins -
type
java -cp org.h2_<currentTimeStamp>.jar org.h2.tools.ShellreplacingcurrentTimeStampby the right value-
set JDBC driver to
org.h2.Driver -
set URL to
jdbc:<path/to/db/folder/<repositoryName>> -
set user name and password
At the end you reach the sql command line
sql>
-
-
then execute the following script
ALTER USER <userName> SET PASSWORD '<newPassword>';replacing<userName>and<newPassword>by the current database user and the new password
8.5. Reinitialize database
You have three ways to reinitialize data in a database.
-
Use the Database – Restore job
-
Restoring a database backup
-
Exporting backed up projects to a given repository
8.5.1. Restore database from database backup
The use of the Database – Restore job should be preferred but it is still possible to manually do the same operation.
This operation should be used to restore a database from the file generated by the Database – Backup job (this file has a pattern like: repoCapella.20151105.171109-sql.zip).
The database will be restored in exactly the same state as it was when the backup was performed:
-
Existing durable locks will also be restored,
-
A corrupted database will be restored in the same corrupted state.
How to manually restore a DB backup
-
Edit "server.ini" file
-
Change the vmarg property collab.db.restore to true as follow: -Dcollab.db.restore=true
-
Specify the backup file location with the -Dcollab.db.restoreFolder parameter (default value is db.restore in the server)
-
Put the .zip backup file in the specified directory.
Example with db.restore:
-
Stop the server using the Server – Stop job
-
Start the server using the Server – Start job
-
If everything went well, you will get a log like the following one in the server’s console:
!ENTRY com.thalesgroup.mde.melody.collab.server.repository.h2 1 0 2020-04-22 18:39:32.409
!MESSAGE Restore repoCapella processing starts.

!ENTRY com.thalesgroup.mde.melody.collab.server.repository.h2 1 0 2020-04-22 18:39:33.977
!MESSAGE Restore repoCapella restored database from : C:\TeamForCapella\server\..\scheduler\jenkins_home\jobs\Database - Backup\builds\7\archive\repoCapella.20200422.182742-sql.zip

!ENTRY com.thalesgroup.mde.melody.collab.server.repository.h2 1 0 2020-04-22 18:39:33.980
!MESSAGE Restore repoCapella processing ends. The file has been moved to C:\TeamForCapella\server\..\scheduler\jenkins_home\jobs\Database - Backup\builds\7\archive\repoCapella.20200422.182742-sql.zip.restored

!ENTRY org.eclipse.emf.cdo.server.db 2 0 2020-04-22 18:39:35.537
!MESSAGE Detected crash of repository repoCapella

!ENTRY org.eclipse.emf.cdo.server.db 1 0 2020-04-22 18:39:35.614
!MESSAGE Repaired crash of repository repoCapella: lastObjectID=OID248, nextLocalObjectID=OID9223372036854775807, lastBranchID=0, lastCommitTime=1 586 948 133 861, lastNonLocalCommitTime=1 586 948 133 86
The .zip backup file will be suffixed by .restored or .error if the restore failed. This behavior can be disabled with the use of -Dcollab.db.restore.rename.source.file=false.
| Restore process only supports textual script backup with the name that ends with –sql.zip. |
If you want to remove restored locking sessions from the database, use the Durable Locks Management view (see the Server Administration part of this documentation).
8.5.2. Restore database from projects backup
This way gives more control on the restoration as you may delete the repository and the repository is restored project by project. To restore projects in a repository:
-
close the server
-
delete file corresponding to the repository in the database folder. See how you configured the cdo-server.xml file to have the information.
-
restart the server
-
export the projects to the server with a Team For Capella client. Those projects are taken from the last valid «Projects - Import» job execution.
8.6. How to externalize configuration in a specific folder
-
To externalize workspace → use the eclipse runtime arguments "-data path_to_folder " in the files capella.ini, importer.bat and command.bat.
Example:
server/server.exe -data C:/data/TeamForCapella/server/workspace
capella/importer.bat -data C:/data/TeamForCapella/server/importer-workspace
capella/command.bat -data C:/data/TeamForCapella/server/command-workspace
-
To externalize configuration folder → copy the folder configuration to the expected path and use the eclipse runtime arguments "-configuration path_to_folder ".
Example:
server/server.exe -configuration C:/data/TeamForCapella/server/configuration
tools/importer.bat -configuration C:/data/TeamForCapella/server/configuration
tools/command.bat -configuration C:/data/TeamForCapella/server/configuration
-
To externalize cdo-server.xml → use the jvm arguments from the server.ini "-Dnet4j.config= path_to_file " .
Example:
-vmargs -Dnet4j.config=C:/data/TeamForCapella/server/configuration/cdo-server.xml
-
To externalize users.properties → update the description property of the <usermanager> element from the cdo-server.xml file.
Example:
Line 18 : <userManager type=«auth» description="C:/data/TeamForCapella/server/usermanager-config.properties" />
-
To externalize db folder → update jdbc url from the cdo-server.xml file editing the value of the attribute url from the tag <dataSource/>.
Example:
<dataSource uRL="jdbc:h2:C:/data/TeamForCapella/server/db/h2/repoCapella;LOG=0;CACHE_SIZE=65536;LOCK_MODE=0;UNDO_LOG=0" (…)
-
Move jenkins_home
Update scheduler/conf/context.xml to change the attribute Environment JENKINS_HOME with the path of the jenkins_home folder :
-
Restart scheduler
-
[Optional: in case you do not user embedded scheduler] To externalize backup and restore folder → use the jvm arguments from the server.ini file: "-Dcollab.db.backupFolder= path_to_file " and "-Dcollab.db.restoreFolder= path_to_file " .
Example:
-vmargs -Dcollab.db.backupFolder=C:/data/TeamForCapella/server/db.backup
-Dcollab.db.restoreFolder=C:/data/TeamForCapella/server/db.restore
To directly externalize all previous file, you can edit server.ini file
Example: To externalize all files in the folder C:\data\TeamForCapella\server
1) Update server.ini
-console
-data
 C:/data/TeamForCapella/server/workspace
-configuration
 C:/data/TeamForCapella/server/configuration
-vmargs
-Dnet4j.config= C:/data/TeamForCapella/server /configuration
-Dcollab.db.backup=false
-Dcollab.db.restore=false
-Dcollab.db.backupFolder= C:/data/TeamForCapella/server /db.backup
-Dcollab.db.restoreFolder= C:/data/TeamForCapella/server /db.restore
-Dcollab.db.backupFolderMaxSize=1G
-Dcollab.db.backupFrequencyInSeconds=900
-Dosgi.requiredJavaVersion=17
-Xms128m
-Xmx2000m
-XX:PermSize=128m
-
Update "-data" and "-configuration" of command.bat and importer.bat
8.7. How to Change Ports Values
See Server configuration section → Cdo-server.xml File
See Jenkins installation section → Change the Port Used by Jenkins.
See Team For Capella Web server section → Change the Port of the admin server
For installations that explicitly enable TCP, by convention the OSGi console can use port 12036 for a server listening on port 2036, 12037 for a server listening on 2037, and so on. These ports are not part of the default WSS/HTTPS configuration.
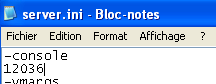
-
Edit configuration of all jobs setup in the scheduler that use the OSGI console
-
Connect to scheduler admin site
-
Go to "Backup database" configuration
-
Edit the build command line to replace "…command.bat localhost port_value" by the expected port
Ex: command.bat localhost 12036 capella_db backup
-
Go to "Server – Stop" configuration
-
Edit the build command line to replace "…command.bat localhost 12036 close" by the expected port
Ex: command.bat localhost 12036 close
-
Go to "Import projects" configuration
-
Edit the build command line to replace "…importer.bat –archivefolder…" by the expected port
Ex: importer.bat –consoleport 12036 –archivefolder
-
This is needed if the importer has to stop the server on import failure
| If you have several jobs using the OSGI port value, you can create an environment variable to store it in a single place. |
8.8. How to Increase the Size of Description and Documentation Columns
When very long text are written in Description or Documentation fields, an error of the following type can occur when saving a remote project or exporting a local project to the server:
[ERROR] org.h2.jdbc.JdbcSQLException: Value too long for column DESCRIPTION VARCHAR(32672)
To avoid this problem, change the file server/configuration/cdo-server.xml to use:
<dbAdapter name="h2-capella" /> instead of <dbAdapter name="h2" />
Fields description and documentation will be stored in CLOB instead of VARCHAR.
h2-capella is the default value in cdo-server.xml.
8.8.1. Customize commit description length
The system property fr.obeo.dsl.viewpoint.collab.common.commit.description.max.length can modify the length of the commit message. By default the value is the Integer maximum value. This property needs to be set to the same value on the client and the server.
This default Integer maximum value length is due to com.thalesgroup.mde.melody.db.h2.H2Adapter that consider the commit comment as a CLOB. Note that this is a custom H2Adapter for Team for Capella. It replaces the default org.eclipse.net4j.db.h2.H2Adapter that expects a VARCHAR for the comment description DB field limiting the length of the message to 255 characters.
If the commit description is longer than the accepted max length, it will be truncated before commit to match the max length in core wizards, actions and session save operations.
For components extending the collaborative layer, if they directly call setCommitComment() and commit() methods on the CDO transaction, they can use fr.obeo.dsl.viewpoint.collab.common.internal.commit.CommitCommentUtil.fitCommitDescriptionLength(String) to fit their commit comment. -1 can be used to remove the limitation. Otherwise only values greater than or equals to 10 are accepted. "Xxxxxxxxxx" will become "Xxxx […]". If the property value if -1, it will take the system dependent SWT widget Text.LIMIT length.
8.9. Passing parameter using system property or environment variable
Some parameters can now be provided using Java system properties or environment variables, in addition to the previous method. Environment variables override the arguments/properties values and Java system properties take precedence over both.
To ensure compatibility with operating systems that have strict naming conventions, the environment variable is looked up twice: first with the given property name, and then a second time with a modified version of the name (converted to upper case, with dots (.) replaced by underscore (_) and dashes (-) removed).
For example, both admin.server.jetty.ssl.keystore.passphrase and ADMIN_SERVER_JETTY_SSL_KEYSTORE_PASSPHRASE are accepted as environment variable to provide the parameter via environment variable.
Here is the list of impacted parameters:
-
Server
-
admin.server.jetty.ssl.keystore.passphrase(takes precedence over the property defined in admin-server.properties) -
admin.server.jetty.ssl.keypassword(takes precedence over the property defined in admin-server.properties) -
t4c.database.h2.user(takes precedence over the user defined in dataSource element of all repositories) -
t4c.database.h2.password(takes precedence over the password defined in dataSource element of all repositories) -
LDAP authenticators
-
ldap.manager.dn(takes precedence over the property defined in ldap-config.properties or equivalent for all repositories) -
ldap.manager.password(takes precedence over the property defined in ldap-config.properties or equivalent for all repositories) -
ldap.truststore.passphrase(takes precedence over the property defined in ldap-config.properties or equivalent for all repositories)
-
-
OpenID Connect authenticators
-
fr.obeo.dsl.viewpoint.collab.server.openid.discoveryURL(takes precedence overopenIDConnect.discoveryURLin repository configuration files ordiscoveryURLin REST API calls). -
fr.obeo.dsl.viewpoint.collab.server.openid.tenant(takes precedence overopenIDConnect.tenantin repository configuration files ortenantin REST API calls). -
fr.obeo.dsl.viewpoint.collab.server.openid.clientID(takes precedence overopenIDConnect.clientIDin repository configuration files orclientIDin REST API calls). -
fr.obeo.dsl.viewpoint.collab.server.openid.scope(takes precedence overopenIDConnect.scopein repository configuration files orscopein REST API calls). -
fr.obeo.dsl.viewpoint.collab.server.openid.responseType(takes precedence overopenIDConnect.responseTypein repository configuration files orresponseTypein REST API calls). -
fr.obeo.dsl.viewpoint.collab.server.openid.state(takes precedence overopenIDConnect.statein repository configuration files orstatein REST API calls). -
fr.obeo.dsl.viewpoint.collab.server.openid.acrValues(takes precedence overopenIDConnect.acrValuesin repository configuration files oracrValuesin REST API calls). -
fr.obeo.dsl.viewpoint.collab.server.openid.complement(takes precedence overopenIDConnect.complementin repository configuration files orcomplementin REST API calls). -
fr.obeo.dsl.viewpoint.collab.server.openid.webServerURL(takes precedence overopenIDConnect.webServerURLin repository configuration files orwebServerURLin REST API calls). -
fr.obeo.dsl.viewpoint.collab.server.openid.login.timeout.ms(takes precedence overopenIDConnect.login.timeout.msin repository configuration files orlogin.timeout.msin REST API calls). -
fr.obeo.dsl.viewpoint.collab.server.openid.loopback.server.name(takes precedence overopenIDConnect.loopback.server.namein repository configuration files orloopback.server.namein REST API calls). -
fr.obeo.dsl.viewpoint.collab.server.openid.loopback.server.port(takes precedence overopenIDConnect.loopback.server.portin repository configuration files orloopback.server.portin REST API calls). -
fr.obeo.dsl.viewpoint.collab.server.openid.accessTokenAudience(takes precedence overopenIDConnect.accessTokenAudiencein repository configuration files oraccessTokenAudiencein REST API calls). -
fr.obeo.dsl.viewpoint.collab.server.openid.userInfoPayload(takes precedence overopenIDConnect.userInfoPayloadin repository configuration files oruserInfoPayloadin REST API calls). -
fr.obeo.dsl.viewpoint.collab.server.openid.userInfoMatchClaim(takes precedence overopenIDConnect.userInfoMatchClaimin repository configuration files oruserInfoMatchClaimin REST API calls). -
fr.obeo.dsl.viewpoint.collab.server.openid.repositoryFilterPayload(takes precedence overopenIDConnect.repositoryFilterPayloadin repository configuration files orrepositoryFilterPayloadin REST API calls). -
fr.obeo.dsl.viewpoint.collab.server.openid.repositoryFilterMatchClaim(takes precedence overopenIDConnect.repositoryFilterMatchClaimin repository configuration files orrepositoryFilterMatchClaimin REST API calls). -
fr.obeo.dsl.viewpoint.collab.server.openid.repositoryFilterMatchPrefix(takes precedence overopenIDConnect.repositoryFilterMatchPrefixin repository configuration files orrepositoryFilterMatchPrefixin REST API calls). -
fr.obeo.dsl.viewpoint.collab.server.openid.repositoryFilterMatchValue(takes precedence overopenIDConnect.repositoryFilterMatchValuein repository configuration files orrepositoryFilterMatchValuein REST API calls).
-
-
-
Client / CLI tools
-
fr.obeo.dsl.viewpoint.collab.https.jetty.ssl.context.passphrase(takes precedence over system property) -
fr.obeo.dsl.viewpoint.collab.credentials.tools.net4j.login(takes precedence over -repositoryLogin, -repositoryCredentials or secureStorage in CLI tools) -
fr.obeo.dsl.viewpoint.collab.credentials.tools.net4j.password(takes precedence over -repositoryLogin, -repositoryCredentials or secureStorage in CLI tools) -
fr.obeo.dsl.viewpoint.collab.credentials.tools.net4j.reponame(takes precedence over-reponame) -
fr.obeo.dsl.viewpoint.collab.credentials.tools.net4j.hostname(takes precedence over-hostname) -
fr.obeo.dsl.viewpoint.collab.credentials.tools.net4j.port(takes precedence over-port) -
fr.obeo.dsl.viewpoint.collab.credentials.tools.net4j.connectiontype(takes precedence over-connectionType) -
fr.obeo.dsl.viewpoint.collab.credentials.tools.http.login(takes precedence over -httpLogin, -httpCredentials or secureStorage in CLI tools) -
fr.obeo.dsl.viewpoint.collab.credentials.tools.http.password(takes precedence over -httpPassword, -httpCredentials or secureStorage in CLI tools) -
fr.obeo.dsl.viewpoint.collab.credentials.tools.http.hostname(takes precedence over-httpHost -
fr.obeo.dsl.viewpoint.collab.credentials.tools.http.port(takes precedence over-httpPort) -
fr.obeo.dsl.viewpoint.collab.credentials.tools.http.usehttps(takes precedence over-httpsConnection)
-