Team for Capella Client installation
1. Requirements
1.1. Recommended system requirements
For successful installation of Team for Capella Client, your computer must meet the following requirements:
-
2 GHz processor
-
3 GB for (for big models, 4GB RAM)
-
System requirements:
-
Microsoft Windows 10/11 64 bits
-
no known issues with Windows 7/8
-
-
Microsoft Windows Server 2022/2025 64 bits
-
no known issues Windows Server 2008/2012/2016/2019
-
-
-
Compatibility with Java Runtime Environment 17 (Eclipse Adoptium Open JDK 17.0.17+10 is provided by SMW)
-
Virus scanner should not be activated on Capella models files:
*.aird, *.capella, *.airdfragment, *.capellafragment and *.afm.
2. Installation Procedure
2.1. Team for Capella Client installation procedure
2.1.1. Default client installation
You may take your Team For Capella client as it has been installed during the server installation. In that case, you need to make an archive of the capella folder and distribute it to users. Remember to include the samples folder if you want to ship the example model.
For Windows and Linux, it possible to follow the server installation procedure without the server nor Jenkins deployment and keep only the capella folder in the end.
|
Before archiving the Capella client that will be deployed on others computers, don’t forget to remove the workspace used for the installation from the recent workspaces list ( |
|
It is also possible to manually install Team for Capella but note that the installation with the |
2.1.2. Scripted client installation
It possible to use the installation script and target your SMW installation. It is similar to run the server server installation procedure without the server nor Jenkins deployment and keep only the capella folder in the end.
Preparation steps:
-
Download and extract the archive
TeamForCapella-7.0.1_202601_SMW-2512_ClientInstaller_Windows.zipin a given directory. It contains aTeamForCapelladirectory with 2 sub-folders and 1 file:-
tools: contains some scripts, properties files and pre-configured jobs to configure a Jenkins as scheduler -
updateSite: the Team For Capella update site for the client -
license.html -
It is also possible to use the server bundle
TeamForCapella-7.1.0_202601_SMW-2512-win32.win32.x86_64.zipand keep only the elements listed in the preceding bullet points.
-
-
Download SMW 2512
Client Installation
-
Install SMW bundle (please refer to the SMW installation requirements).
-
Move
license.htmland thetools`and `updateSitefolders next to thecapellafolder of your SMW 2512 installation directory. -
Resulting structure of your SMW folder:
-
capella -
samples -
tools -
updateSite -
license.html
-
-
Navigate to the tools folder and execute
installTeamForCapellaInSMW.bat.-
The installation script will install the Team for Capella features in SMW, update the splash screen and update some properties in
SMW.iniandconfig.ini. -
It is configured by default to retrieve the Team For Capella update site in the folder:
..\updateSite
-
2.1.3. Manual client installation
To manually install Team for Capella client in a SMW bundle, please follow the next steps:
-
Download and install SMW 2512
-
Download and extract the archive
TeamForCapella-7.0.1_202601_SMW-2512_ClientInstaller_Windowsand keep only theupdateSiteandtoolsfolders orTeamForCapella-7.0.1_202601_SMW-2512-win32.win32.x86_64.zip. -
Launch SMW (
SMW.exe) -
Click Menu Help/Install New Software… , add the archive file in the
updateSitefolder and select features in the Team for Capella category:-
Team for Capella
-
User Interface to request a License
-
Other features from Team for Capella and Team for Capella – Administration categories are optional and not installed by the installation script.
-
-
Then you need to do the additional tasks performed by the installation script:
-
change the splashscreen:
-
replace the value of
osgi.splashPathbyplatform\:/base/plugins/com.thalesgroup.mde.melody.collab.uiincapella\configuration\config.ini
-
-
copy the
license.htmlfile fromtoolstocapellafolder -
avoid performance impact of CDO internal tracing:
-
add
-Dorg.eclipse.net4j.util.om.trace.disable=trueat the end of the-vmargssection incapella\SMW.ini
-
-
avoid third parties components logging noise
-
add
-Dlogback.configurationFile=configuration/logback.xmlat the end of the-vmargssection incapella\SMW.ini -
copy the
logback.xmlfile fromtools/resources/client_rootfilestocapella/configurationfolder
-
-
add possibility to override default repository connection information:
-
add
-pluginCustomization

pluginCustomization.ini
before the-vmargssection incapella\SMW.ini -
copy the
pluginCustomization.inifile fromtools/resources/client_rootfilestocapellafolder
-
-
add the
license.htmlincapellafolder, copied fromtools\license.
-
-
Add the license server configuration key as described in Client configuration. If you have installed Team for Capella in a Capella bundle already completed with some add-ons, remember to check if they provide a “CDO Feature” for Team for Capella compatibility.
Steps 4 and 5 are done by the installation script.
2.1.4. Extensions installation
If meta-model extensions or add-ons are needed, use one of the following ways to install them:
-
Use the Help > Install New Software… wizard if the extension are provided as update sites
-
Otherwise if they are provided as dropins
-
Either unzip/copy their binary files in the folder
TeamForCapella\capella\dropins -
Or:
-
Unzip/copy them in any folder (it can be a shared folder between this server installation and client installations)
-
Modify the configuration file
TeamForCapella\capella\SMW.iniby adding the following parameter, after -vmargs :-Dorg.eclipse.equinox.p2.reconciler.dropins.directory=<ExtensionFolder>
-
-
|
Exactly the same extensions have to be installed on all clients including the server-side client. Installation of a new version of an addon may require a migration, see Capella Addon migration. |
2.2. Team for Capella Client configuration
For the complete client configuration documentation, refer to the chapter User Guide > Client Configuration > Preferences
-
Launch SMW (Team for Capella is installed in it),
-
Optional: clean the user’s Secure Storage (it contains the save Login/Password, if “Remember Me” option was used): Go to menu Window > Preferences > General > Security > Secure Storage,
-
Open the
Contentstab, -
Select
[Default Secure Storage], -
Click on
Delete, -
Upon request, restart the Team for Capella client.
-
-
Go to the menu Window > Preferences > Sirius > Team collaboration
-
Set the server location with the hostname or the IP address of the Team for Capella Server (localhost if the server is setup on the same machine),
-
Click on
Apply
-
2.3. Verification installation procedure
-
Create a new project > Right click in the Capella Explorer > New > Capella Project
-
Call it Test for example > Finish
-
-
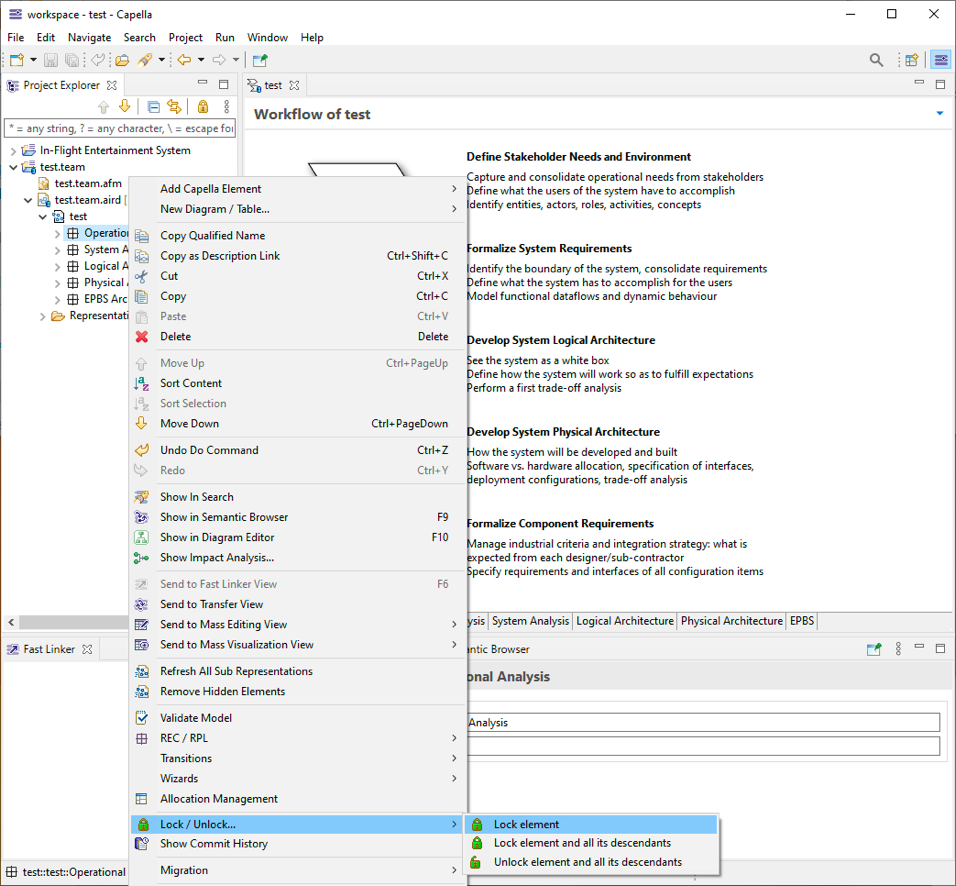
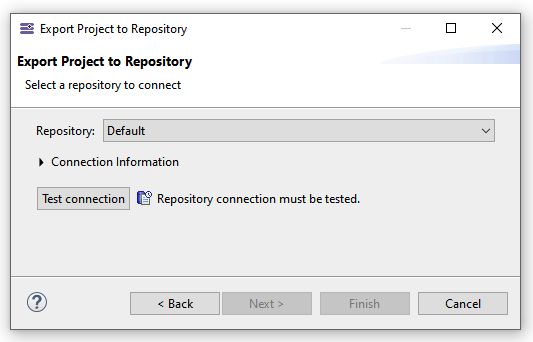
Export the project to the remote repository
-
Right click on the project > Export > Team for Capella > Export model to remote repository>Next,
-
(Optional) Expand Connection Information if the deployed repository with default parameters
-
Click on Test Connection :
-
Provide the user name and password (by default: user1/user1, user2/user2, user3/user3, admin/admin).
-
Click on Finish.
-
-
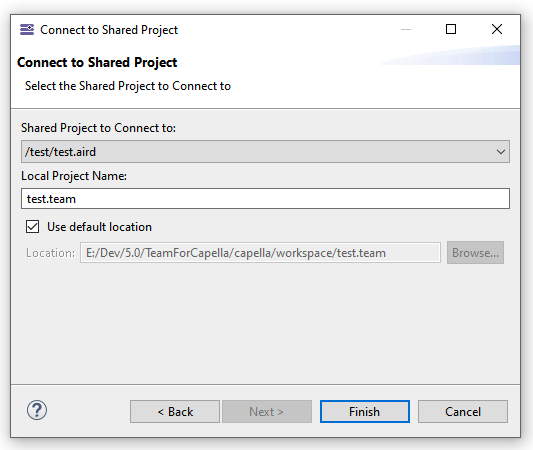
Connect to the remote project previously exported,
-
Right click in the Capella Explorer > New > Capella Connected Project
-
Test Connection,
-
Select sthe Shared project from the list:
-
Click on Finish,
-
-
You should now be able to work on the project on the remote repository.