Publication For Capella Global Configuration with IBM Jazz Team Server Tutorial
1. Description
This tutorial aims at showing Publication For Capella ability to interact in a Global Configuration context. It shows step by step how to configure IBM Jazz Team Server and Publication For Capella to allow the OSLC linking between them in a Global Configuration context.
| This tutorial has been made with for IBM Jazz Team Server version 7.0.2. |
2. Setup the IBM Jazz Team Server server
A IBM Jazz Team Server server must be up and running and configured with two applications:
-
A Global Configuration application
-
A Requirements Management application
| The Requirements application will be used for the purpose of this tutorial, in order to create links from Publication For Capella to IBM DOORS Next requirements. Other kind of applications could be used instead. |
Those applications should appear on IBM Jazz Team Server dashboard.
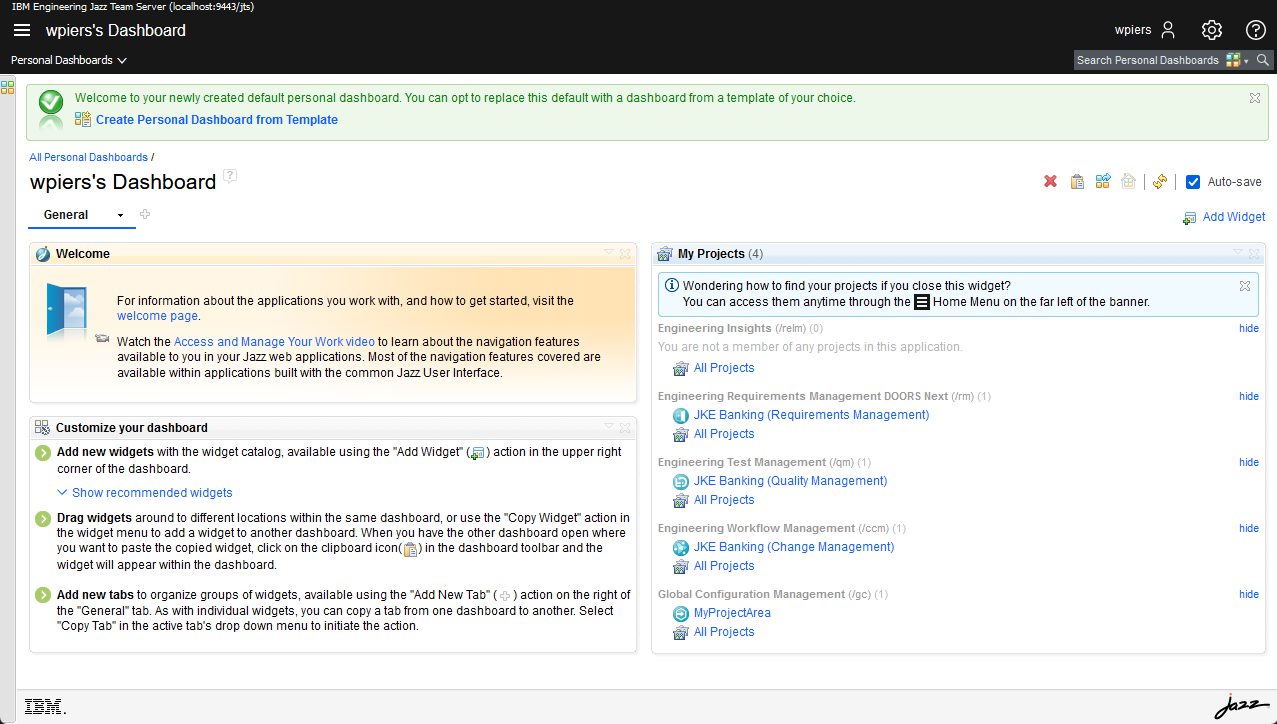
This tutorial requires the Global Configuration application to contain a Project Area with at least one Component and the associated Stream. The Requirements Management application is linked to this Project Area and can switch from a Global Configuration to another.
Here are the key steps to setup that environment in IBM Jazz Team Server:
-
Register a Global Configuration license key in IBM Jazz Team Server
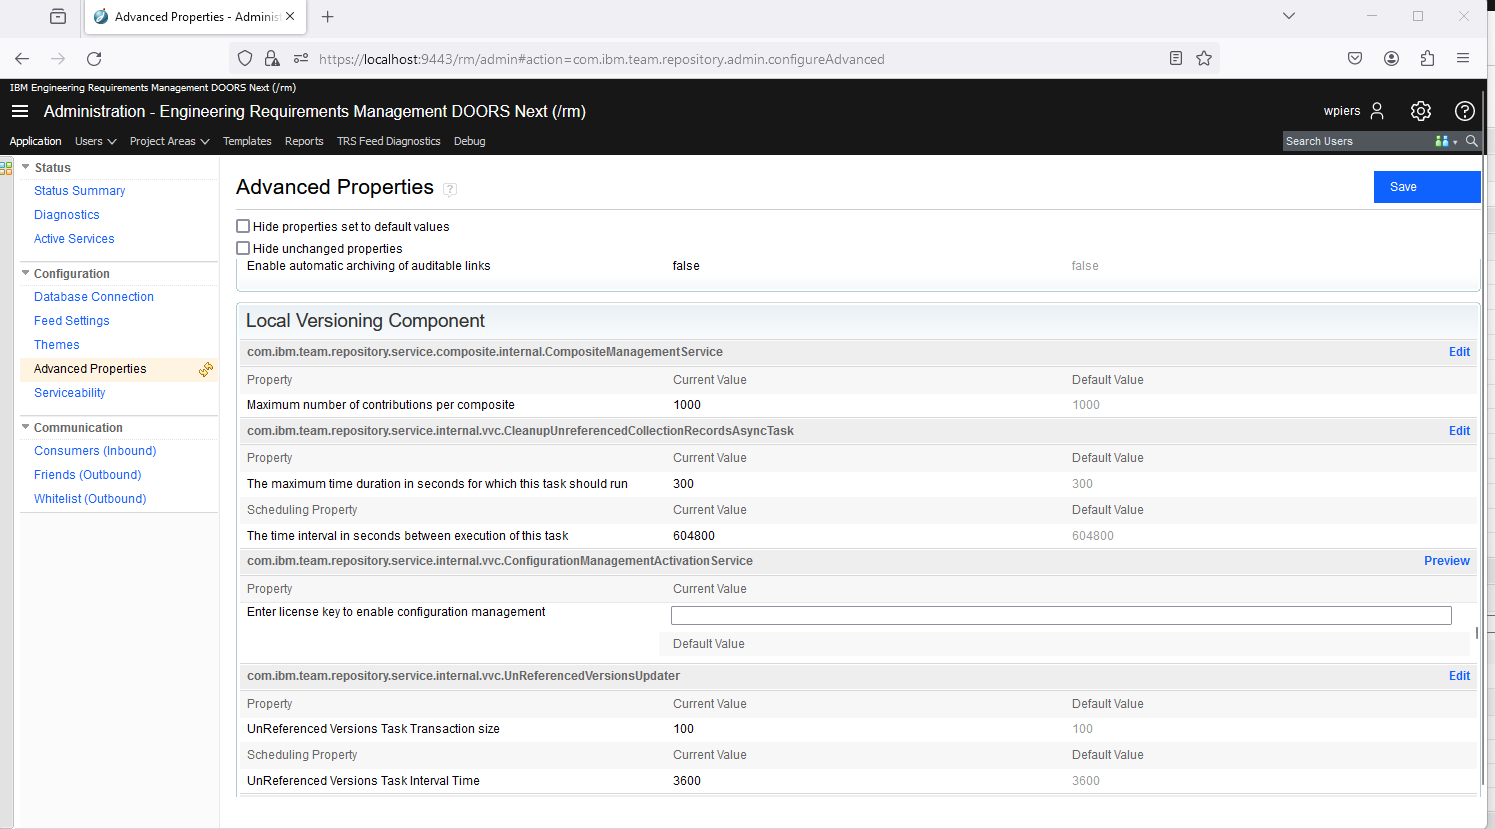 Figure 2. Register License Key
 -
In the Global Configuration application (<jazz_server_url>/gc), create a Project Area
 Figure 3. Create a Project Area
 -
Add yourself as a member of this Project Area with the Administrator process role
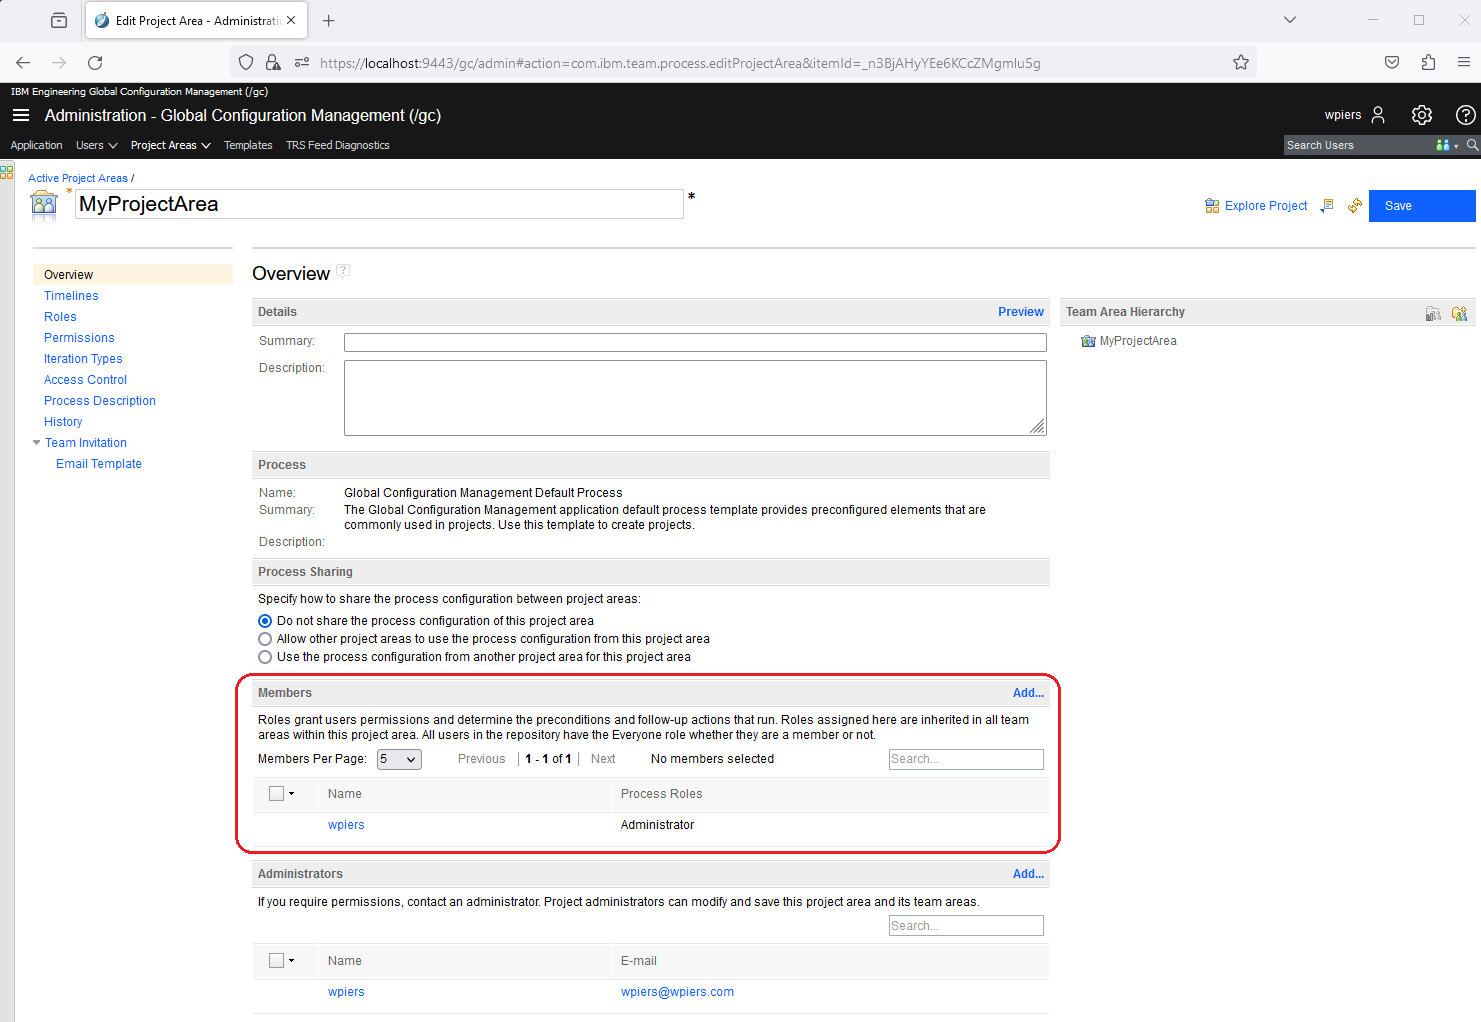 Figure 4. Add Project Area Member
 -
Create at least one Component in this Project Area
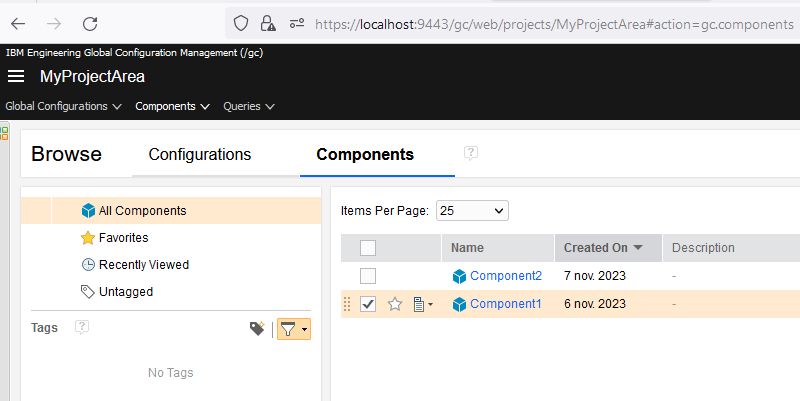 Figure 5. Create Components
 -
An Initial Development Stream is automatically created
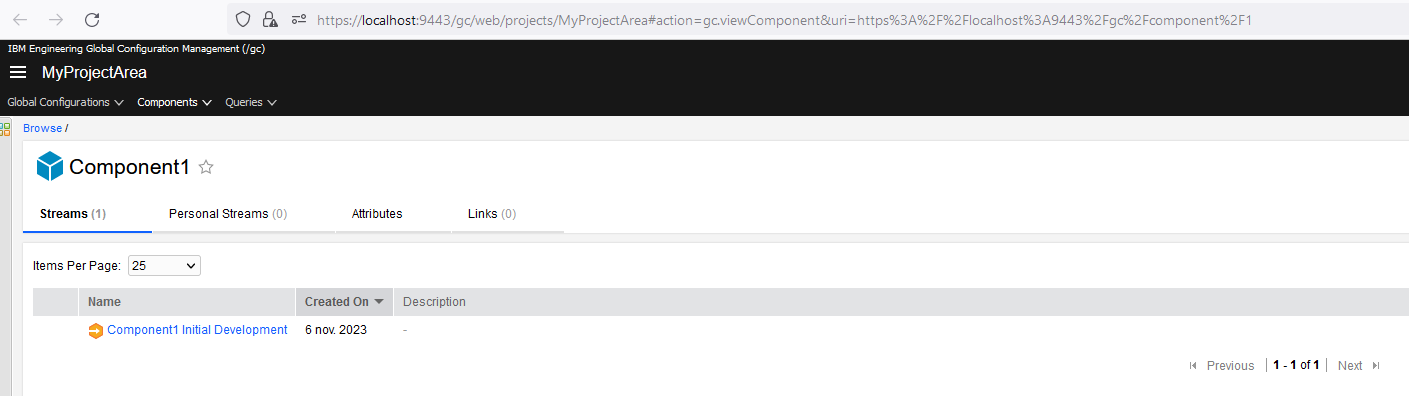 Figure 6. Creates Stream
 -
In the Requirements Management application (<jazz_server_url>/rm), create a Project (or reuse a demo project from IBM Jazz Team Server)
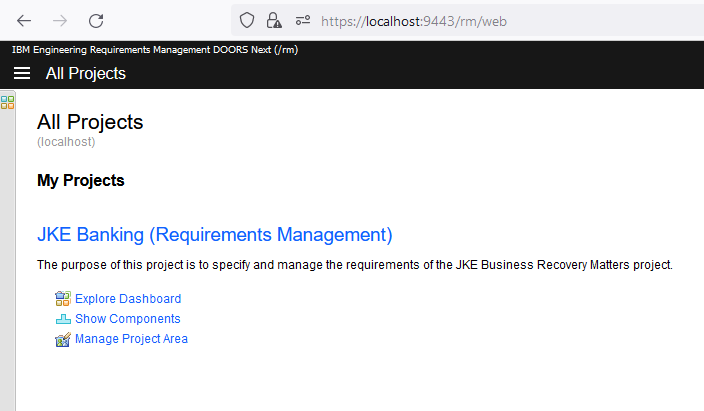 Figure 7. Requirements Project
 -
Activate Global Configuration for this project
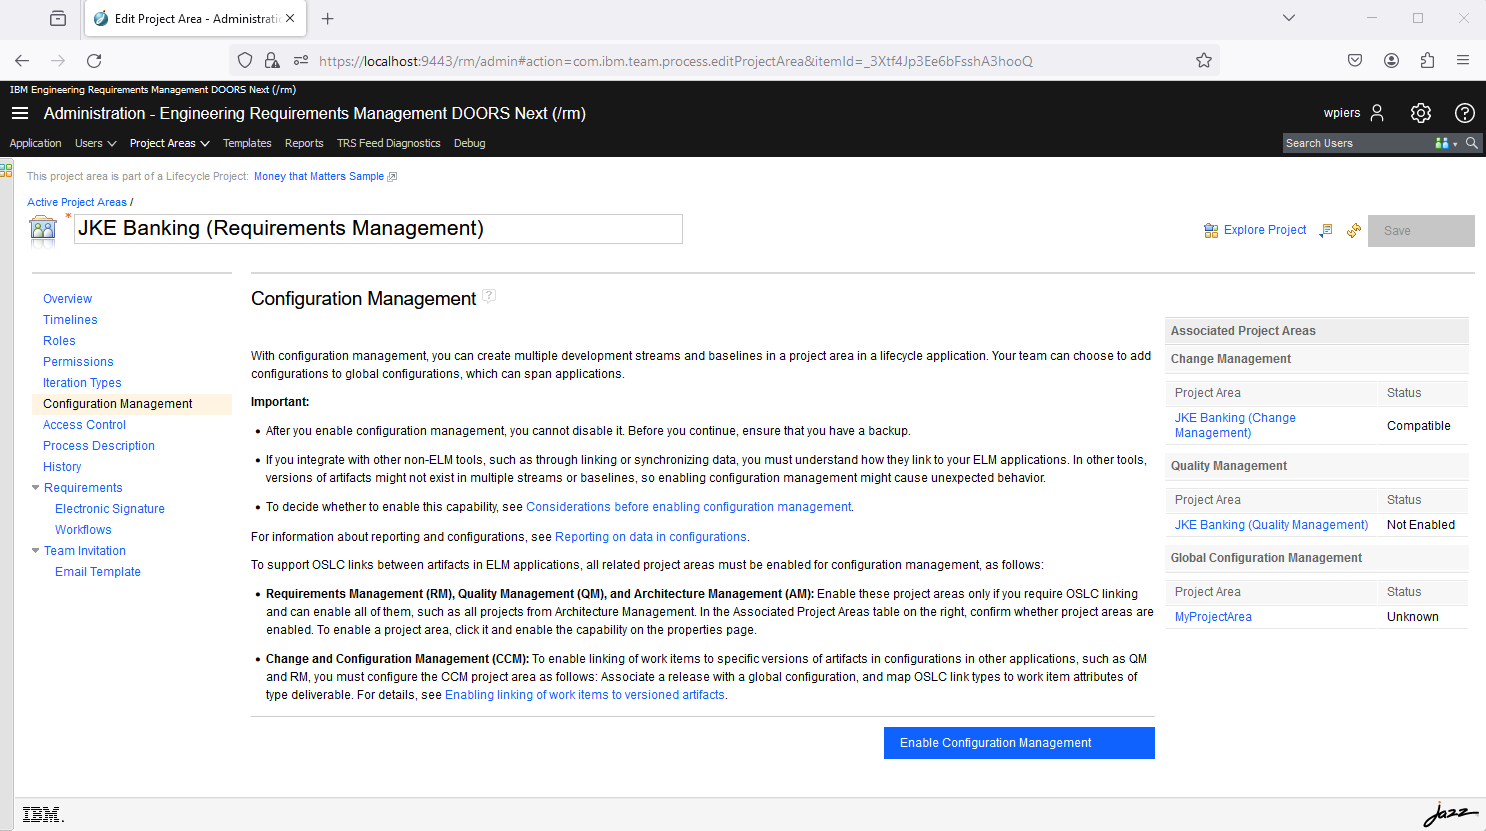 Figure 8. Activate Global Configuration
 -
In the Global Configuration application, associate the Project Area with that project
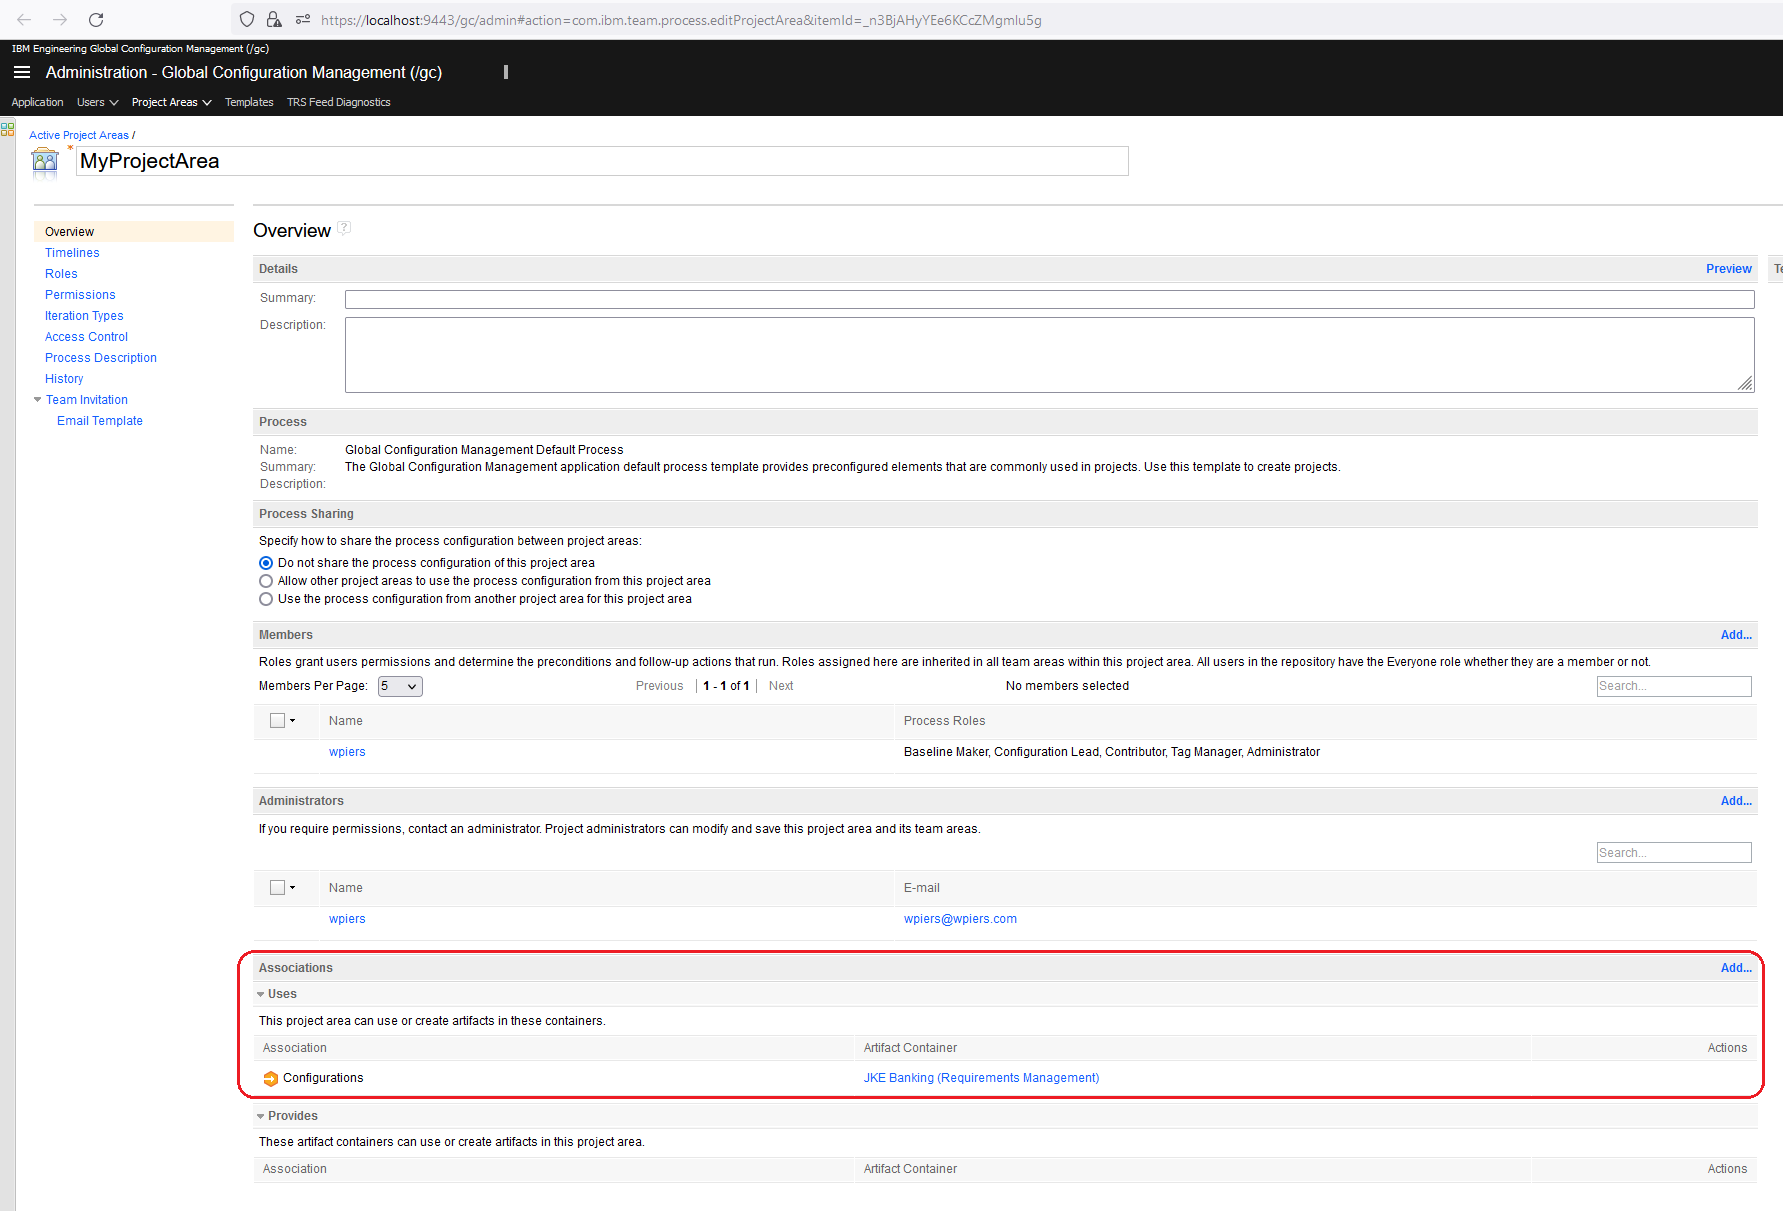 Figure 9. Project Area association
 -
In the Requirements Management Project, create a Stream
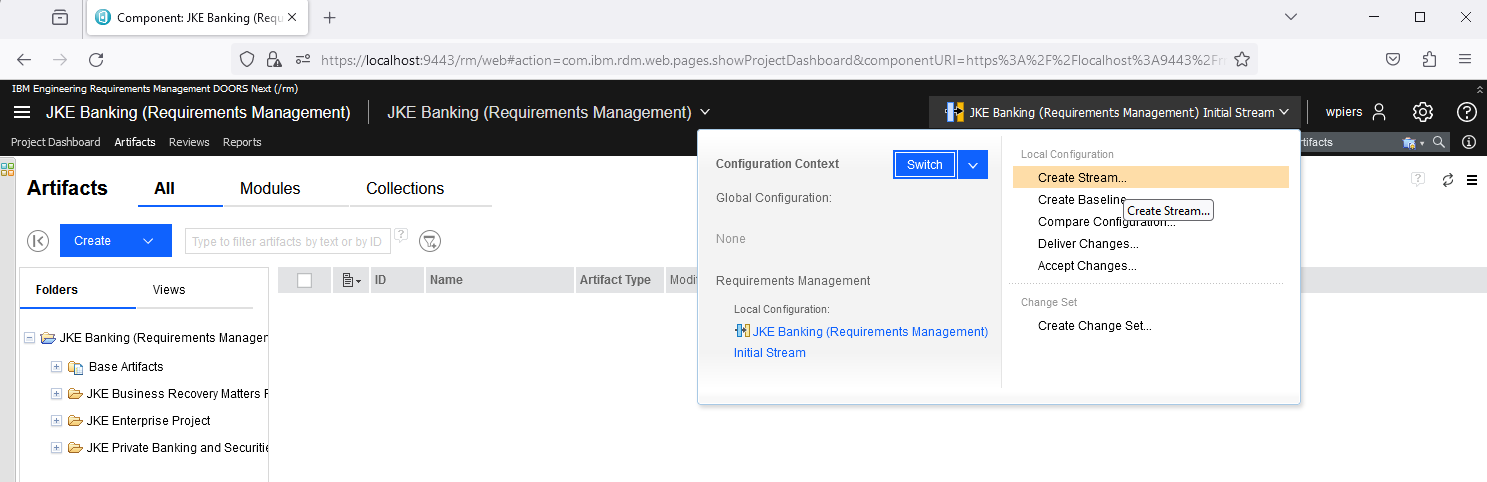 Figure 10. Create Stream
 -
In the Global Configuration application, add this Stream to the Component you created before
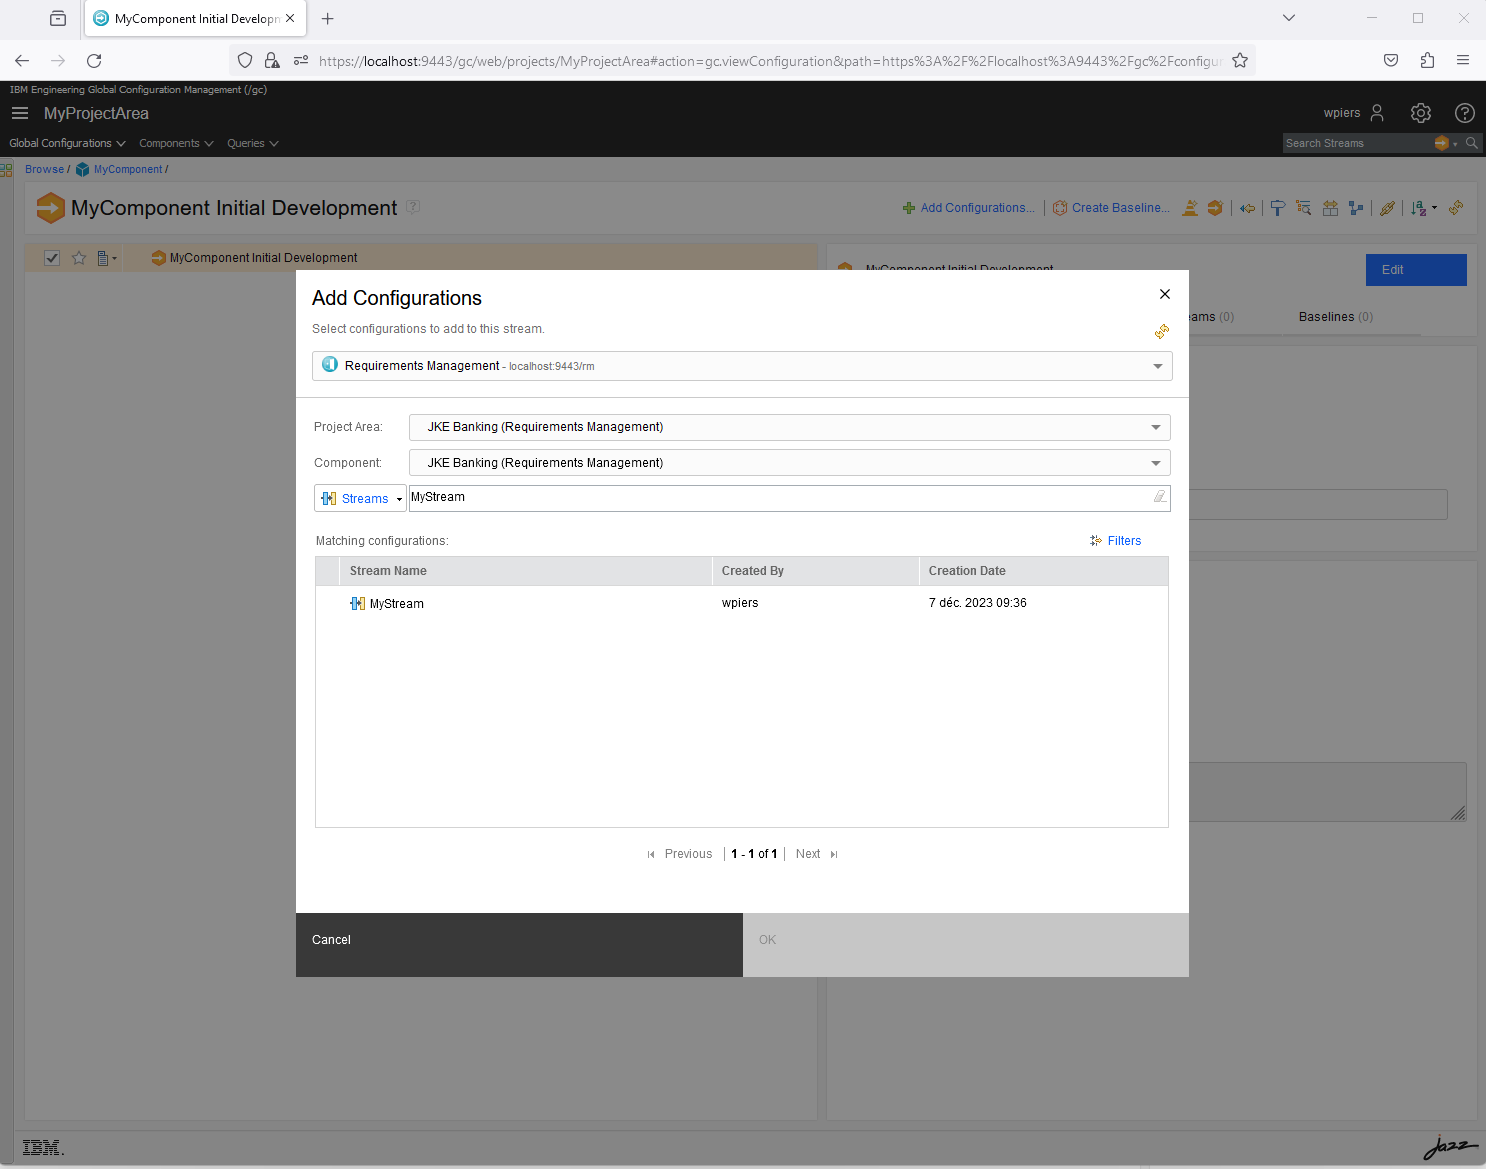 Figure 11. Link Streams
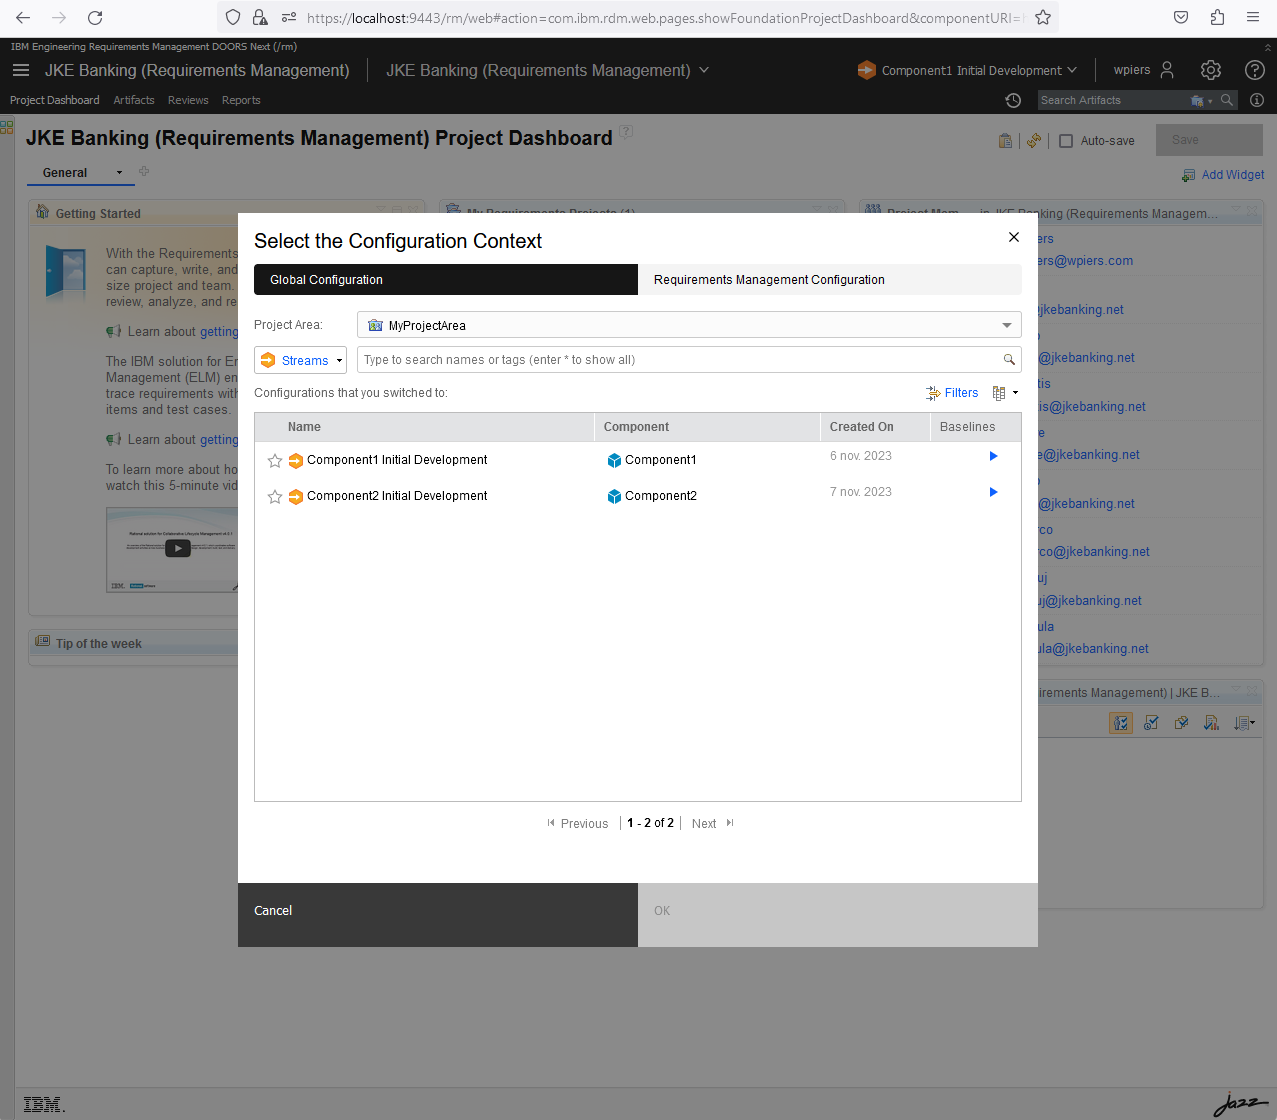
You should now be able to switch between configurations from the Requirements Project:
| The tutorial focuses on the use of Global Configuration in Publication For Capella, please rely on IBM Jazz Team Server documentation for more details. |
| If you use Google Chrome, an extra step is required (at least with IBM Jazz Team Server 7.0.2) to allow OSLC delegated dialogs. It is described at https://www.ibm.com/docs/en/engineering-lifecycle-management-suite/lifecycle-management/7.0.2?topic=server-customize-websphere-liberty-samesite. |
3. Setup the Publication For Capella Server
A Publication For Capella server (minimal version 2023.12) must be up and running. A server administrator will be needed to register OAuth friends.
-
Create a New Publication For Capella Project
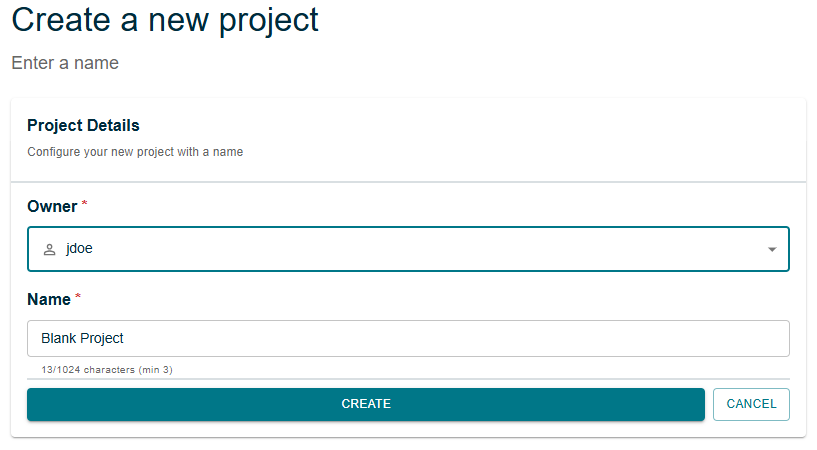 Figure 13. New Project Creation
 -
In the project settings, click on Activate Global Configuration, confirm
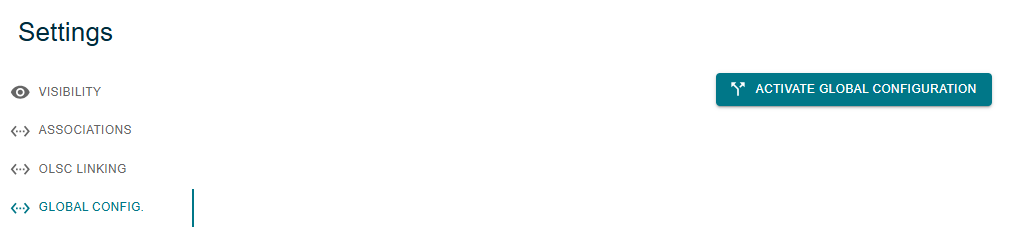 Figure 14. Global Configuration activation
 -
Publish a Capella model on this project
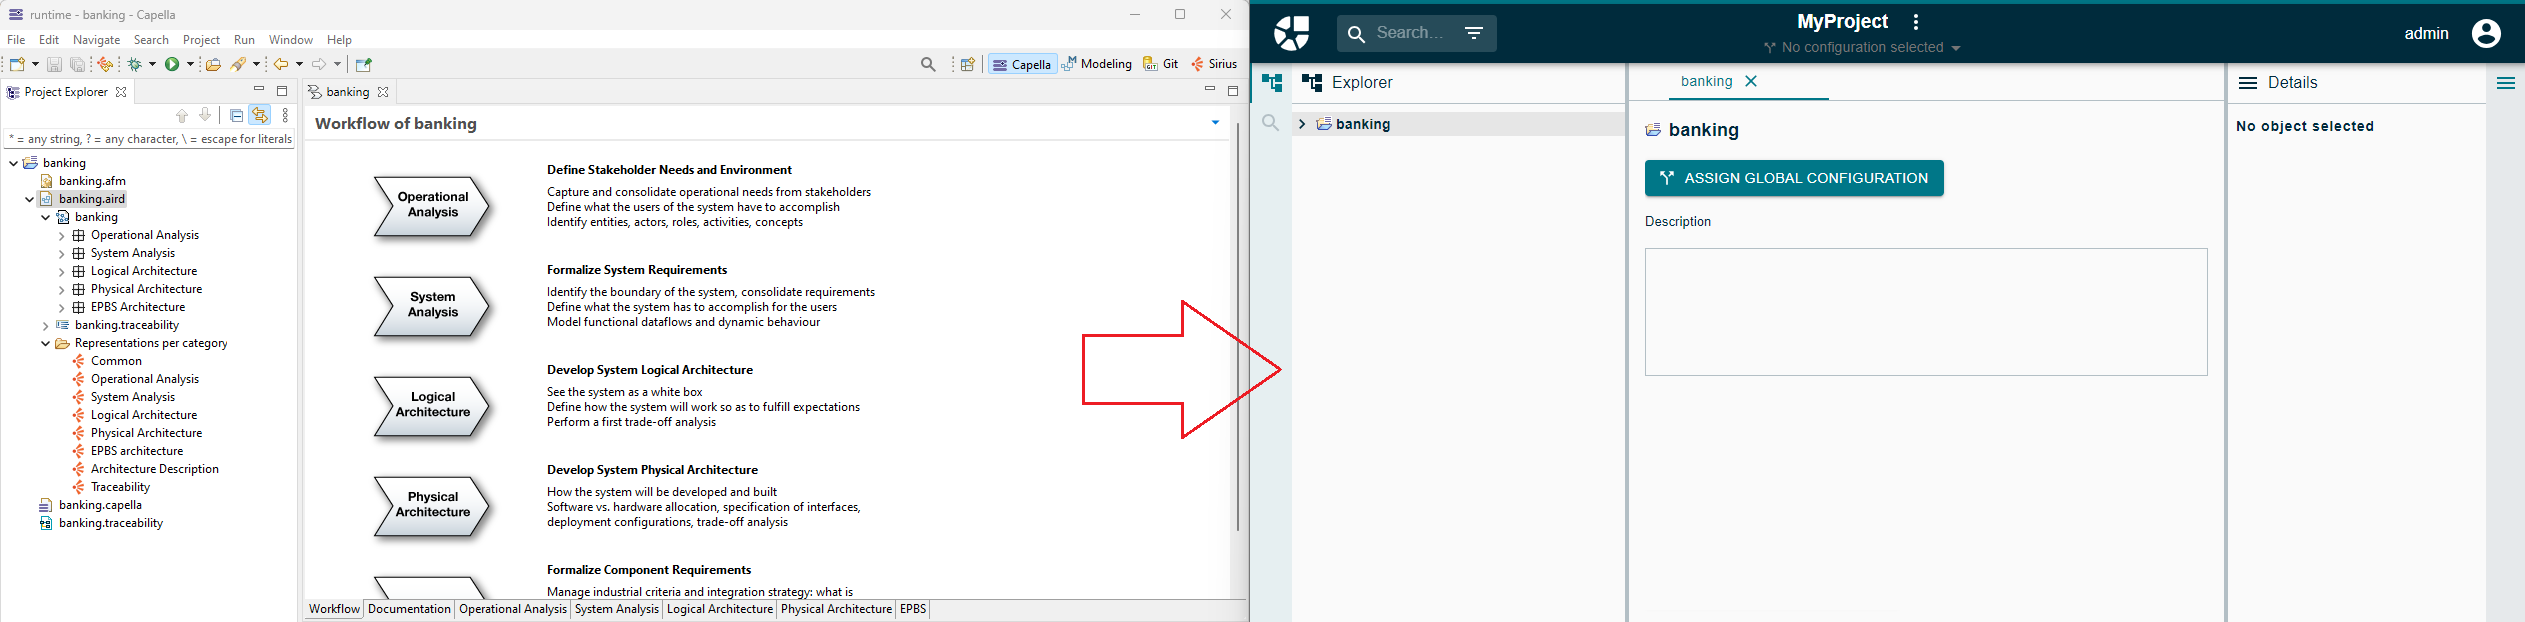 Figure 15. Published model
4. Register IBM Jazz Team Server in Publication For Capella
To establish the communication with IBM Jazz Team Server we must first register Publication For Capella as a friend in IBM Jazz Team Server, in the <jazz_server_url>/jts/admin#action=com.ibm.team.repository.admin.friends administration page.
Then we can create two friends:
-
The Global Configuration application (
<jazz_server_url>/gc)
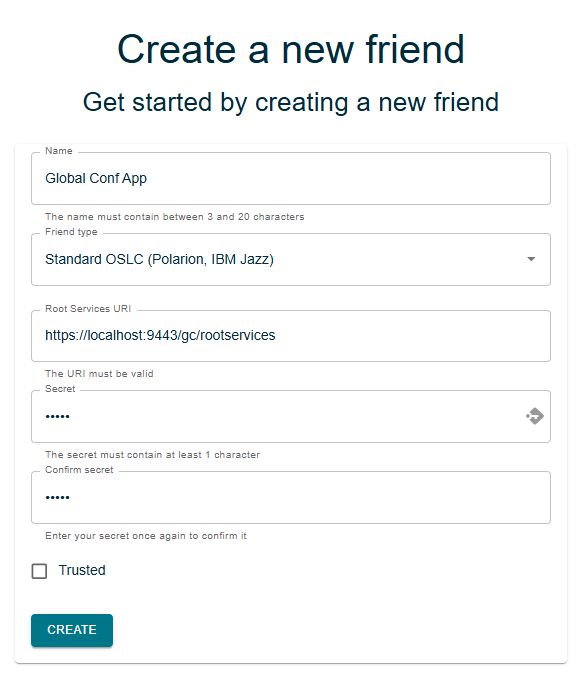
-
The Requirements Management application (
<jazz_server_url>/rm)
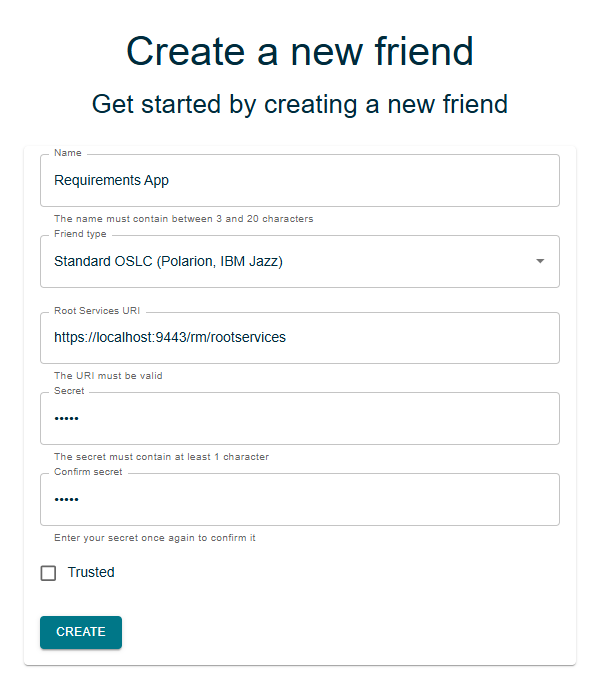
| If IBM Jazz Team Server uses a self-signed certificate, it must be exported from IBM Jazz Team Server website then registered in Publication For Capella JVM. |
5. Approve IBM Jazz Team Server Consumers
The new Publication For Capella friends are viewed as consumers on the IBM Jazz Team Server side and must be approved to allow the connection.
-
Open the IBM Jazz Team Server admin interface (<jazz_server_url>/jts/admin) and click on the Manage Server setting.
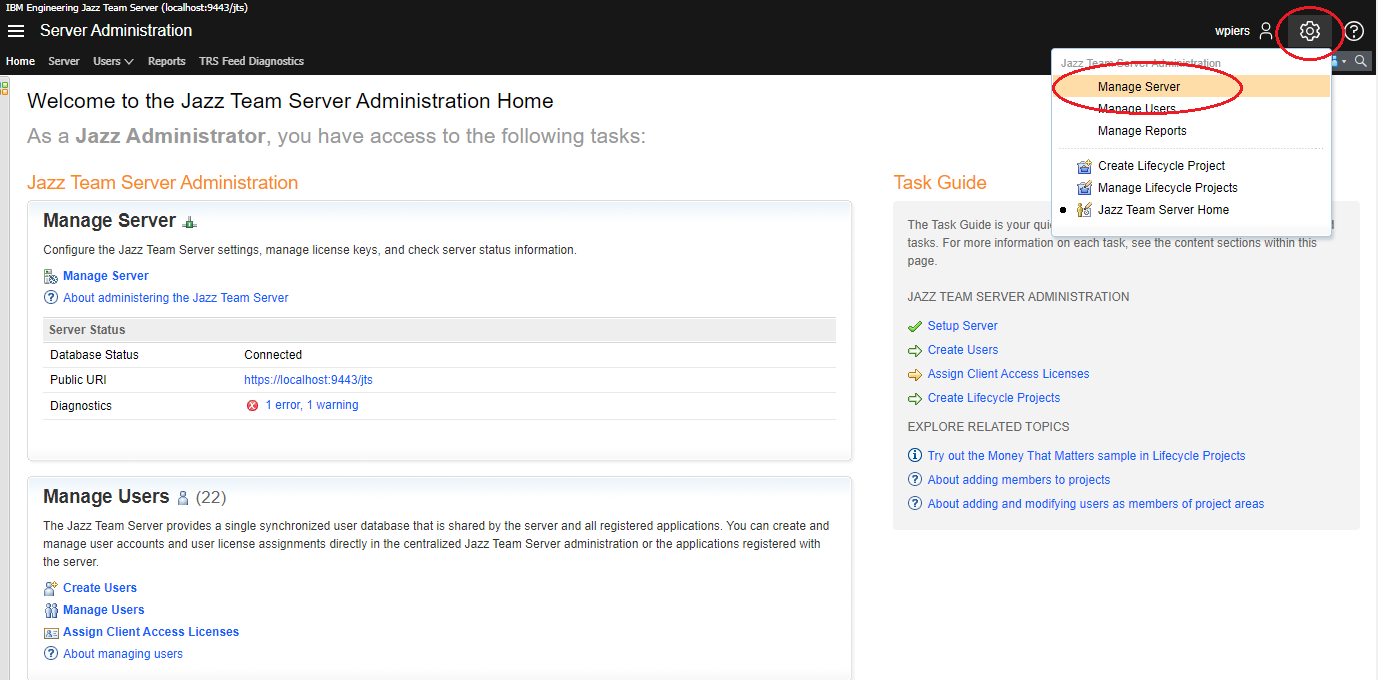 Figure 18. IBM Jazz Team Server Administration
 -
On this page there is a section dedicated to consumers management with a Consumers (Inbound) link.
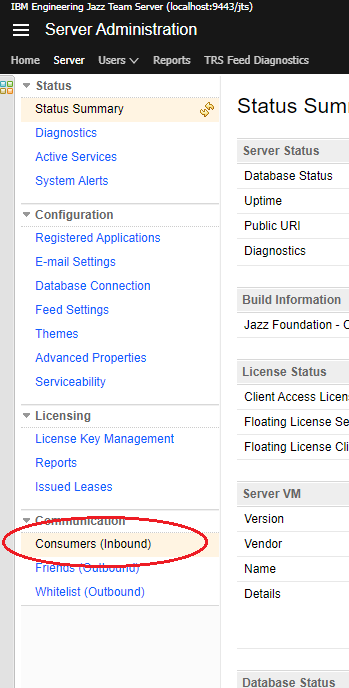 Figure 19. IBM Jazz Team Server Consumers
 -
This link leads to a page where consumers can be approved. Change their status then click on the Save button.
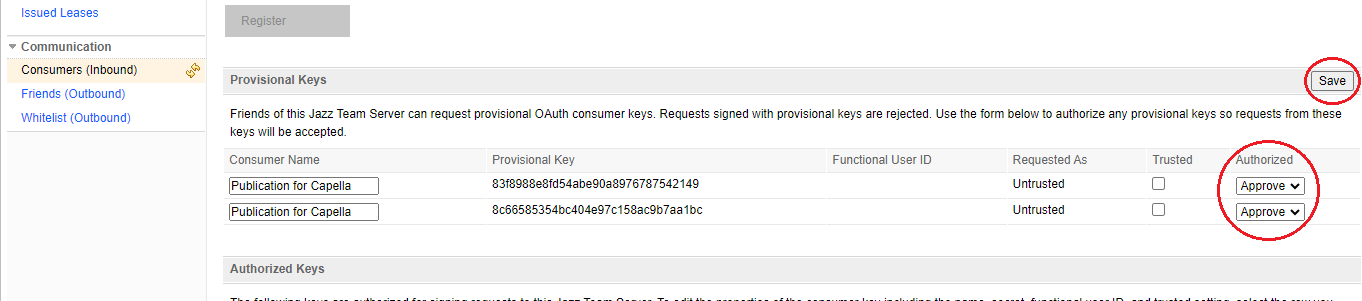 Figure 20. Approve IBM Jazz Team Server Consumers
6. Associate the Publication For Capella Project to IBM Jazz Team Server Service Providers
At this point we can associate the Publication For Capella project with the needed service providers from those two friends:
-
A Global Configuration provider
-
A Requirements provider
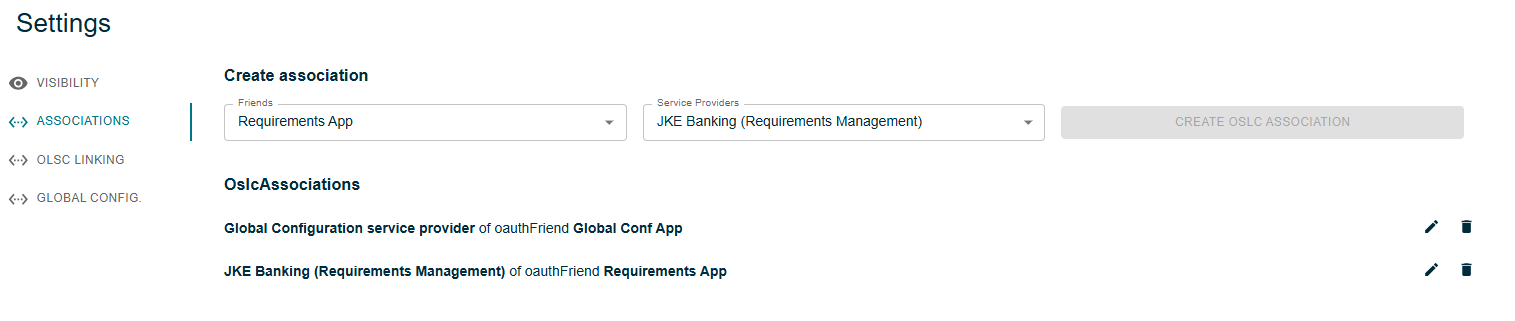
In the project settings, open the Associations tab and create those associations.
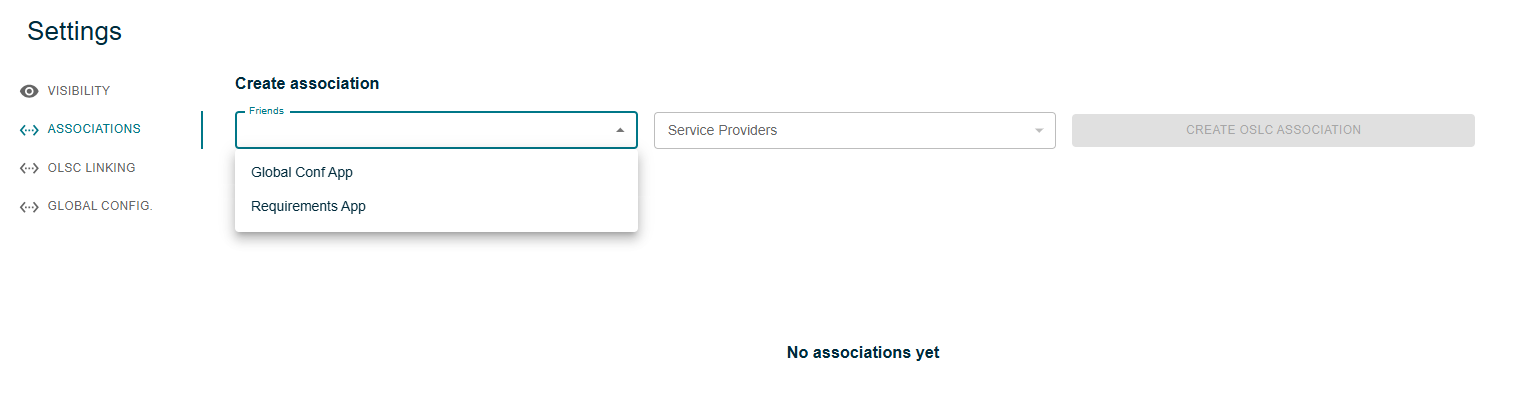
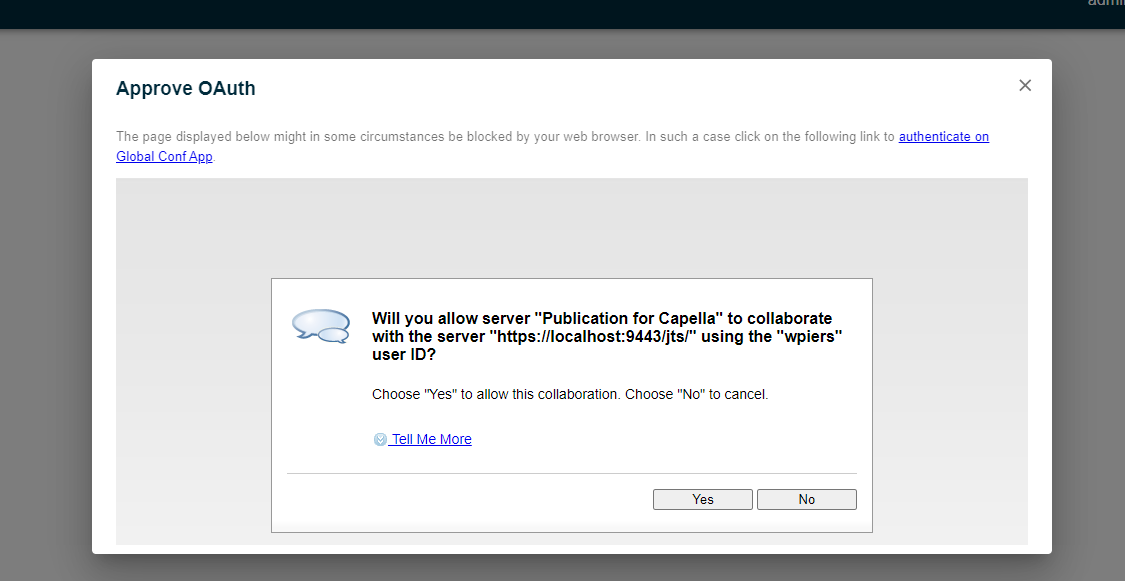
| When selecting a friend in the associations settings the first time, IBM Jazz Team Server will prompt for an OAuth approval. Click Yes and close this dialog. |
The Publication For Capella project is now associated with two service providers.
7. Assign a Global Configuration to the Model
We can now assign a Global Configuration to our model.
-
Click on the model in the Explorer and click on the Assign model configuration button. A dialog opens and purpose configurations available on IBM Jazz Team Server.
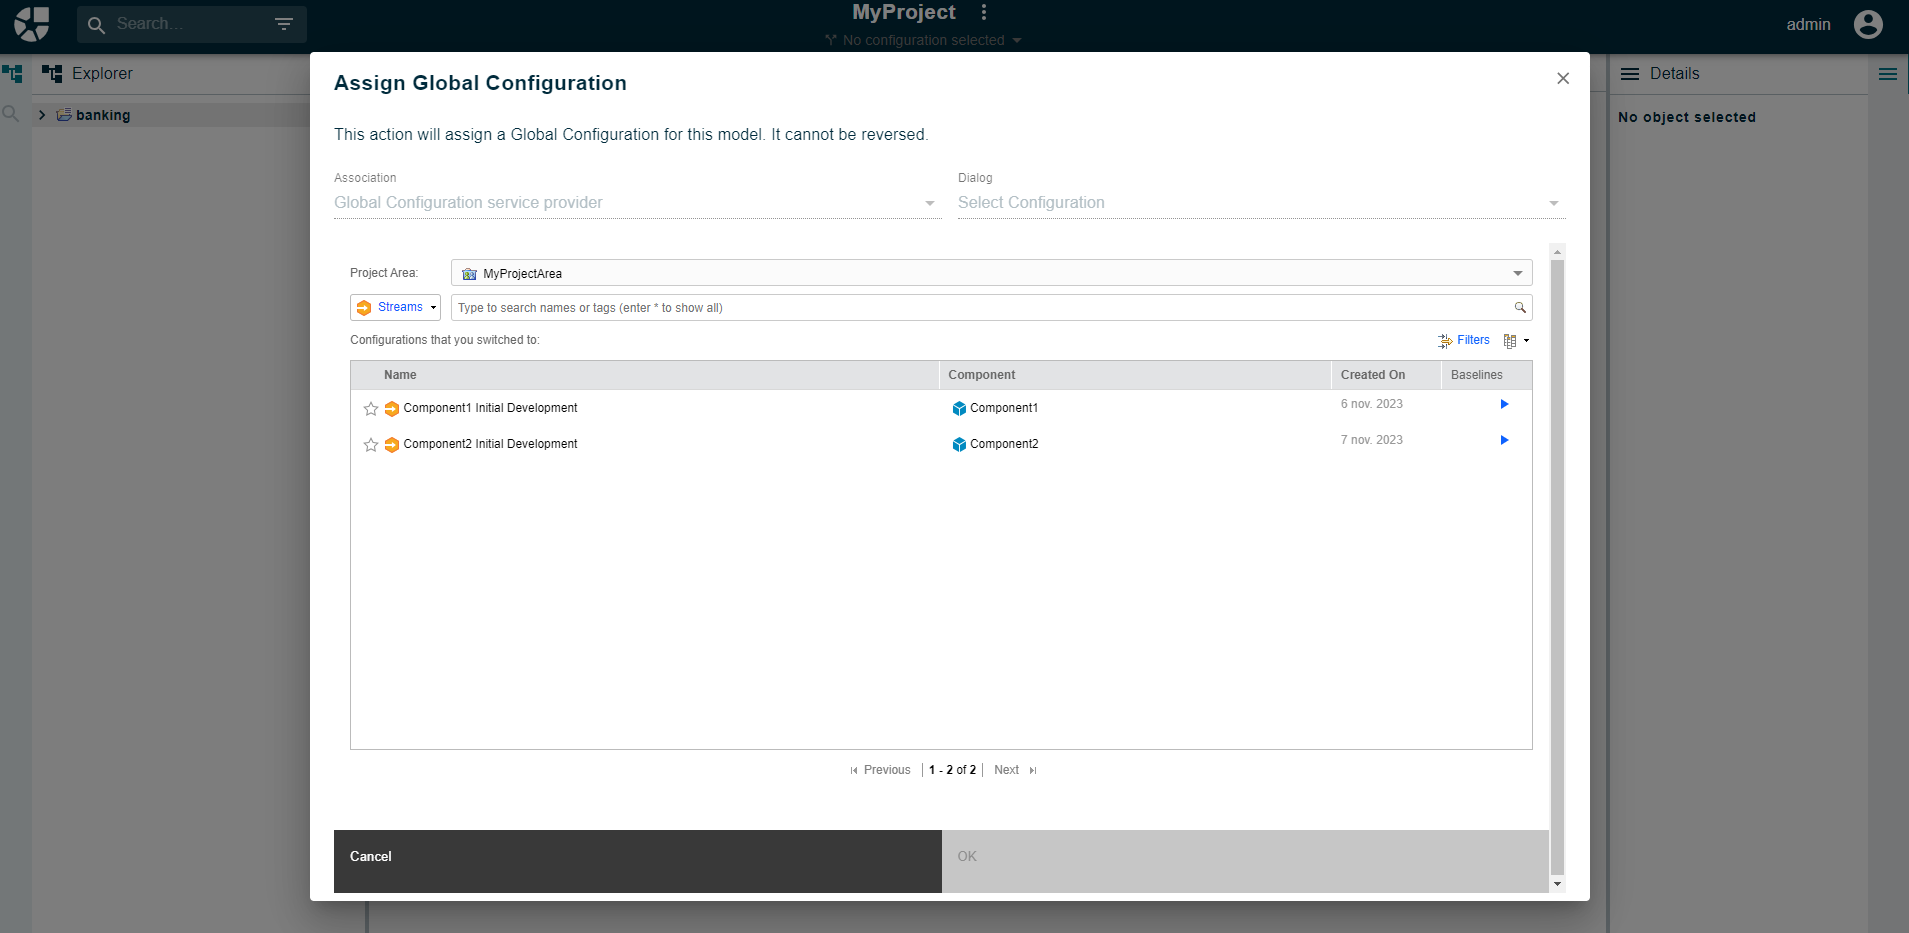 Figure 24. Assign Model Configuration
 -
Select a configuration and click OK, then Confirm on the warning dialog.
8. Filter the Project by Global Configuration
In this tutorial there is only one model in the project but if there are several models, assigned with various configurations, it is possible to filter models by Global Configuration to display only the models that are assigned a given Global Configuration.
-
Click on the No configuration selected label under the project name. A dialog opens and purpose configurations available on IBM Jazz Team Server.
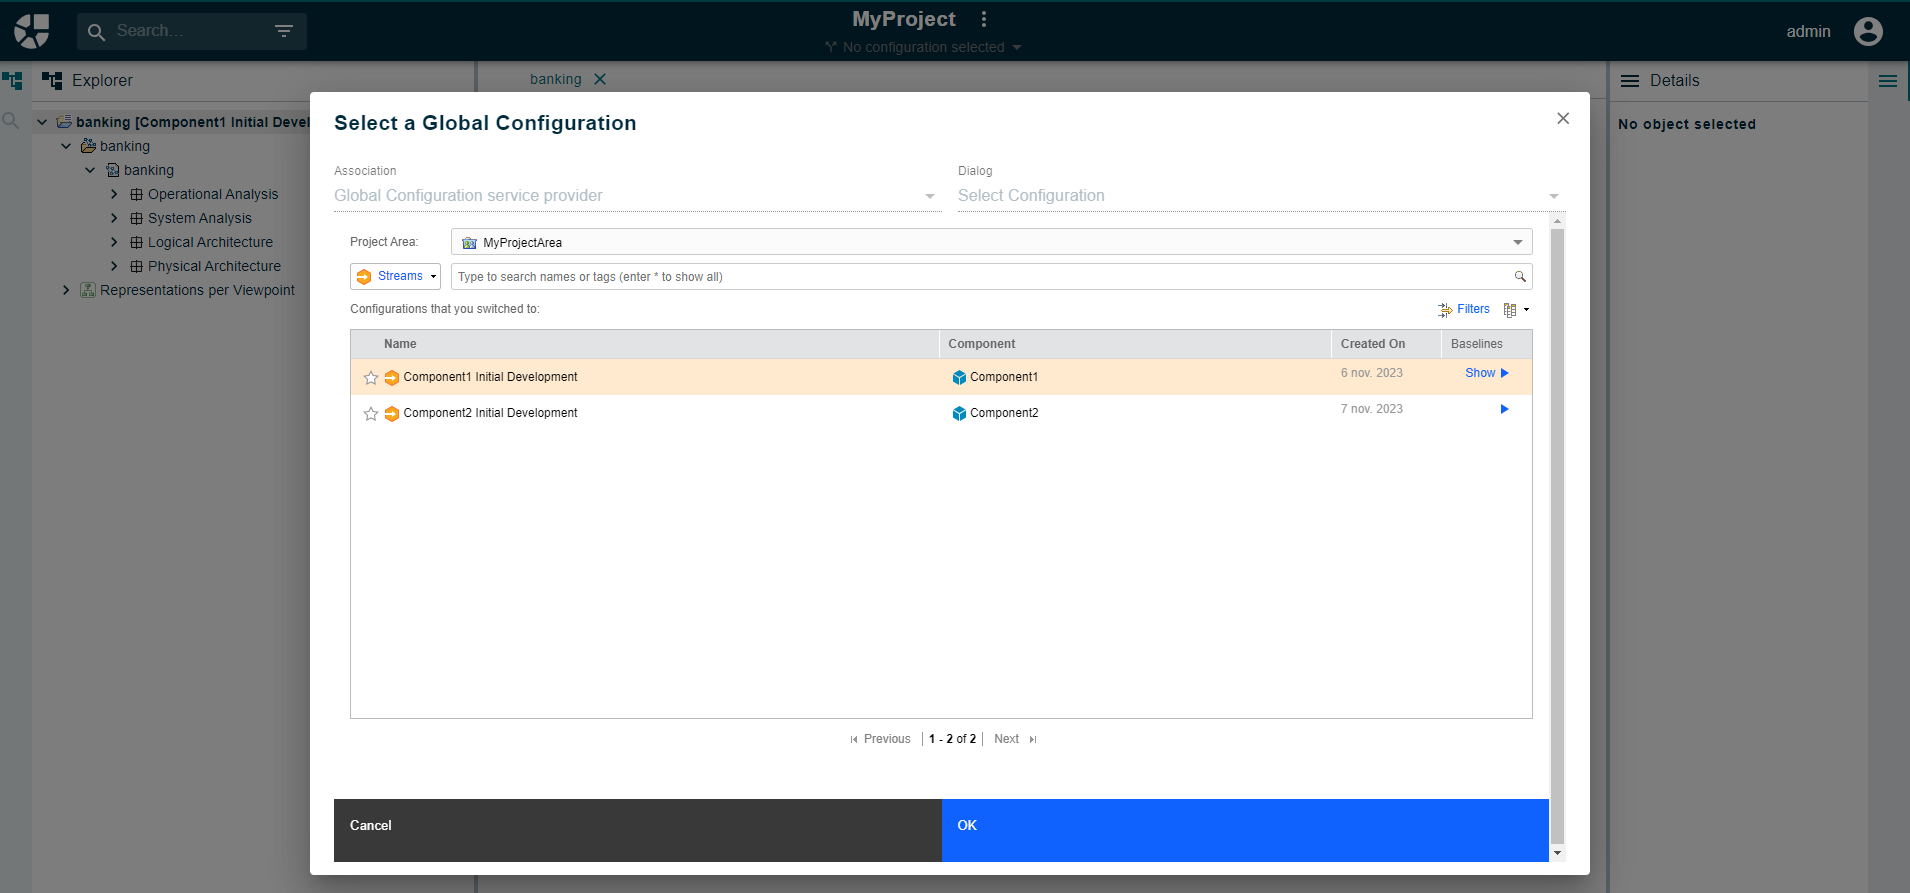 Figure 25. Select Project Configuration
 -
Select a configuration, click OK. The label now shows the configuration title.
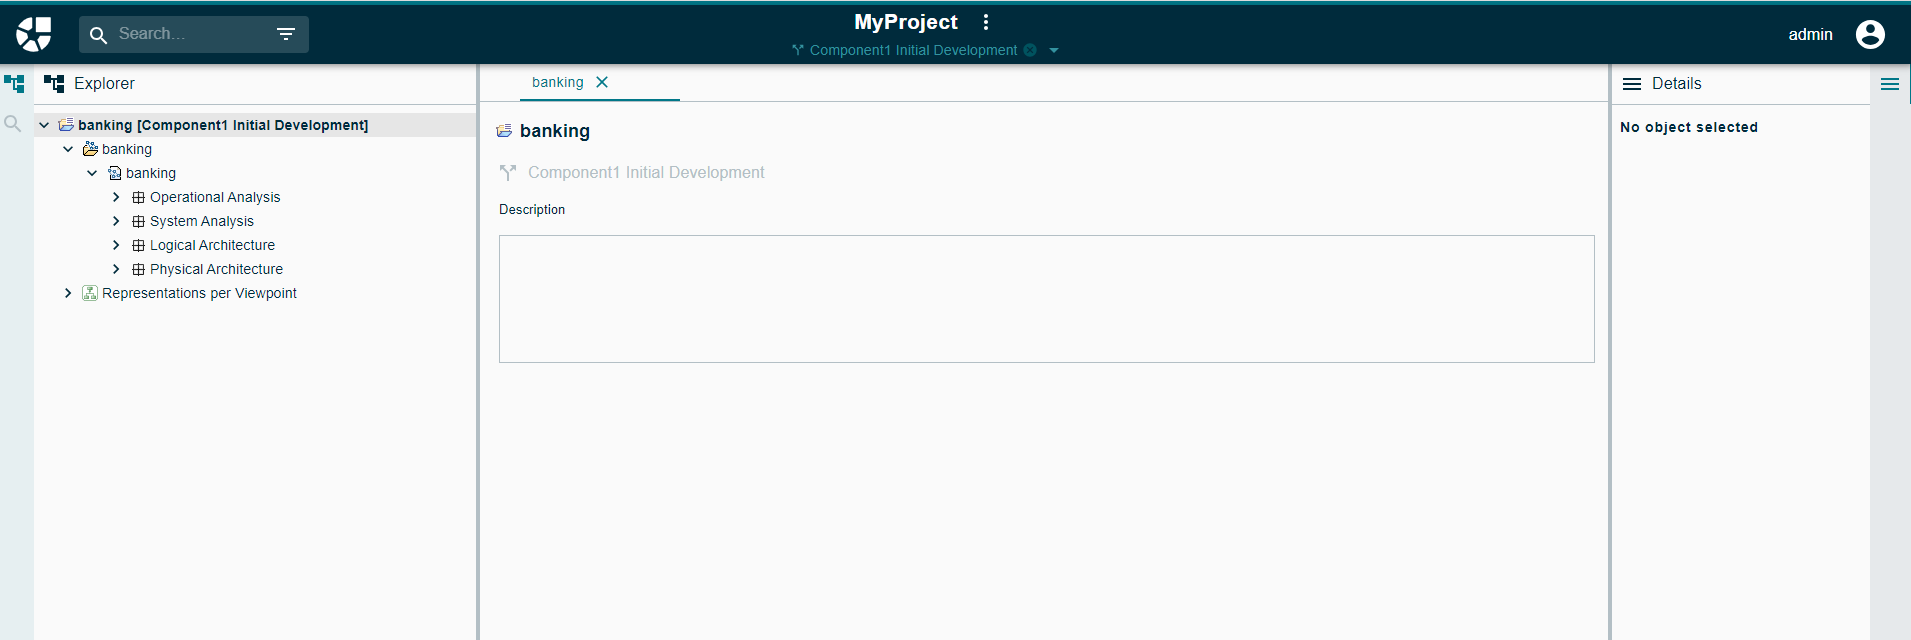 Figure 26. Selected Project Configuration
You can simply reset this filter by clicking on the cross icon next to the configuration label.
9. Create an OSLC Link
To demonstrate that the model is now tied to the assigned Global Configuration we are going to create a link from Publication For Capella to some element in DOORS Next.
-
Select the Root Logical Function in the Explorer then click on the link creation button.
 Figure 27. Create Link Button
 -
Select a requirement. The dialog already only shows requirements available within the assigned configuration.
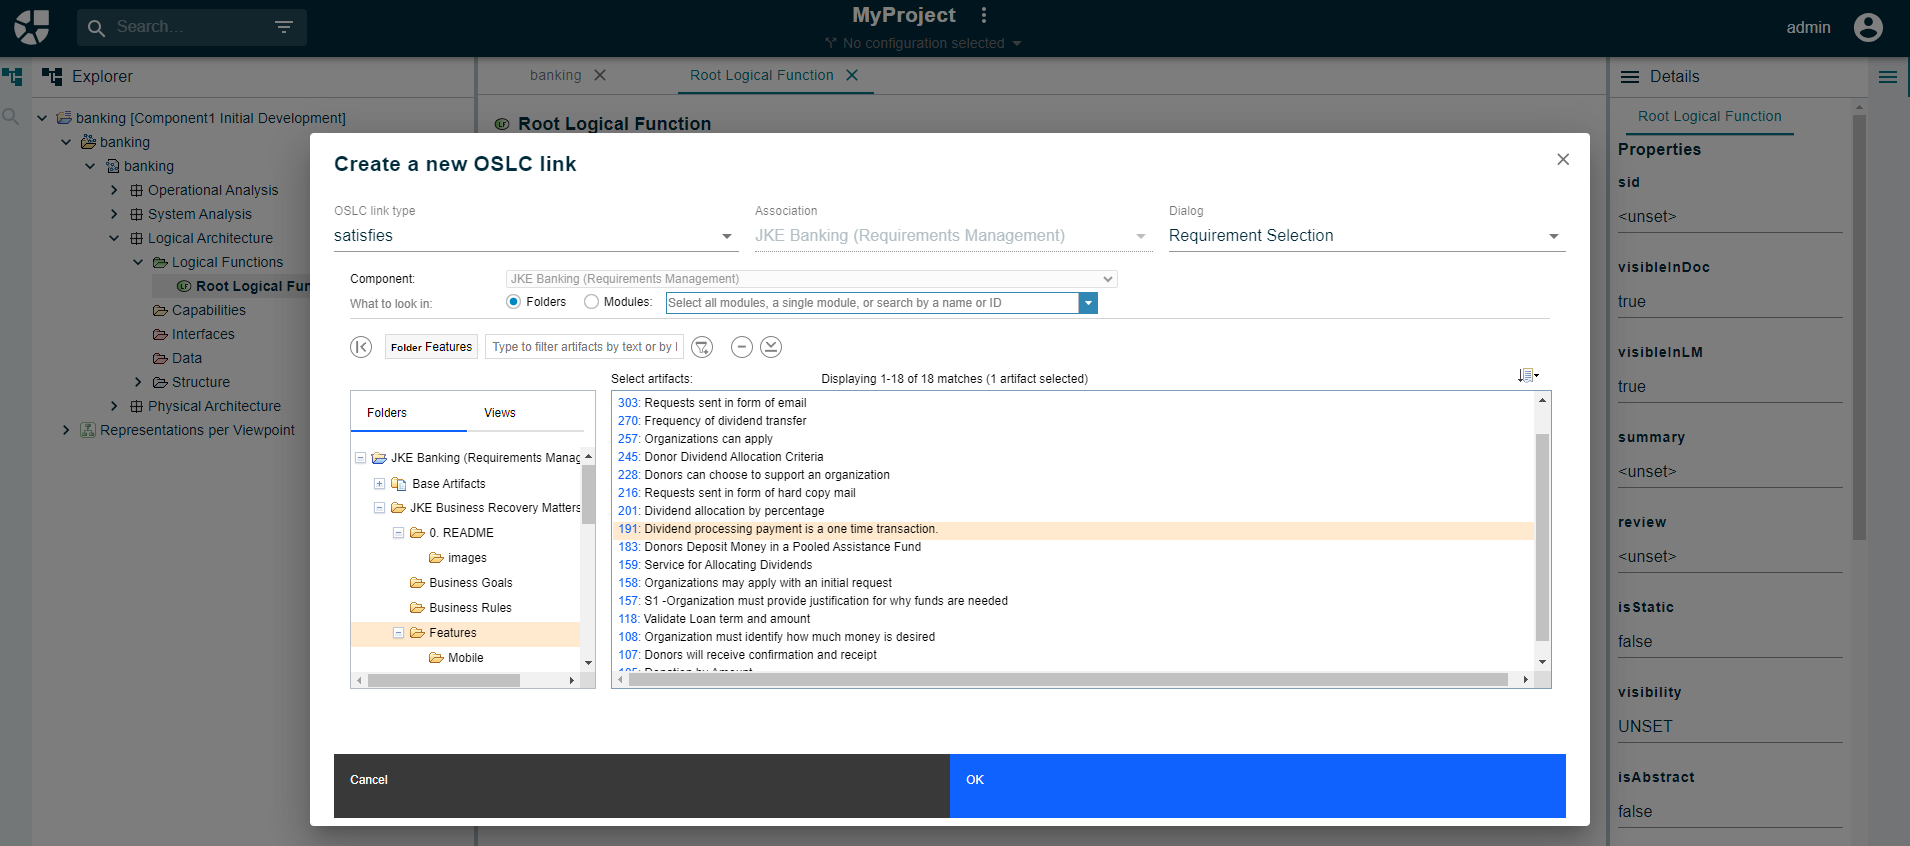 Figure 28. Create Link
 -
The link is created on Publication For Capella.
 Figure 29. Link Created
 -
Clicking on the link will lead to the requirement page on DOORS Next, within the right configuration.
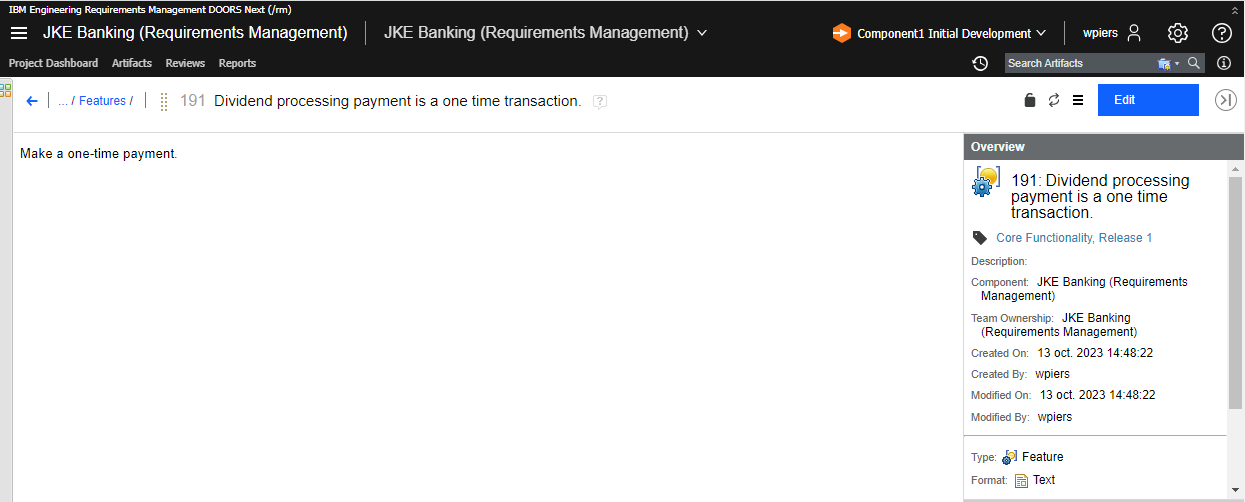 Figure 30. Requirement in DOORS Next
10. Update the Capella Model
Now we are going to update the Capella model in order to fetch the new link from Publication For Capella.
-
First we need to Initialize the traceability model in order to allow storage of the configuration. Right-click on the aird file then click on Initialize traceability.
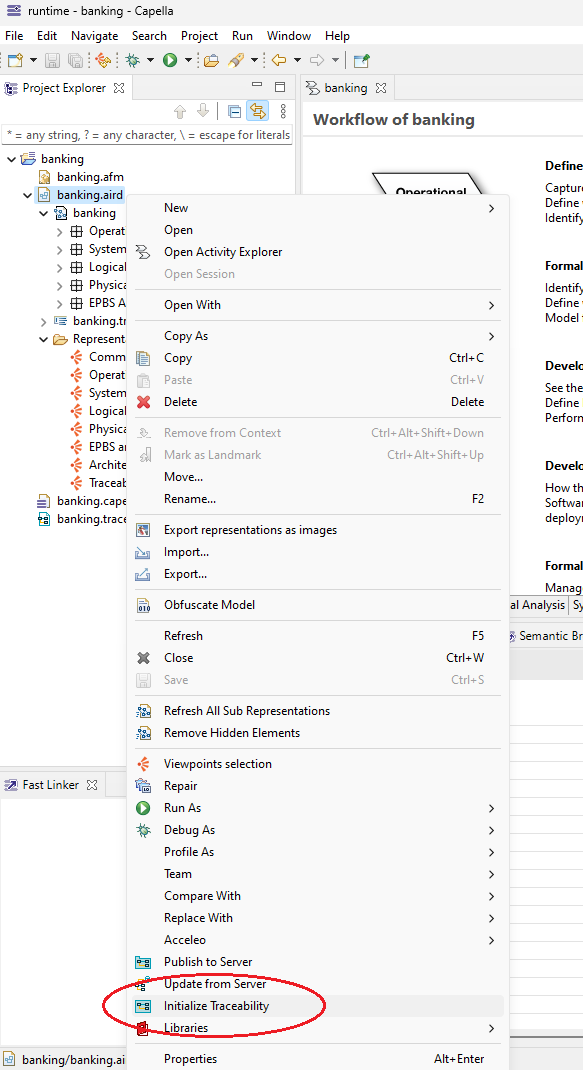 Figure 31. Initialize Traceability Action
 -
In the dialog, select Requirement & Configuration Management Domains, and the two available repositories. Click OK.
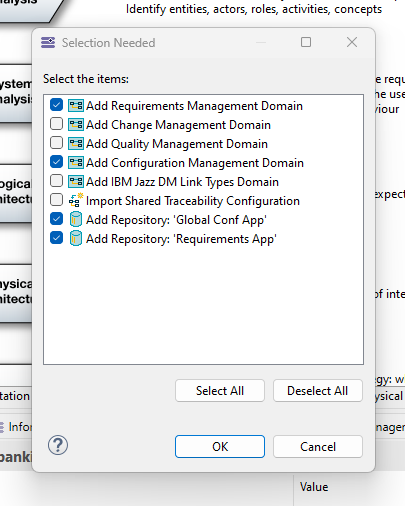 Figure 32. Initialize Traceability Dialog
 -
Right-click on the aird file again but this time click on Update from server.
-
A dialog shows the new link, accept it.
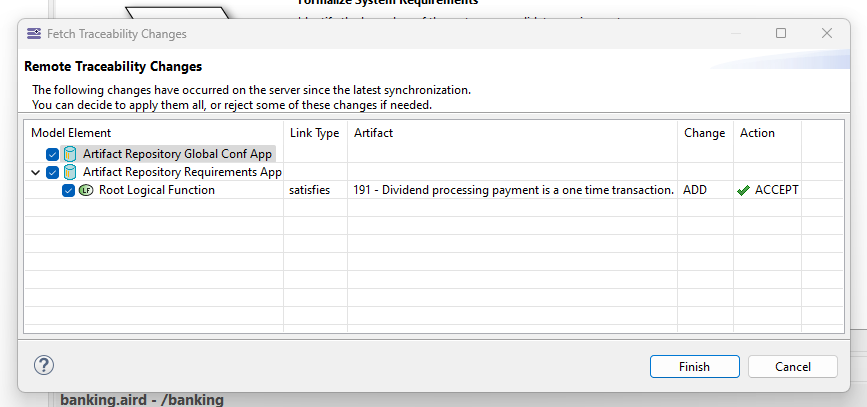 Figure 33. Update Changes