Polarion Configuration for Publication For Capella
Publication For Capella exposes model data according to the OSLC AM (Architecture Management) domain.
Polarion can be configured to make it possible to link Polarion items to model objects exposed by Publication For Capella.
This document describes the necessary configuration that must be done in Polarion.
1. Global Administration Settings
-
Declare the Publication For Capella server as a friend:
-
In Polarion, connect as an administrator;
-
Go to 'Global Administration > Linked Data > Linked Data Friends';
-
This configuration is made at
http://<polarion.mycompany.com>/polarion/#/administration/linkeddata/friends;
-
-
Click on 'Add Friend' and enter the following information:
-
URI:
"https://<publication.mycompany.com>/oslc/rootservices";-
e.g.
https://publication.mycompany.com:9090/oslc/rootservicesfor a Publication For Capella server deployed on port9090atpublication.mycompany.com;
-
-
Name:
"Publication For Capella"(or any name to recognize the Publication For Capella server instance); -
OAuth Secret: a password - Use a random string of characters, no need to remember it or save it anywhere else;
-
-
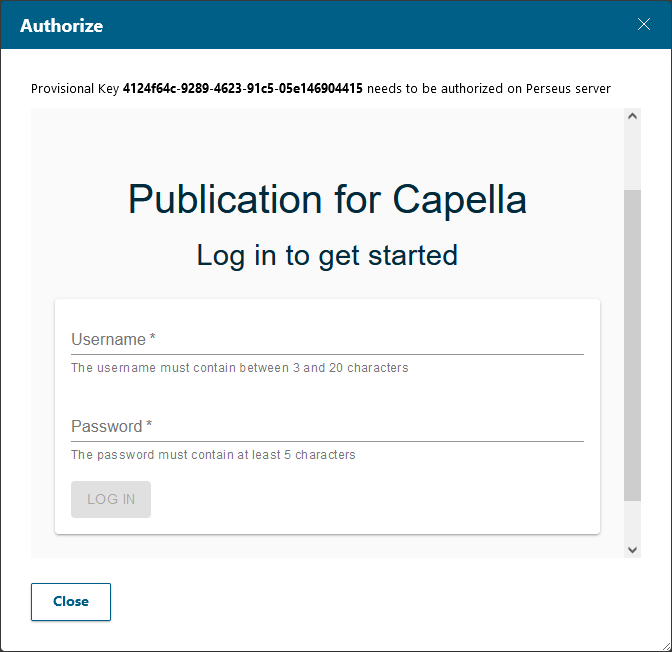
Click on Next. A dialog appears to validate the provisional key that will be used to authenticate communications between the two servers:
-
-
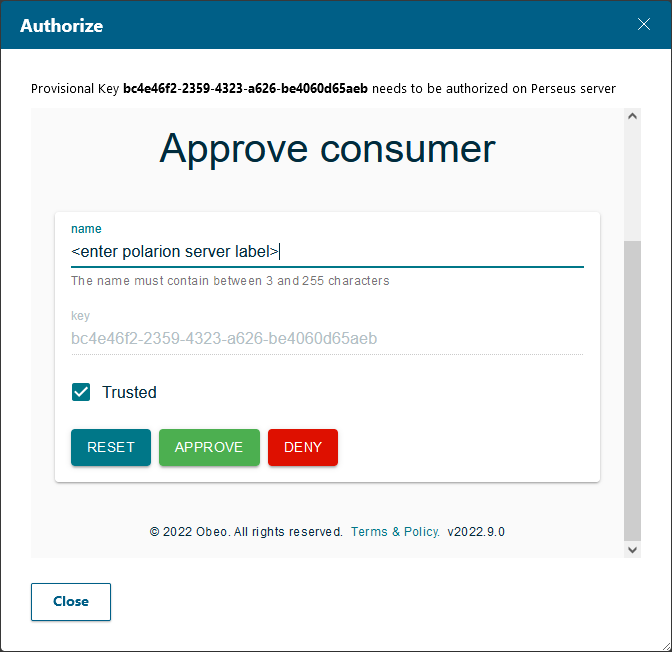
Use the Server Administrator credentials to connect in this dialog (by default, "admin"/"odweb"):
-
Enter a name for the Polarion server, as seen from Publication For Capella;
-
Leave
"Trust Level"to"Trusted"; -
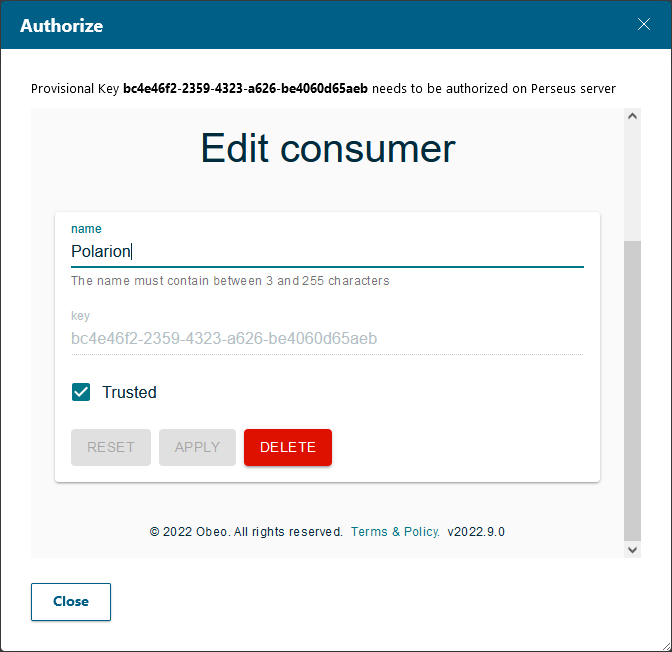
Click on 'Approve' - You can still edit the server name, and access that edition page later from Publication For Capella.
-
Close the dialog with the Close button;
-
If you don’t have these credentials, ask the Publication For Capella Server Administrtor to connect to the Publication For Capella server and navigate to
https://<publication.mycompany.com/admin/oauth/consumersto validate the provisional key; -
The Publication For Capella friend appears in the list of OSLC friends;
-

-
Configure the Linked Data Semantics:
-
Go to 'Global Administration > Linked Data > Linked Data Semantics';
-
This configuration is made at
http://<polarion.mycompany.com>/polarion/#/administration/linkeddata/semantics;
-
-
In the
Configurationeditor area:-
In the
<namespaces>element, add a namespace for OSLC AM withprefix="oslc_am"andurl="http://open-services.net/ns/am#"; -
In the
<domains>element, add domain withprefix="oslc_am"and resourceTypelabel="Architecture Resource", uri="oslc_am:Resource"; -
In the
<linking>element, add the relevant links according to the kinds of links you want to make available. An example is provided below;
-
-
Save the configuration.
-
  <namespaces>
    (...)
    <namespace prefix="oslc_am" url="http://open-services.net/ns/am#"/>
  </namespaces>
  <domains>
    (...)
    <!-- OCP -->
    <domain prefix="oslc_am">
      <resourceType label="Architecture Resource" uri="oslc_am:Resource"/>
    </domain>
  </domains>
  <linking>
    (...)
    <!-- OCP -->
    <link name="oslc_rm:elaboratedBy" reverse="oslc_rm:elaborates">
      <from type="oslc_rm:Requirement"/>
      <to type="oslc_am:Resource"/>
    </link>
    <link name="oslc_rm:satisfiedBy" reverse="oslc_rm:satisfies">
      <from type="oslc_rm:Requirement"/>
      <to type="oslc_am:Resource"/>
    </link>
    <link name="oslc_rm:specifiedBy" reverse="oslc_rm:specifies">
      <from type="oslc_rm:Requirement"/>
      <to type="oslc_am:Resource"/>
    </link>
  </linking>
2. Project Configuration
Each Polarion project should be associated to one or several Publication For Capella projects to be able to create OSLC links between each other.
-
Go to the configuration page of the Polarion Project;
-
Go to '<polarion_project> > Linked Data > Linked Data Associations';
-
This configuration is made at
http://<polarion.mycompany.com>/polarion/#/project/<polarion_project>/administration/linkeddata/serviceproviders;
-
-
Declare the Publication For Capella server as a friend:
-
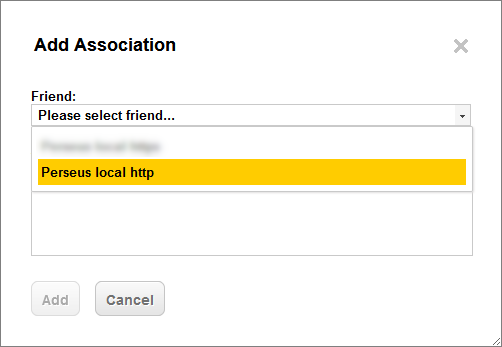
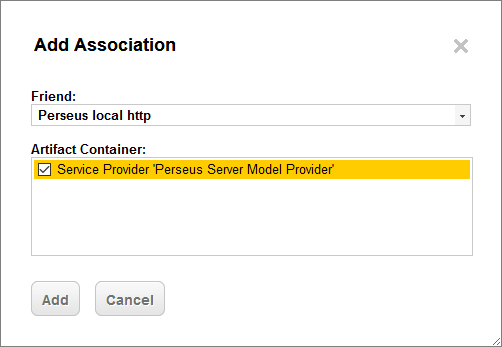
Click on 'Add Association';
-
In the dialog that opens, select the relevant Publication For Capella friend server (that has been configured in section Global Configuration):
-
-
-
A pop-up window opens
| check the web browser pop-up settings if the pop-up doesn’t show up. |
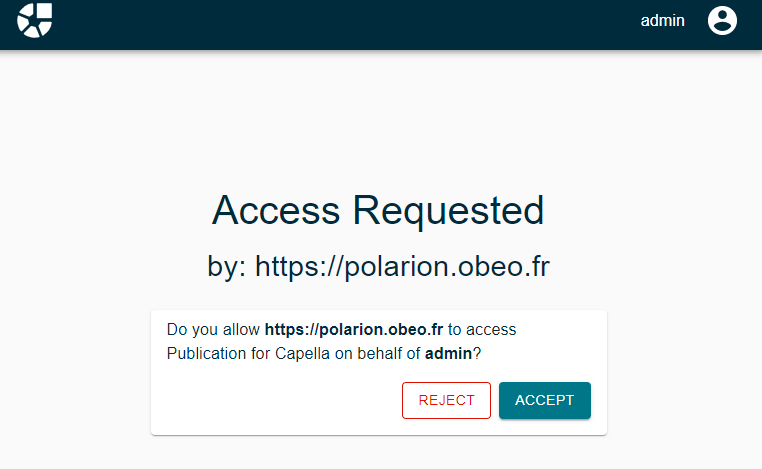
| Sometimes, Polarion’s authentication is rejected because the authentication token is too old. In such a case, you will get an error message indicating that the connection failed. Close the pop-up window and reopen it and Polarion should authenticate properly. |
-
Enter valid credentials to connect to Publication For Capella;
-
Select project(s) you want to link to then click on 'Add':
-
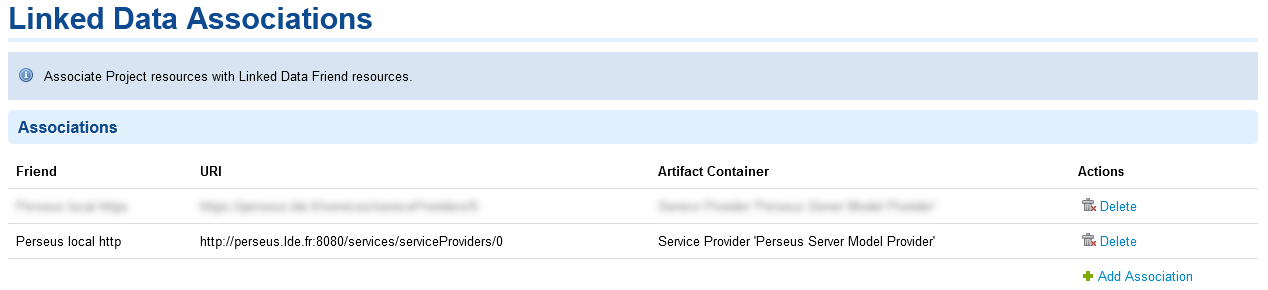
The association appears in the list of the Polarion project’s linked data associations;
-
Go to the Linked Data Mapping page of the Polarion Project;
-
This configuration is made at
http://<polarion.mycompany.com>/polarion/#/project/<polarion_project>/administration/linkeddata/mapping; -
In the
<link-role-mappings>section, add mappings for the roles you want to use to link polarion objects to Publication For Capella model elements; -
Save the configuration;
-
Example:
-
-
<link-role-mappings>
  (...)
  <link-role-mapping linkRole="elaborated_by" oslcLinkProperty="oslc_rm:elaboratedBy"/>
  <link-role-mapping linkRole="satisfied_by" oslcLinkProperty="oslc_rm:satisfiedBy"/>
  <link-role-mapping linkRole="specified_by" oslcLinkProperty="oslc_rm:specifiedBy"/>
</link-role-mappings>-
Go to the configuration management page of the Work item enumerations;
-
This configuration is made at
http://<polarion server>/polarion/#/project/drivepilot/administration/workitems/enumerations;
-
-
Edit the
workitem-link-role-enum.xmlby clicking on the 'Edit' link in the column 'Actions';-
Make sure there is a line for each role defined in the previous step, and that these roles are associated to the right type of Polarion element. If not then create them.
-
Example:
-
-

-
Click on 'Save' to save the configuration.
Configuration is over. It should now be possible to link Polarion work items to Publication For Capella model elements.
If you want to create links from Publication For Capella to Polarion, then you need to made same kind of configuration but into Publication For Capella.
Refer to the Publication For Capella user manual, chapter OAuth Consumers Management.
|