1. Project Page
The Project Page is accessible from the [project-list] once a user is logged in, by clicking on the name of a project in the list.
The Project Page is the entry point to browse the models it contains.
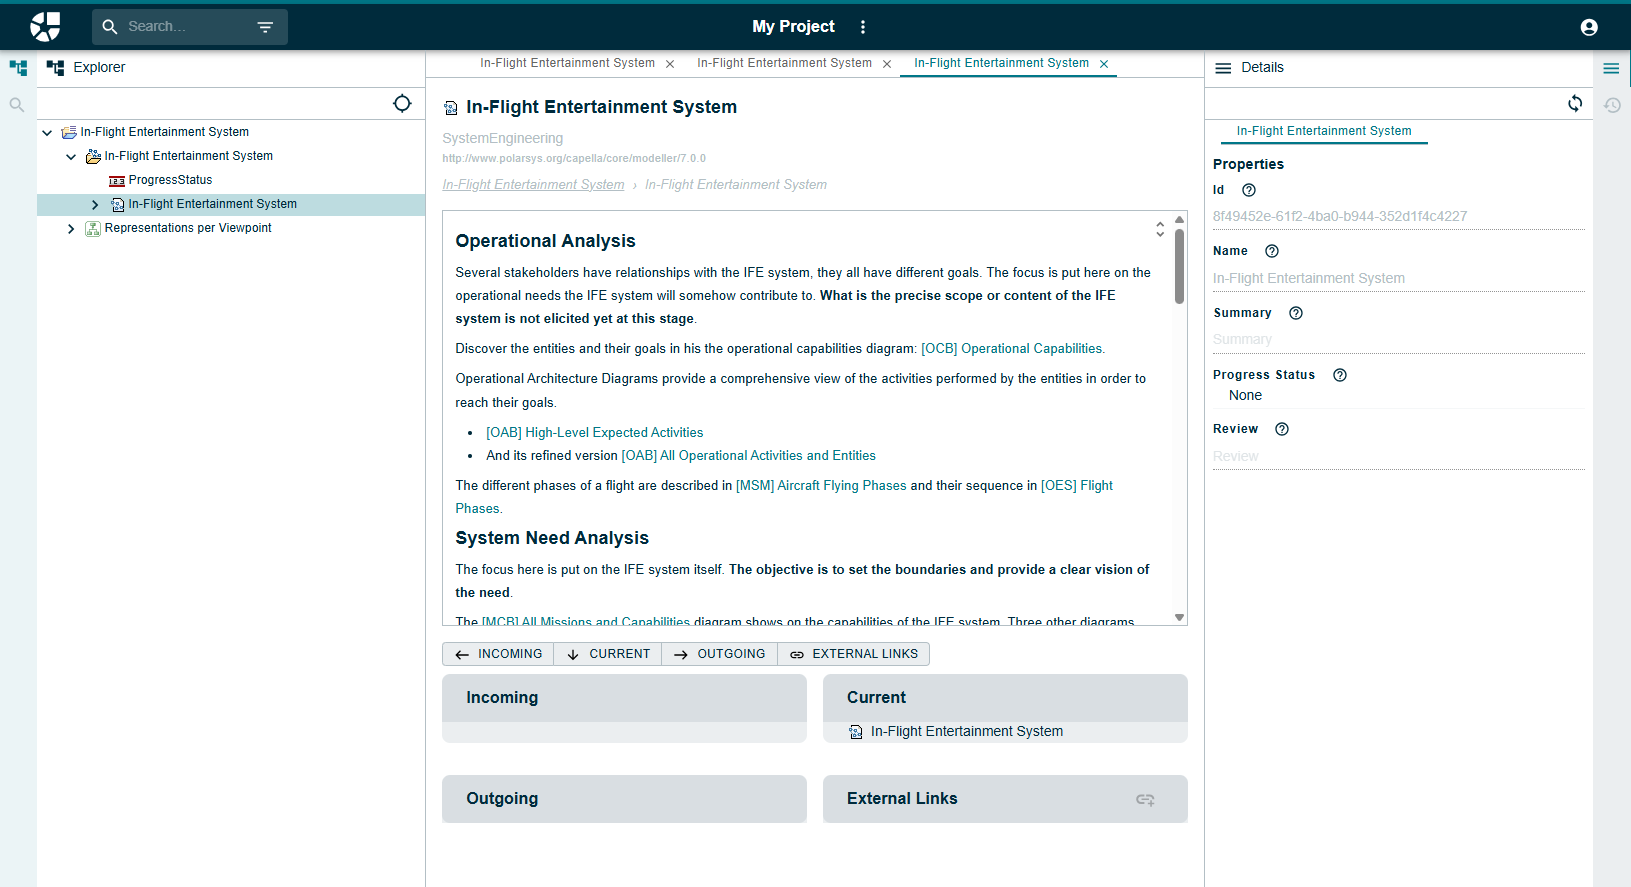
It is made of:
-
A header that contains:
-
The Obeo icon, which can be clicked on to navigate to the [welcome-page];
-
The project name;
-
A hamburger menu for this project, with the following entries:
-
Rename;
-
Share: an action to copy a shareable link to the project into the clipboard;
-
Settings - see [project-settings];
-
Delete.
-
-
(Optional) A customizable hoverable label (see [custom-info-ext])
-
The logged-in user name and menu.
-
-
A main panel, split in three columns:
-
The left column contains the explorer, that displays the models exposed by this project, and their structure;
-
The middle panel displays information on the selected element;
-
The right panel displays the details (properties) of the selected element.
-
1.1. Model Explorer
The model explorer, in the left panel, can be used to navigate inside the structure of the model(s) available in the current project.
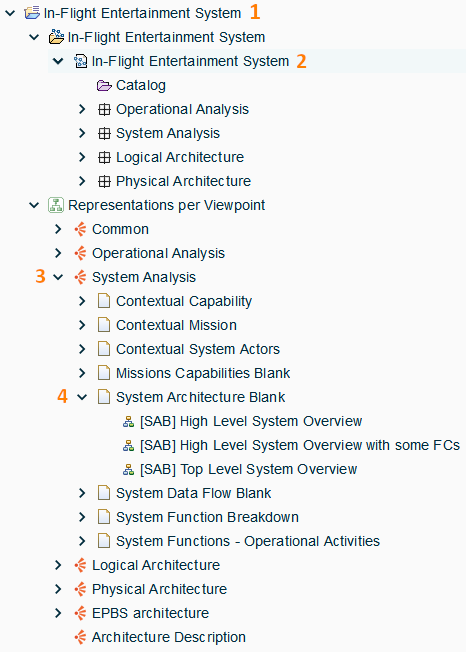
The top-level elements in the explorer correspond to the models themselves (1).
Inside of it the user can find the actual model elements (2), which correspond to the content of the .capella model, and all the exported diagrams (3) organized by category (4).
Clicking on any element in the explorer will select it and display its corresponding information in the main panel, and details in the right panel. The information displayed in the main panel depends on the type of element selected. See Main Panel - Model Navigation for more details.
When navigating in the model elements, the explorer selections stays the same. To select the currently viewed element in the explorer, click on the target icon on top of the explorer.

| When an element is selected, the browser’s URL can be bookmarked to reopen this specific object. This URL can also be provided to other users so that they can access the details of this particular page, provided they have the appropriate permissions. |
1.2. Search
Model Objects within a project can be searched in two ways:
-
From the Quick Search, available in the project header;
-
From the Filtered Search View, available in a dedicated panel of the project workbench.
1.2.1. Quick Search
The quick Search feature makes it possible to search for a given String in Model Object names, in a case insensitive way, within the current project. It also looks for OSLC links whose target title or URL matches.
This pattern is searched 'as is', there is no support yet for wildcard characters such as '*' or '_'.
Any value containing the exact search terms will match.
|

The search is launched each time a character is typed in its field and only displays the first 10 results.
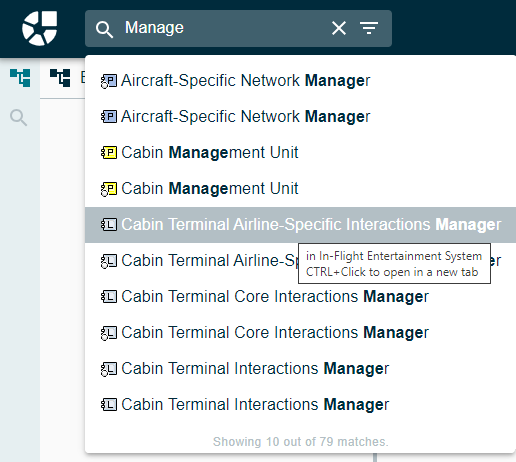
Clicking on a result will set the current selection to the object.
The object page can be opened in a new tab using Ctrl+Click.
Results can also be browsed using the keyboard up/down arrows and selected with Enter.
Ctrl+Enter will open the object page in a new tab.
1.2.2. Filtered Search View
If more results are needed or there is a need to use more criteria for the search than the name only, the filtered search view provides a more complete search feature. It can be accessed directly from the search bar by clicking on this icon:

Or it can be opened/closed the same way the explorer is by clicking on this icon:

The filtered search view can be used through the following form:
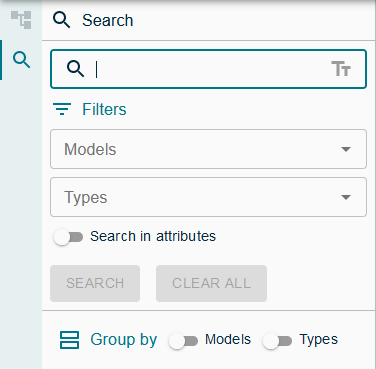
The form accepts the following search parameters:
-
A text field which accepts a pattern to find in model objects names or attributes. This pattern is also looked for in the title, URL, or identifier of OSLC link artifacts. It makes it easy to find model elements linked to a particular artifact when the artifact’s title or ID is known.
This pattern is searched 'as is', there is no support yet for wildcard characters such as '*' or '_'.
Any value containing the exact search terms will match.
|
-
A model filter, which limits the search to the specified models. If left blank, all models in the projects are considered by the search.
-
A type filter, which limits the search to the specified types. If left blank, any type will be considered by the search.
-
A 'search in attributes' switch, which activates the search in all model objects attribute values, instead of only in their names. If activated, the search will also look in OSLC identifiers. This option can have a significant impact on the duration of the search.
Unlike the Quick Search, a filtered search is launched when the 'Search' button is clicked or when 'Enter' is pressed. This button will be enabled only if either a pattern or a type is set.
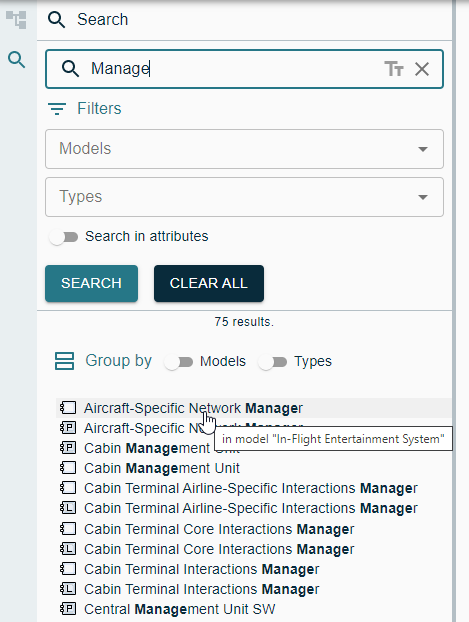
Each model object in the result list can be clicked, which will open the model object page as a new tab within the current page.
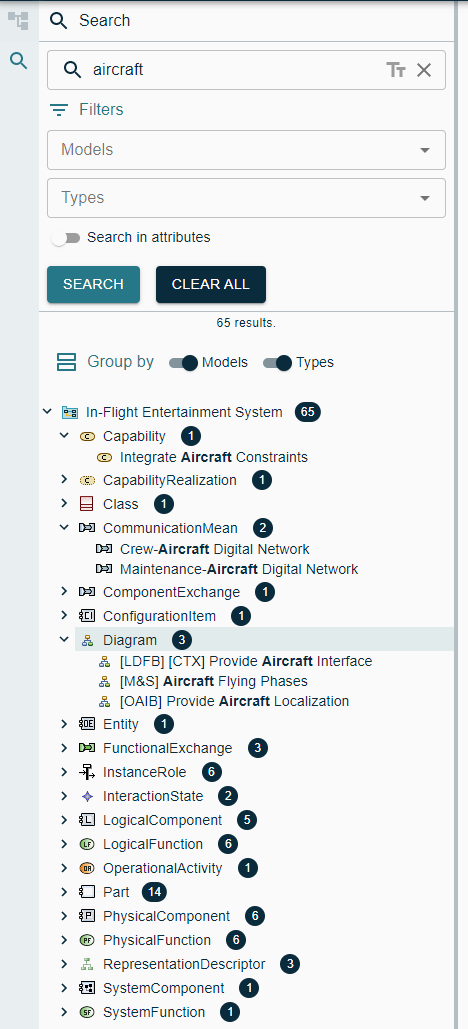
To ease the reading of the result of a search, it is possible to group the results by model and/or by type. It will turn the list of results into a tree grouping the results by their respective model and/or type (depending on the selected grouping options). A badge above the group name shows how many results are under the group.
To help with the selection of the right element among the search results, it is possible to hover any result to display its Preview.
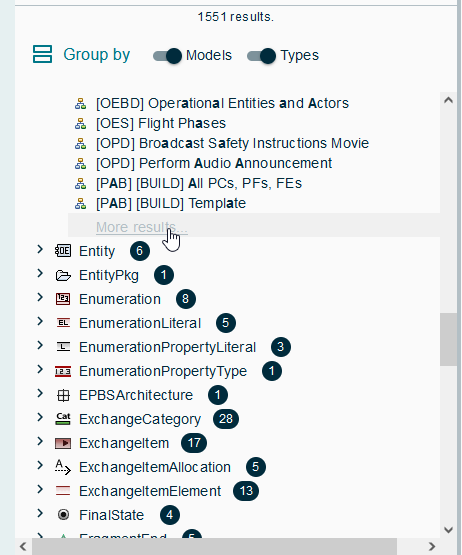
The results shown in the view are paginated, which means only the first 30 results of each group are shown. To see more results, a 'More results' link appears at the bottom of a list of results (if there are more to show).
The 'Clear all' button will reset the form to its initial state. All search parameters will be left blank and options reset to their default (no result grouping, no search in attributes).
1.3. Main Panel - Model Navigation
The main panel displays useful information about a particular object, which can be a 'Model' or a 'Model Object', including a special kind of of model object that is a 'Diagram'.
1.3.1. Models
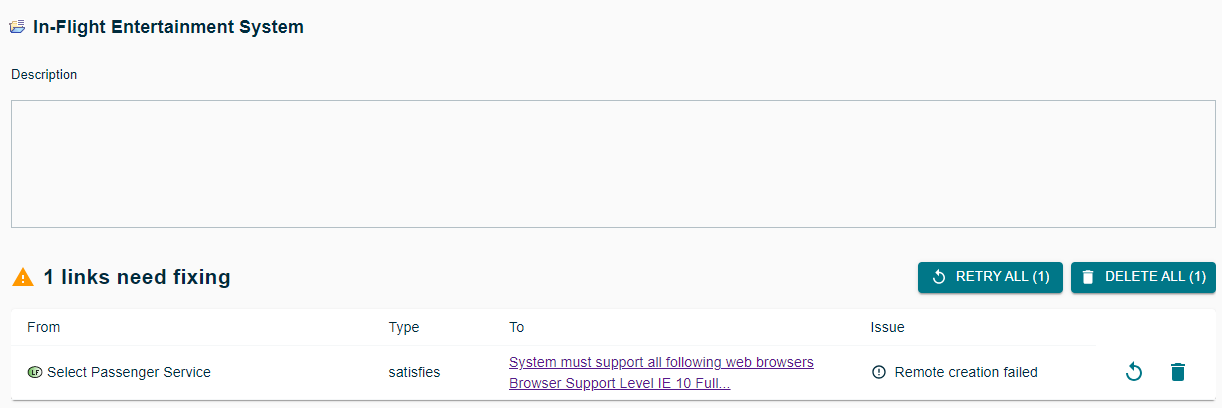
For Models, the main panel displays:
-
The model Name;
-
Description;
-
An optional section to fix invalid OSLC links (for more details, see [fix-invalid-links]).
1.3.2. Model Objects
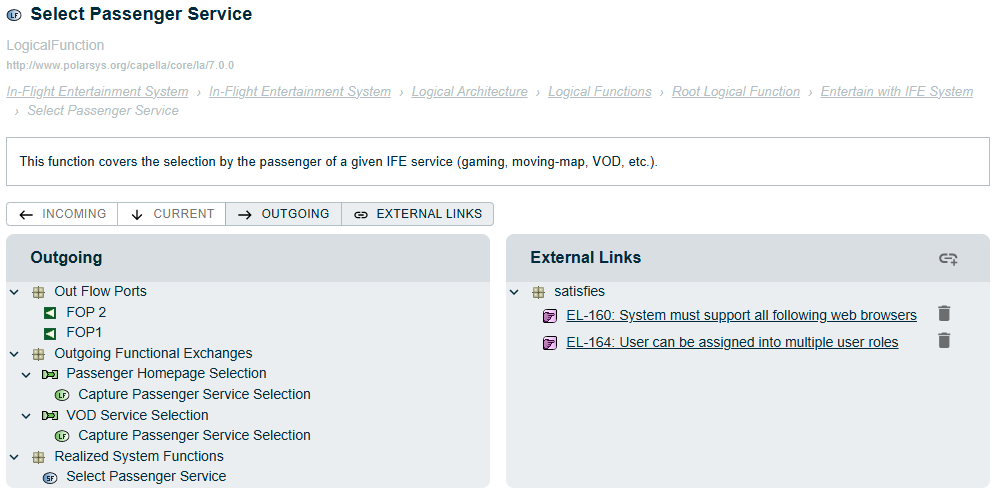
The model object pages display:
-
The object’s icon and label;
-
The object type name (its meta-class name);
-
The namespace of the object’s meta-class (useful to configure OSLC Linkings);
-
The 'Bread Crumbs', which displays the list of parents of the object in the model hierarchy;
-
The parent objects in the 'Bread Crumbs' can be navigated by clicking on them.
-
-
The object’s rich text description;
-
The description may contain links to other model elements or diagrams, which can be used to navigate within the model. It is possible to hover any link that refers to a model element or diagram to display its Preview.
-
Since version
2026.5.0, the rich text description can also display embedded images, which can increase the value of the description.
-
-
The semantic browser. See next section for more information about the semantic browser.
| The layout of the original rich text description created in Capella will not always be totally similar. The reason is that the injected HTML is sanitized to prevent any risk of malicious HTML injection. This sanitization step can result in a (hopefully minor) loss of formatting. As a rule of thumb, it is a good idea to avoid fancy layouts in the rich text descriptions and to focus on their contents and illustrations. |
1.3.3. Semantic Browser
The semantic browser is organized as follows:
-
3 optional panels display the Capella semantic browser, as it is in Capella.
-
These panels are only present if the model is a Capella model, and has been published with the 'semantic browser' option.
-
-
One panel 'OSLC links' that displays the links to third-party repositories, if any.
-
This panel makes it possible to view and edit links between the current object and artifacts exposed by Friend OSLC repositories.
-
The types of the links that can be created depends on the OSLC Linking Settings.
-
The semantic browser has a 'title bar' made of buttons, one button per available panel. This title bar acts a a filter to display or hide panels at will. Each Panel can be hidden or displayed by clicking on its name in this title bar.
The selected panels will be remembered between pages for each user, using the navigator local storage.
| If access to the browser’s local storage is forbidden, then the selected panels will be reset each time the user navigates. |
1.3.4. External Links
External Links are displayed in a specific panel within the semantic browser. When a model object page is loaded, the semantic browser is automatically displayed. The External Links Panel can appear with limited information.
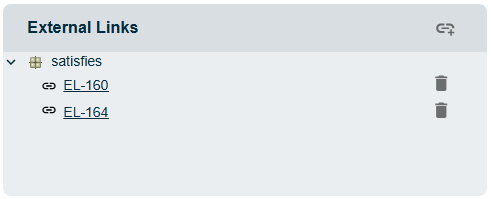
Then, the External Links Panel will be refreshed automatically when they receive up-to-date information from the friend server(s). That information includes:
-
The icon of the remote artifact
-
The label of the links
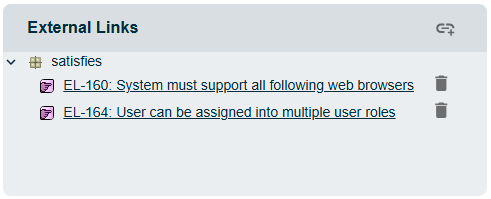
The External links can be clicked to navigate to this object on the remote repository.
The External Links Panel displays:
-
A button to refresh the panel;
-
A button to create a new link in this panel;
-
A tree of existing links, grouped by type. For each link, the panel displays:
-
An icon;
-
A label (as a navigable URL, that opens in a different page);
-
A delete button, to delete that link.
-
| Once they are created, links are displayed in the External Links Panel to every user who can read the contents of the project that contains the model. There is no check that the current user has any kind of access or authorization to the third-party server. This can lead to revealing the existence of artifacts to users who are not authorized to see these artifacts on their remote repositories. |
1.3.5. Add an OSLC Link
-
Pre-Requisites
-
The user must have the right to edit the project.
-
The user must have an account on the targeted remote repository, and whatever rights are needed on that repository to create links.
-
An OSLC Association (see [oslc-assoc]) must have been configured on the project that contains the current model.
-
-
Modus Operandi
-
Click on the 'add link' button
 in the OSLC Links Panel header.
That will open the OSLC Link Creation Dialog.
in the OSLC Links Panel header.
That will open the OSLC Link Creation Dialog. -
Select the link type in the left drop-down menu:
-

-
Then select the OSLC Action Dialog to use for the selection or creation of the remote artifact. The contents of this drop-down is dynamically loaded from the Friend server:
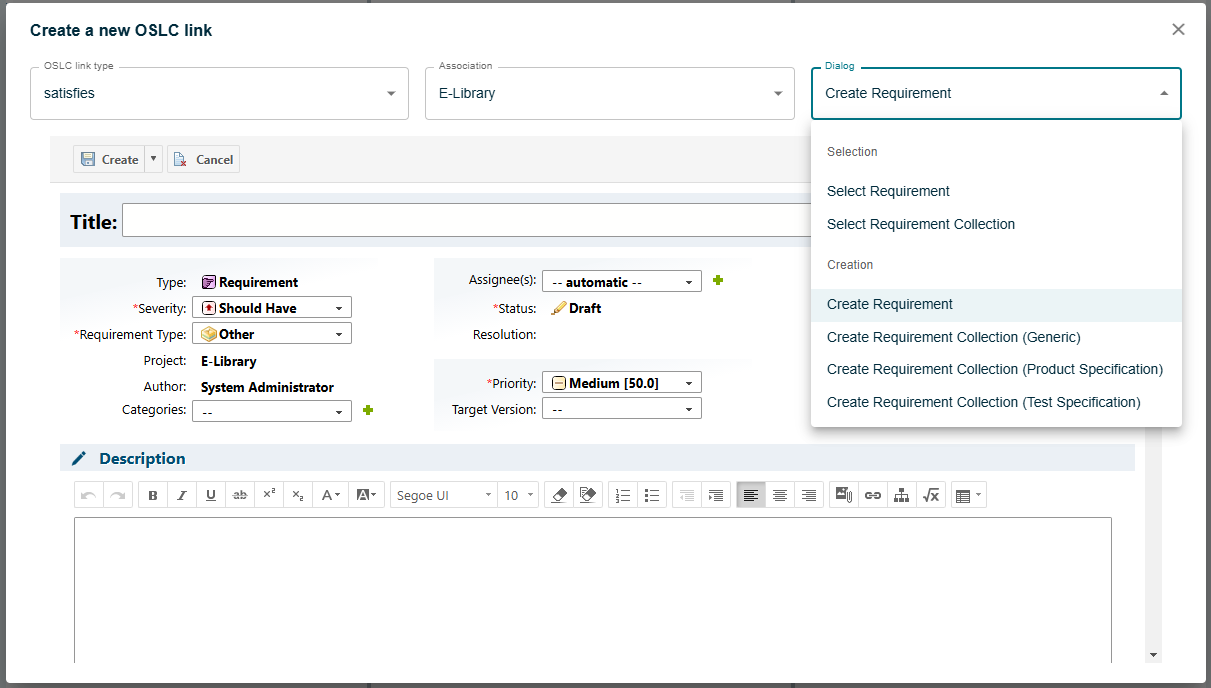
-
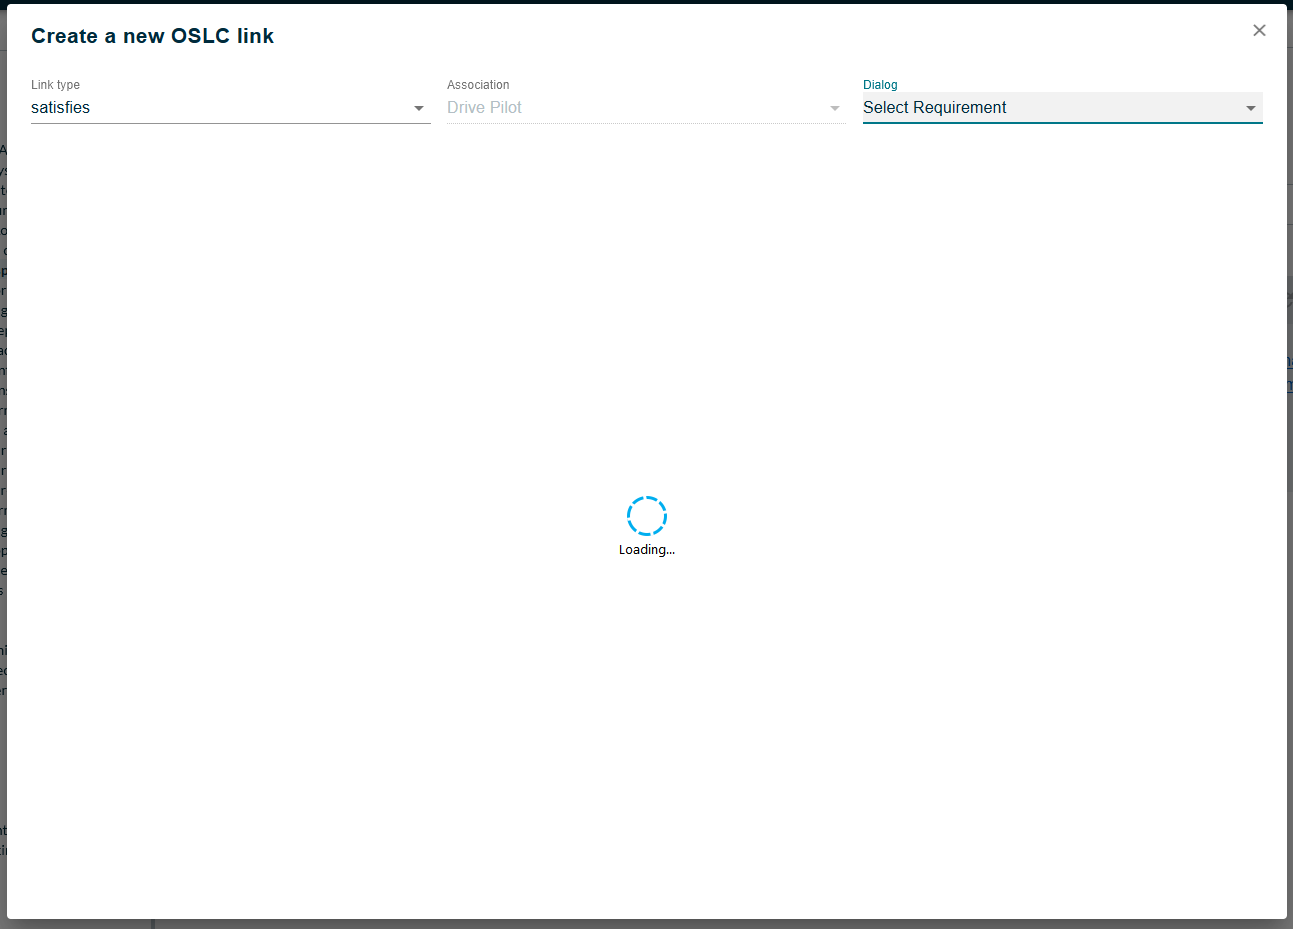
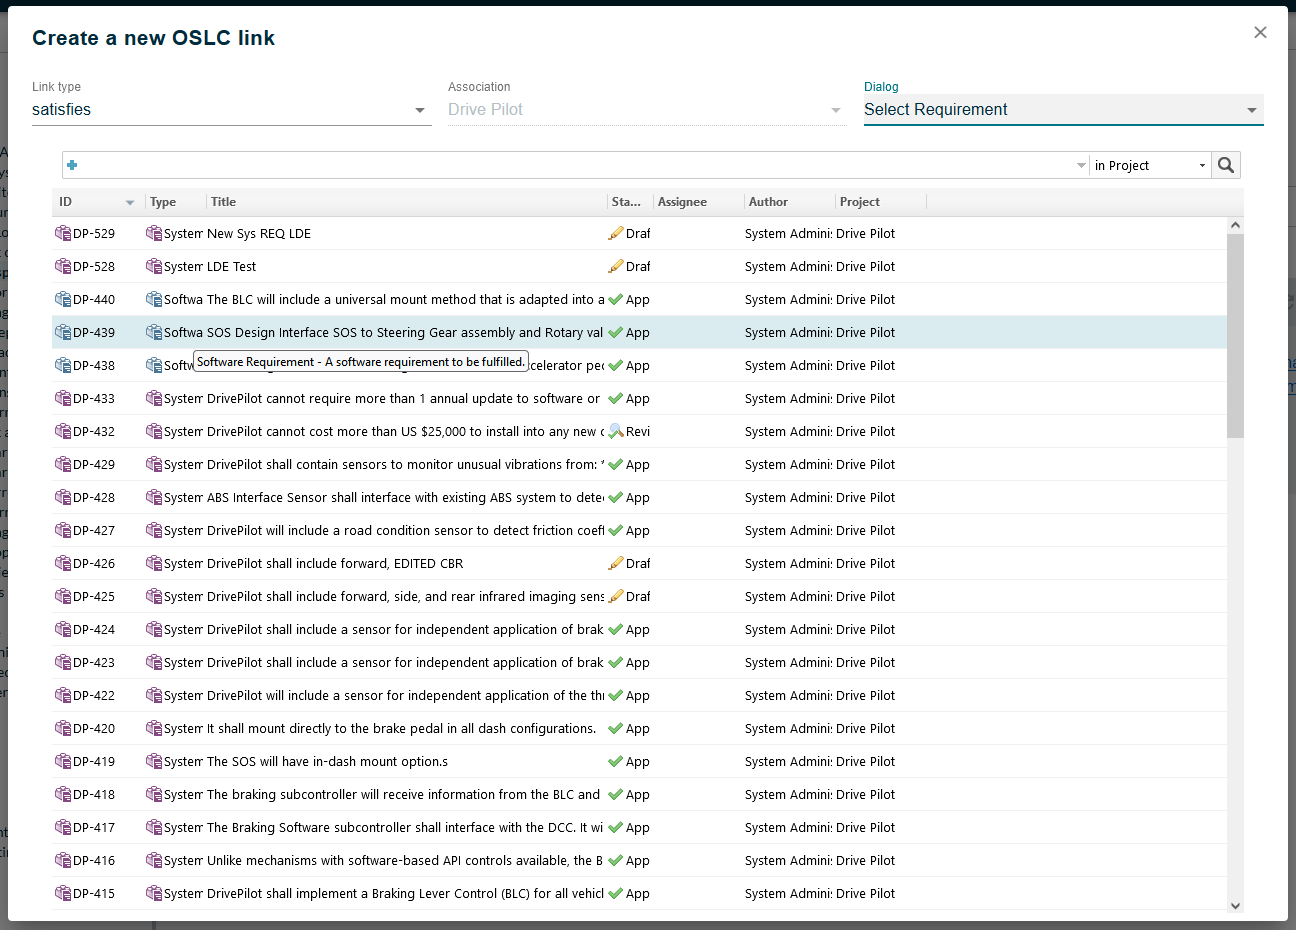
The relevant delegated UI will then be displayed within the OSLC Link Creation Dialog. Here is an example using Polarion:
-
Use the delegated UI to select or create the target of the link on the remote Friend server:
-
The OSLC Link Creation Dialog remains open in case the user wants to create several links in a row. To close it, click outside of it anywhere in the page.
-
The OSLC Links Panel is automatically updated with the new link or links.
| During this process, it is possible that the Friend server demands a confirmation to the Publication For Capella user that they agree on Publication For Capella accessing their data on their behalf on the friend server. Refer to the OAuth section of this documentation for more details. |
| Any creation of link done in Publication For Capella server will be effective in the corresponding Capella model after the "Update from server" action described in the [update-from-server] chapter. |
1.3.6. Delete an OSLC Link
-
Pre-Requisites
-
The user must have the right to edit the project.
-
The user must have an account on the targeted remote repository, and whatever rights are needed on that repository to create links.
-
An OSLC Association (see [oslc-assoc]) must have been configured on the project that contains the current model.
-
-
Modus Operandi
-
Click on the 'delete' button
 of the OSLC link to delete.
That will trigger the deletion of the link.
A progress indicator appears on the panel until the deletion is done.
of the OSLC link to delete.
That will trigger the deletion of the link.
A progress indicator appears on the panel until the deletion is done.
-
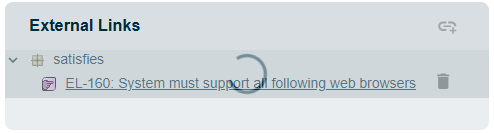
-
On success, the OSLC Links Panel is automatically updated and the deleted link disappears.
-
It may happen that the delete is partial, which means that the deletion of the corresponding backlink on the remote server failed. In such a case, the link will appear in the 'Invalid link' widget of the containing model which offers solutions to resolve the problem, as described in the [fix-invalid-links] section.
| During this process, it is possible that the Friend server demands a confirmation to the Publication For Capella user that they agree on Publication For Capella accessing their data on their behalf on the friend server. Refer to the OAuth section of this documentation for more details. |
| Any deletion of link done in Publication For Capella server will be effective in the corresponding Capella model after the "Update from server" action described in the [update-from-server] chapter. |
1.3.7. Diagrams
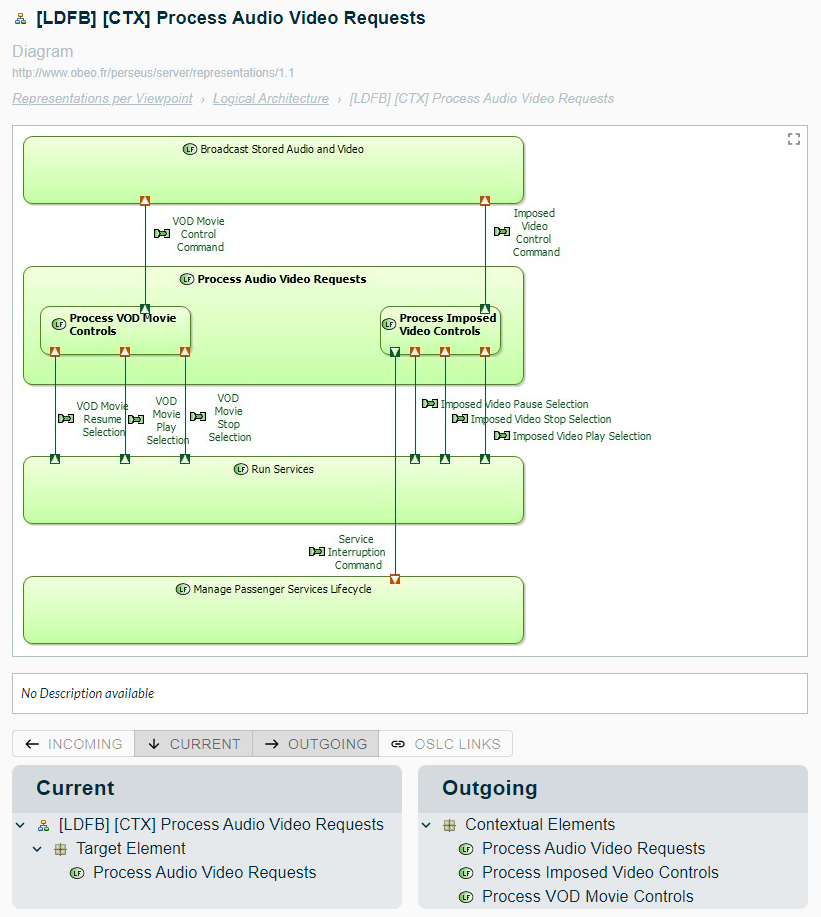
The information displayed for diagrams is mostly identical as for any other model element.
The only difference is that the diagram’s image is displayed between the 'Bread Crumbs' and the description.
This image can be used to navigate in the model by clicking on the objects displayed in the diagram, except the object links.
It is possible to hover any object to display its Preview.
In some cases, a shape in a diagram represents several model elements. In such a case, a small pop-up menu is displayed and the user can choose to which element he or she wants to navigate.
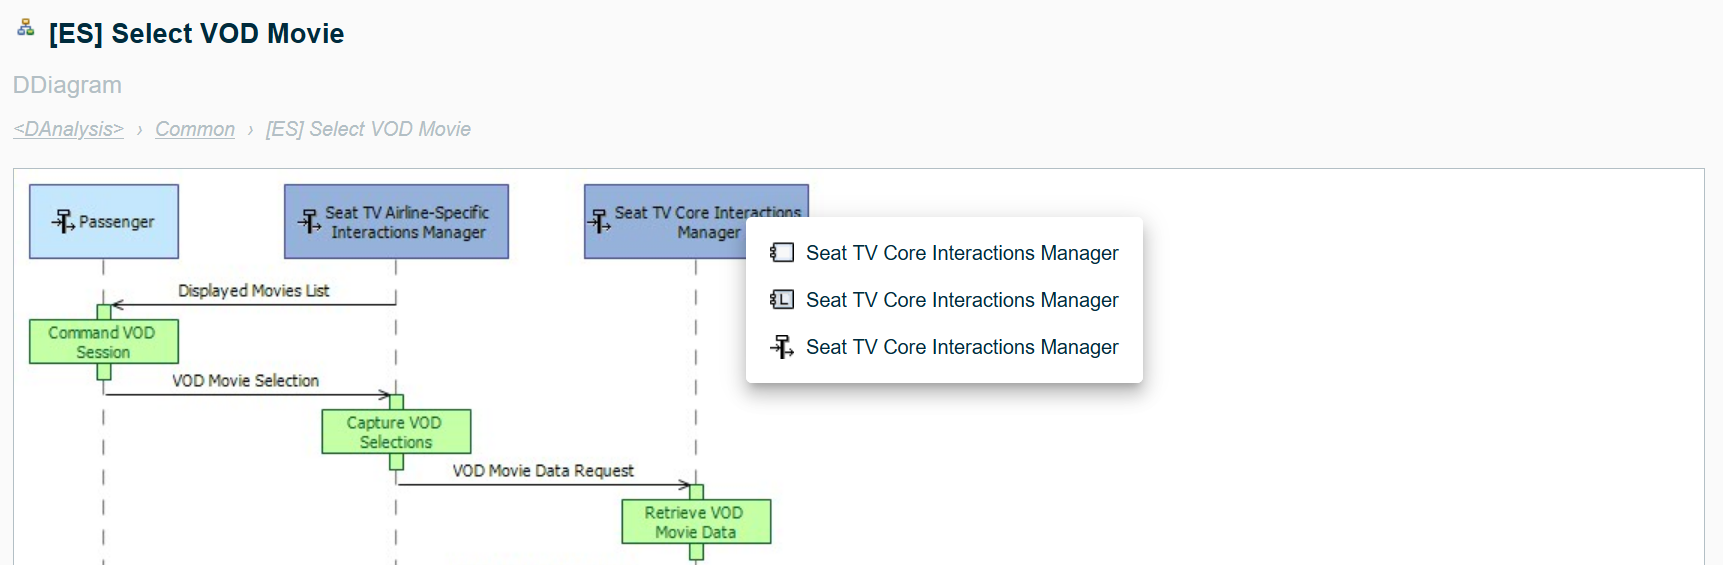
The button in the top right of the diagram image is used to open the diagram in full size, using all the space available in the browser’s window.
| Known limitation: Object links in the diagrams cannot be navigated by clicking on them. |
Diagrams are actually standard model objects, with a type of DDiagram, mainly to match the diagram concept of Sirius, which are stored in *.aird files.
However, diagrams in Publication For Capella just own an image of the corresponding Capella diagram, they do not contain all the information of the DDiagrams contained in the *.aird files.
|
1.4. Details Panel
The details display the selected object’s attributes, as defined by its meta-class.
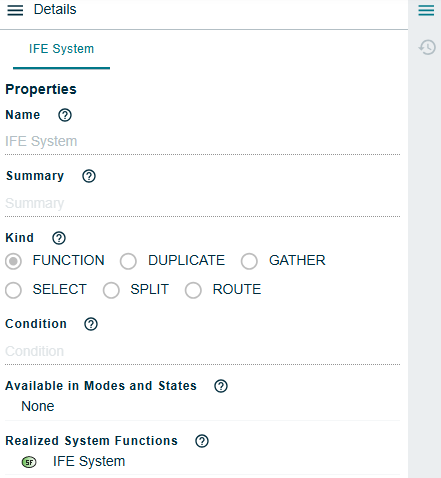
The value of the properties cannot be edited. If the user attempts to edit them, an error message will be displayed.
| This view is somehow similar to the properties view in Capella. However, it is much more simplistic and not configurable (yet). Consequently, the details are displayed in a similar manner for all objects. |
1.5. History Panel
There is exactly one history per project, which contains:
-
a list of commits numbered by version, which refer to the changes made on any model of the project (usually a single model).
-
a list of baselines, each baseline referring to a commit of the history.
The history panel displays a list of the changes related to the current selection. Changes are displayed in a compact way but leaving the mouse over them displays a pop-up with detailed information.
1.5.1. Model History Panel
When the selected object is a Model, then the history panels displays the complete history of this model, including any change to any element it contains.
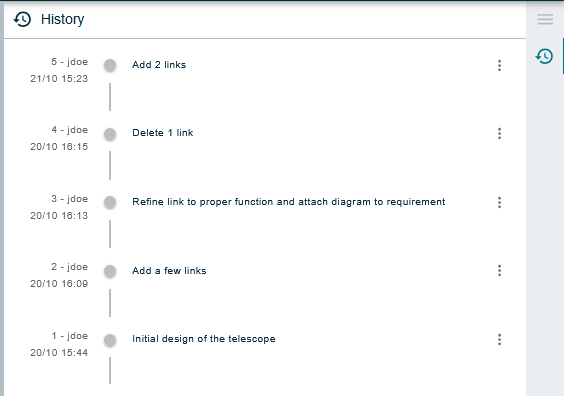
Hovering any commit in the model history view will display a tooltip that provides some details about the commit in question:

Several actions are available in the history panel when a model is selected, via the contextual menu:
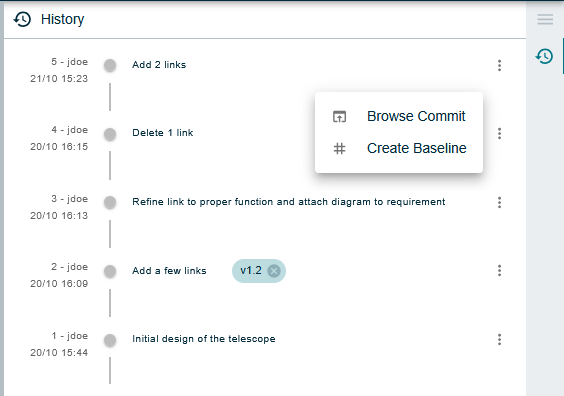
-
Create a baseline (if the logged-in user is at least a contributor to the project).
-
Delete a baseline (if the logged-in user is administrator of the project).
-
Browse the model on any baseline or even commit.
-
To browse the model on an existing baseline, just click on the baseline tag in the history view.
-
To browse the model on any commit, just select the action 'Browse Commit' on the desired commit.
-
To delete an existing baseline, click on the cross icon on the baseline chip.
A confirmation dialog is displayed:
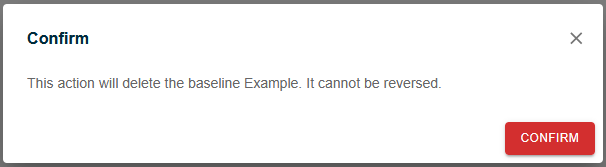
Click on 'Confirm' to delete the baseline.
| Creating a baseline requires being logged in as a contributor to the parent project. Deleting a baseline requires being logged in as an administrator of the parent project. |
| For the moment, baselines cannot be renamed. |
1.5.2. Model Object History Panel
When a model object is selected, only the changes impacting this object are listed in the history panel.
Hovering any commit in the model object history displays a preview of the selected object, as it was in this commit. If the selected object is a diagram, the preview displays the diagram, as it was in the hovered commit.
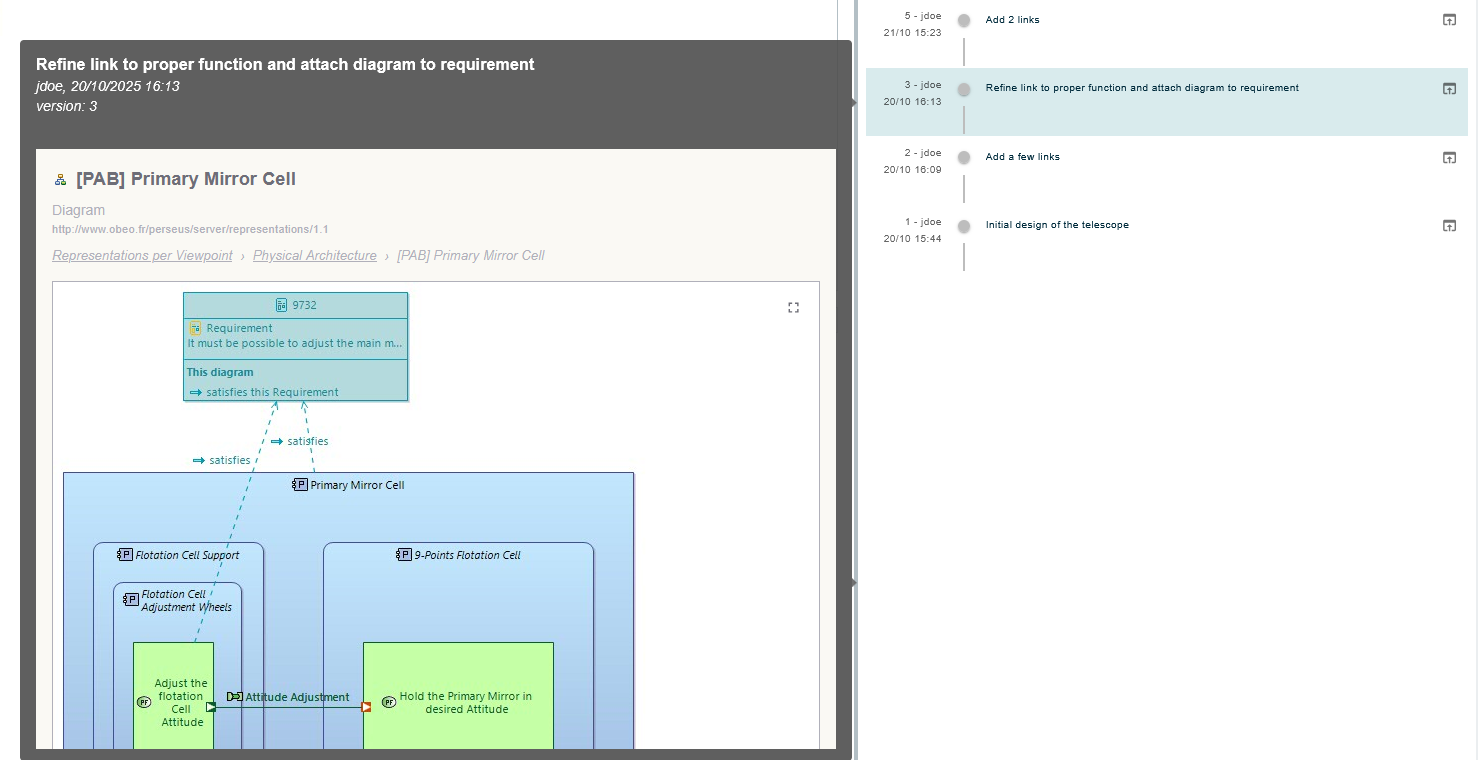
Several actions are available in the history panel when a model object is selected, via the contextual menu:
-
Delete an existing Baseline (if the logged-in user is administrator of the project).
-
Browse the model on any visible Baseline or commit. Activating the browsing will land on the currently selected object’s page, in the context of the desired Baseline or commit.
| Creating a baseline can only be done from the Model History Panel. |
1.6. Preview
Previews of model objects and remote artifacts linked through OSLC are available when hovering several elements:
-
Breadcrumbs items;
-
Search results;
-
Model elements in the semantic browser;
-
Invalid links table elements;
-
Model elements, artifacts, and some edge labels in the diagrams;
-
Links that refer to model elements or diagrams in the rich text descriptions;
-
History commits.
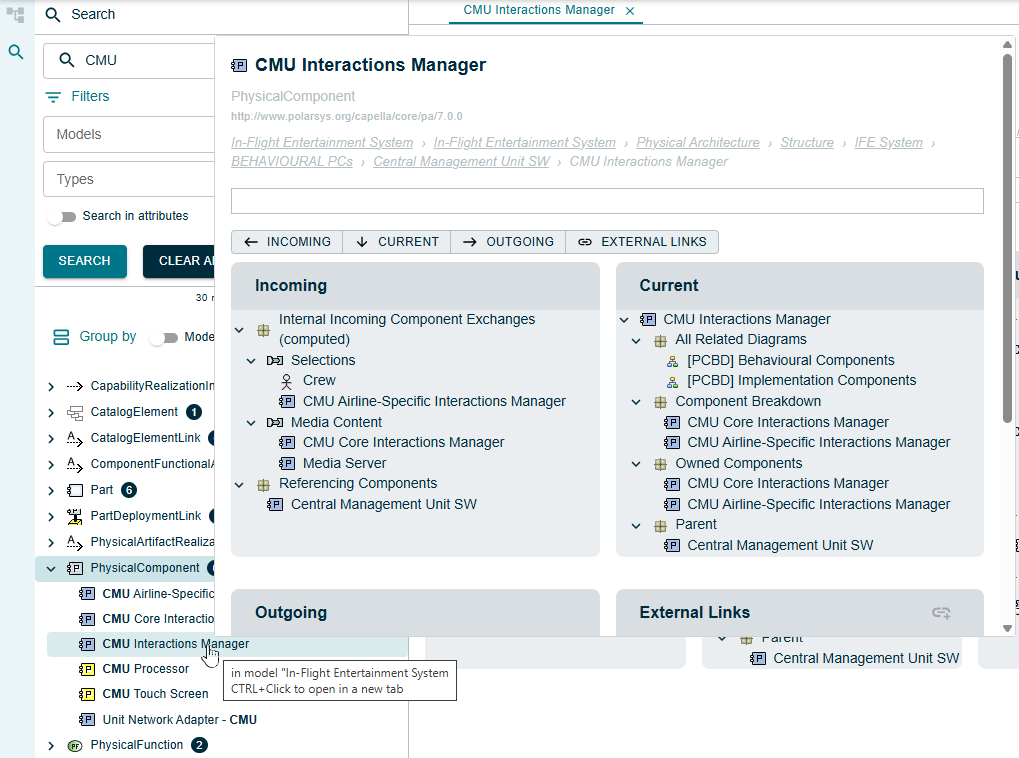
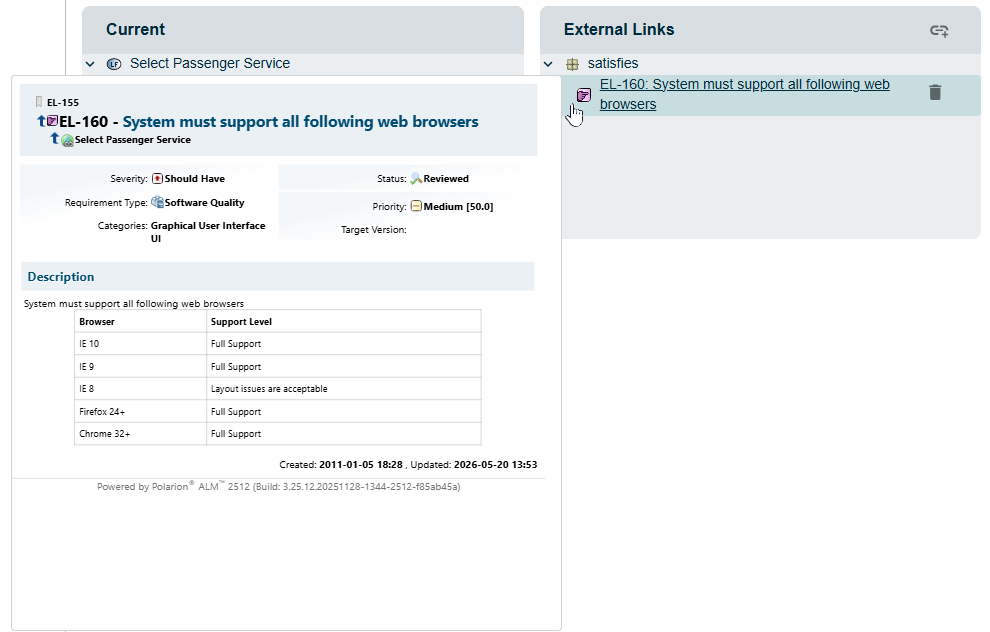
| Previews are currently unavailable in the model explorer. |