Jenkins scheduler for Team for Capella installation guide
The documentation of Team for Capella presents many applications (Backups, diagnostics…) that can be scheduled with Jenkins in order to have a centralized platform to manage your shared projects.
1. Download and install Jenkins
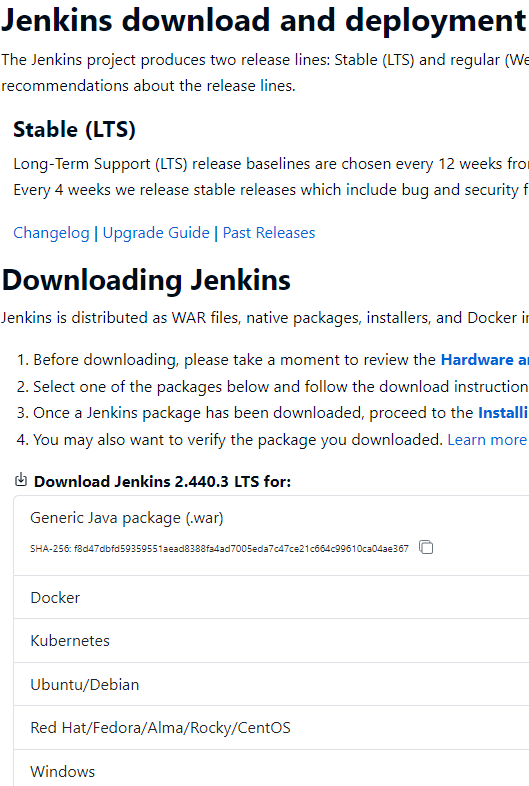
It is recommended to install a 2.440.3 LTS release. Team for Capella 7.0.0 has been tested with Jenkins 2.440.3 LTS release.
If you choose to deploy a more recent version, we strongly recommend to use a release from the LTS (Long Term Support) stable releases stream available at Jenkins.io.
|
The default Jenkins port is 8080. But it is recommended to set the port to 8036 (In the previous Team for Capella installation, the embedded Jenkins was deployed on port 8036). Otherwise, there will be a conflict with the REST admin server which default port is 8080. The port can be chosen in the Jenkins installation wizard. This following documentation will often reference the port 8036. |
1.1. Windows
The Jenkins 2.440.3 LTS Windows installer can be downloaded from this link.
If you choose to deploy a more recent version, we strongly recommend to use a release from the LTS (Long Term Support) stable releases stream available at Jenkins.io.
Once downloaded, proceed to the installation. It is recommended to install the Jenkins service (automatic loading on restart). Note that if you previously had an older version of Jenkins on this machine, with the same user account, even if you uninstall it properly you may have the installation process stopping with this message:
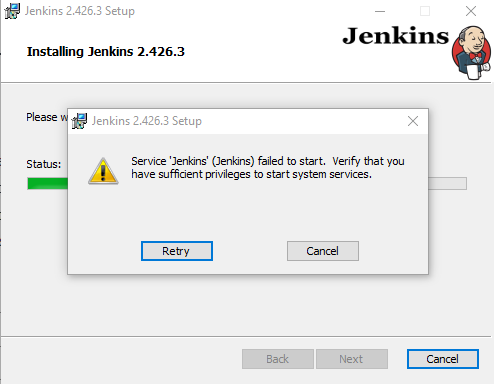
In that case, you need to open your service menu, find the existing Jenkins service. Go to its properties, tab "Log On" and set the password again.
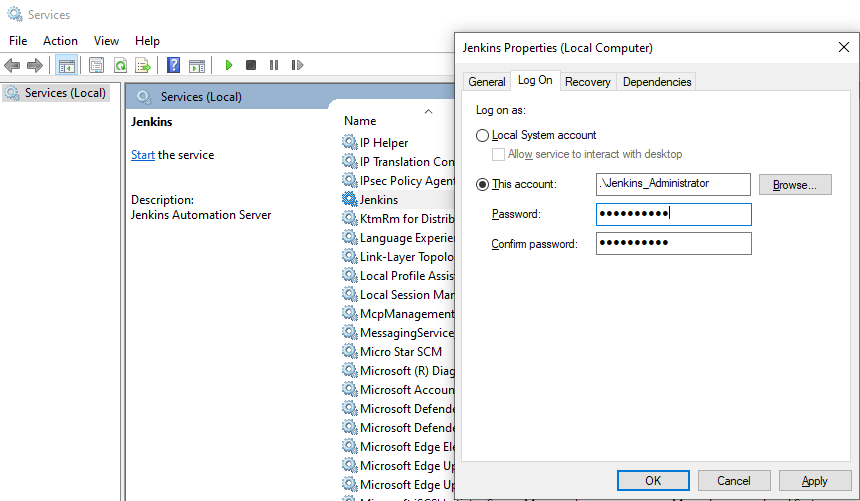
Once the installation is done, you can enter the address localhost:8036 to initialize the Jenkins application.
After an authentication page asking to find a generated password, there is a customization page suggesting some plugin installation.
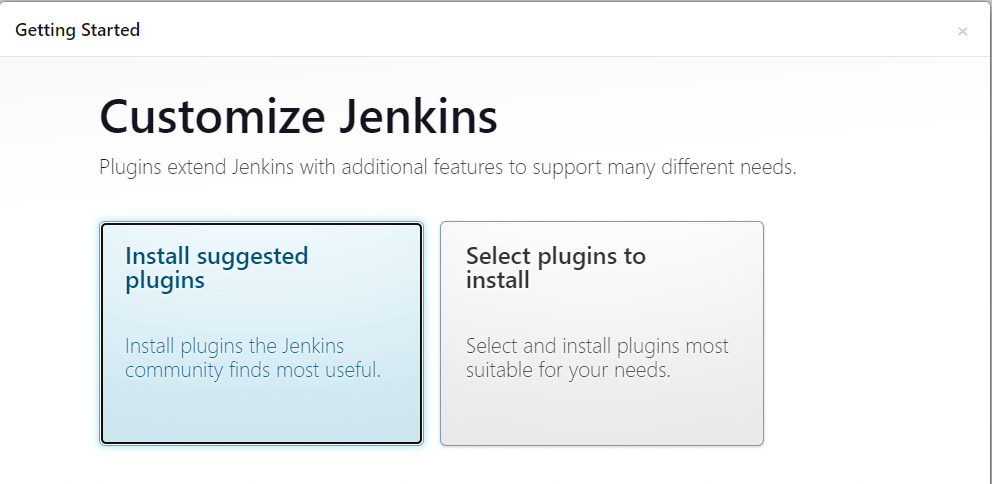
This step can be ignored. In the next step of this guide, you will execute a script that install all the Team for Capella jobs in Jenkins and the necessary plugins. You can press on the top-right cross, but that will end the initialization wizard, skipping a step where you can configure the admin password. We recommend to click on the "Select plugins to install" button. On the next page, select None and then the Install button.
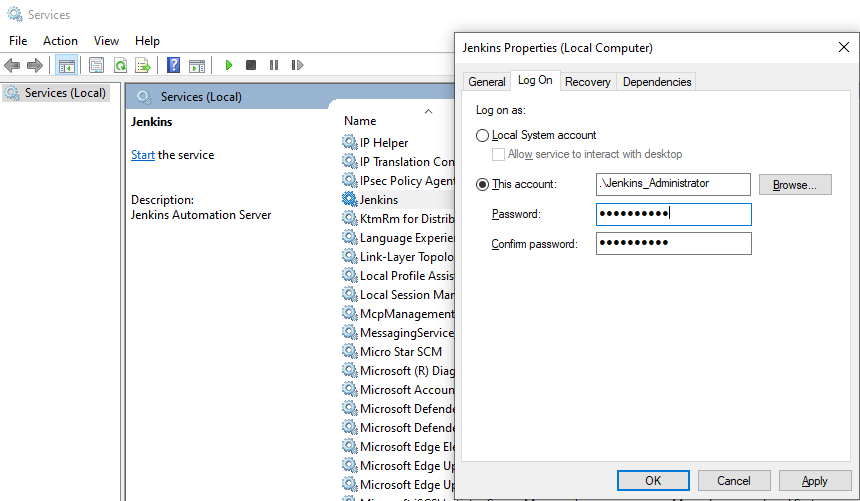
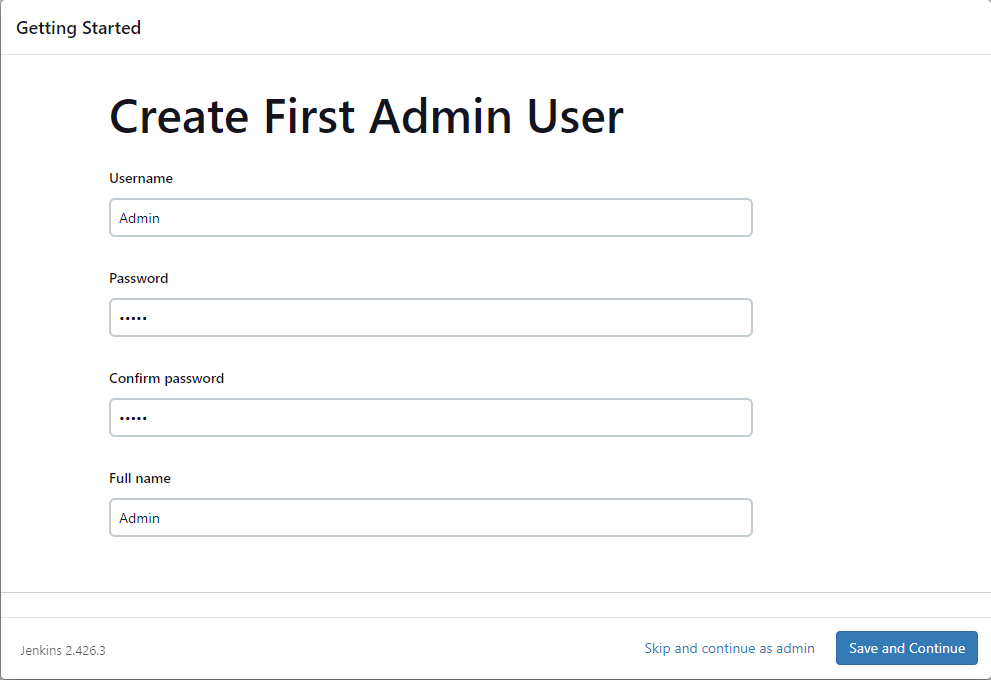
Finally, create your admin login/password. This will replace the generated password that was used at the begining of this wizard. Click on Save and Continue to complete this wizard.
Note: If the Jenkins installation on Windows 10/11 Home is blocked despite using an administrator account (See popup below), it can be a configuration issue preventing access to the Local Group Policy Editor (gpedit.msc).
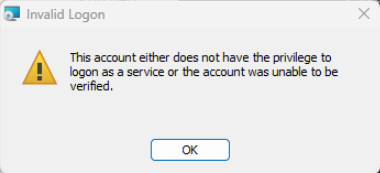
This editor can be activated with two commands using a command prompt as an administrator: * FOR %F IN ("%SystemRoot%\servicing\Packages\Microsoft-Windows-GroupPolicy-ClientTools-Package~.mum") DO (DISM /Online /NoRestart /Add-Package:"%F") * FOR %F IN ("%SystemRoot%\servicing\Packages\Microsoft-Windows-GroupPolicy-ClientExtensions-Package~.mum") DO (DISM /Online /NoRestart /Add-Package:"%F")
After this, restart the Jenkins installation.
1.2. Linux
The Jenkins 2.440.3 LTS packages for Linux can be downloaded from the LTS Releases package repository corresponding to the targeted distribution. See this link.
The scheduler has been tested on RedHat and Debian based distributions. The Jenkins installation instructions are available at Installing Jenkins: Linux
The Server and Importer applications require a display to be executed properly. An Xvnc server needs to be installed on the Linux server.
On Debian based distributions, you can install either tigerVNC or TightVNC:
sudo apt install tightvncserver
sudo apt install tigervnc-standalone-server
On RedHat based distributions:
dnf install tigervnc-server
In addition, make sure that the Xvnc jenkins plugin is installed on the Jenkins (it is installed by install-TeamForCapellaAppsOnJenkins.sh).
Note: Make sure that the jenkins user has read, write and execution permission on the TeamForCapella root folder.
1.3. End of the installation
At the end of the installation, your web browser should be displaying Jenkins.
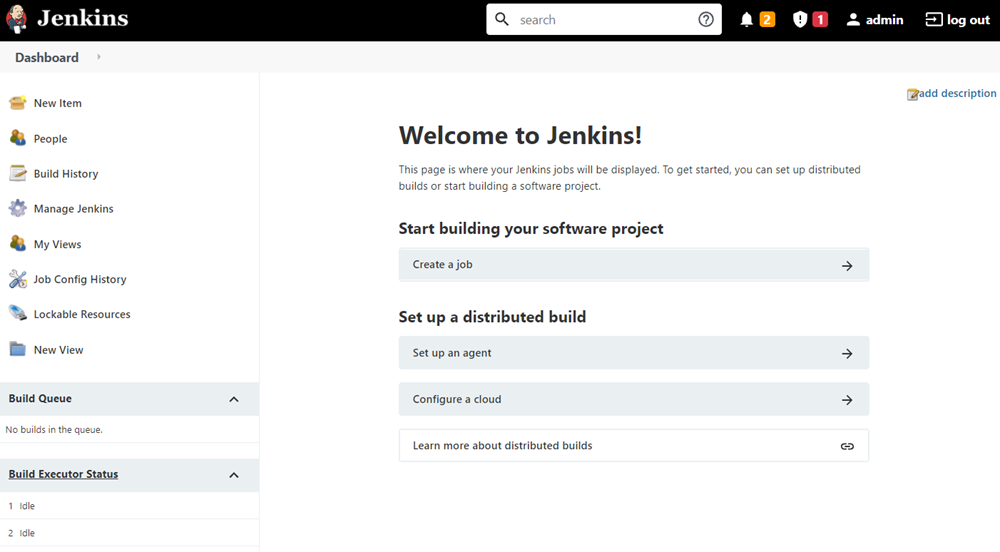
2. Install Jenkins plugins and jobs required for Team for Capella
2.1. Automatic installation
Once Jenkins is installed, you can run our installation script that will install all the jobs allowing the Jenkins scheduler to manage the different Team for Capella applications. This script also downloads all the Jenkins plugins required for the different jobs.
In your Team for Capella installation folder, go to the tools/resources/scheduler folder. In this folder, you will find the installation script: install-TeamForCapellaAppsOnJenkins.bat (or install-TeamForCapellaAppsOnJenkins.sh for Linux). It contains all the required commands to download and install the plugins, and install and configure the jobs.
It comes with install-TeamForCapellaAppsOnJenkins.properties, a properties files containing parameters to configure the script commands:
-
JENKINS_URL: The web address of your Jenkins
-
JENKINS_USER_ID: The login of a user able to connect to Jenkins
-
JENKINS_API_TOKEN: The password or API token of this user
-
INSTALL_T4C_SCHEDULER_JOBS_AND_VIEWS: A boolean allowing to skip or run the jobs and views installation steps.
-
INSTALL_T4C_SCHEDULER_REQUIRED_JENKINS_PLUGINS: A boolean allowing to skip or run the Jenkins plugins installation steps.
-
PLUGINS_LIST_FILE: the name of the text file containing the list of plugins. Four predefined files:
-
the first one with a list of plugins versioned urls (default, exact tested version for Team for Capella 7.0.0 and Jenkins LTS 2.440.3),
-
the second one with a list of plugin short names. Plugins will be installed from the update center,
-
the third and fourth lists correspond to the list of plugins which were listed in T4C 6.1 and previous versions.
-
-
JAVA_CALL: The path to the java executable to use for the installation. By default it points to the JRE embedded in Capella.
As documented in https://www.jenkins.io/doc/book/managing/cli/, you can get your API token from /me/configure page of your Jenkins. The script will automatically download the Jenkins CLI client and use it to install the plugins. Then it will create all the Team for Capella jobs and sort them into different views. Finally, once the script finished, you only need to restart Jenkins. The simplest way is to use the /restart page of your Jenkins. On Windows, if you have installed Jenkins, to restart it, you could also use your system Services window.

The dashboard will present all the Team for Capella applications.
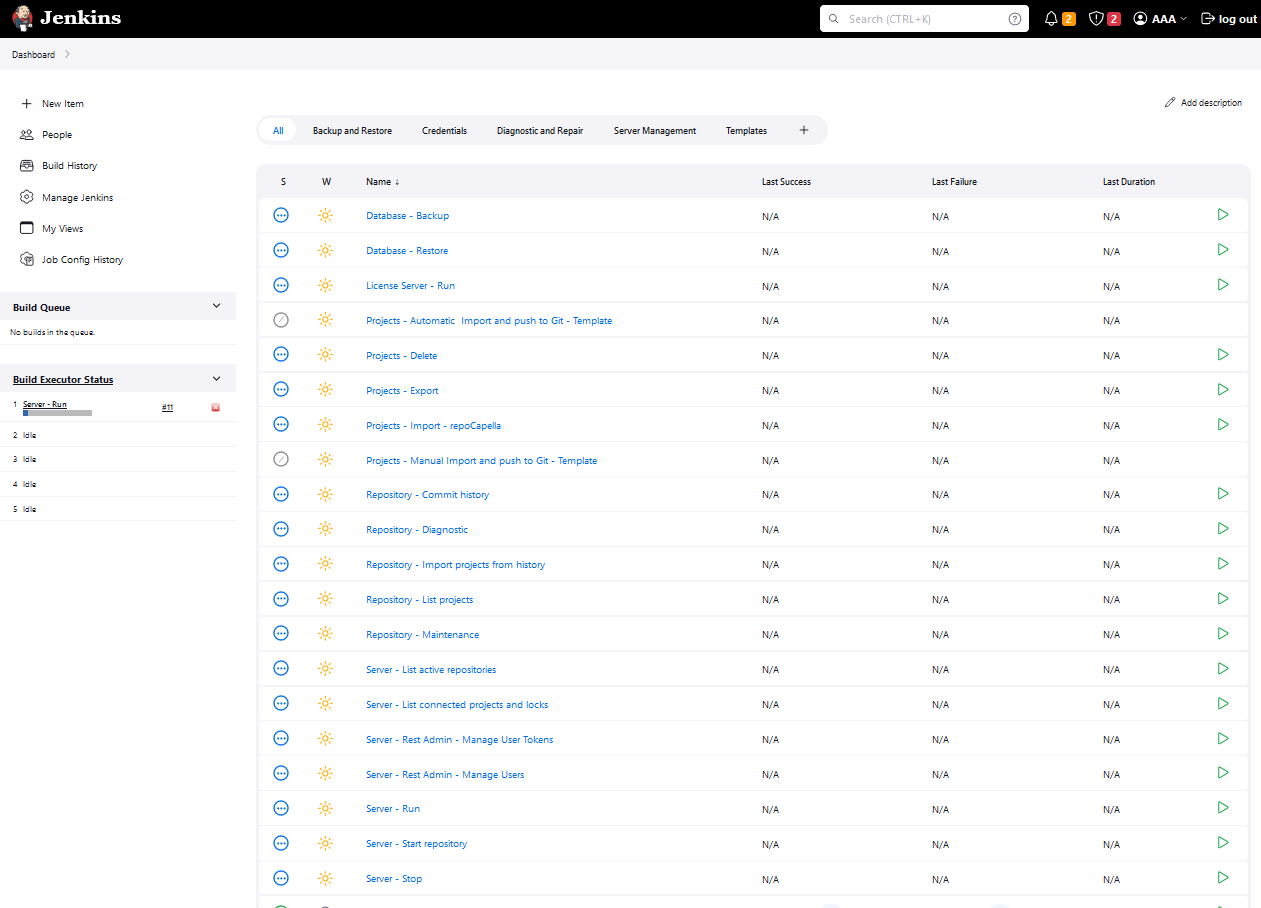
Note that the plugins versions were chosen at the time of the release of the Team for Capella version you are working on. Once the script executed, it is recommended to keep Jenkins up to date and also to check for new updates of the installed plugins. Go to Manage Jenkins > Plugins. On the Update tab, select all plugins and then click on the Update button.

|
These jobs executes Team for Capella applications, therefore Jenkins requires a global environment variable referencing the location of your team for Capella installation:
Note that the development team is working on improving the installation script to add this variable, but some Jenkins APIs have been removed for security reasons as it was seen as code injection. |
Additional configuration steps are recommended, see Executors, Locale, Default view and Display Job Description in miscellaneous settings section.
Restart Jenkins or its service after this configuration phase.
2.2. Manual installation
If you do not wish to install the Team for Capella applications with the script, you can still proceed manually. The first step is to install the required plugins. In your Team for Capella installation folder, go to the tools/resources/scheduler folder, you will find two files with names starting with RequiredPlugins.
They contains the same list of plugins, one lists them by name, the other one list them by URL to their .hpi. You need to install all of them. Go to Manage Jenkins > Manage Plugins to install them from the plugin manager. Then restart Jenkins.
Now that the required plugins have been installed, the Team for Capella jobs can be deployed as well:
-
Still in the tools folder of your Team for Capella installation, you can find a folder named jobs.
-
Copy this folder.
-
Then, we will need to paste it in the Jenkins configuration folder.
-
To locate this folder go to Manage Jenkins > Configure System.
-
The first information should be the Jenkins home directory (it should be the user home folder followed by AppData>Locale>Jenkins>.jenkins).
-
-
Go to this folder and paste your clipboard there (there should already be an empty jobs folder that will be fused).-
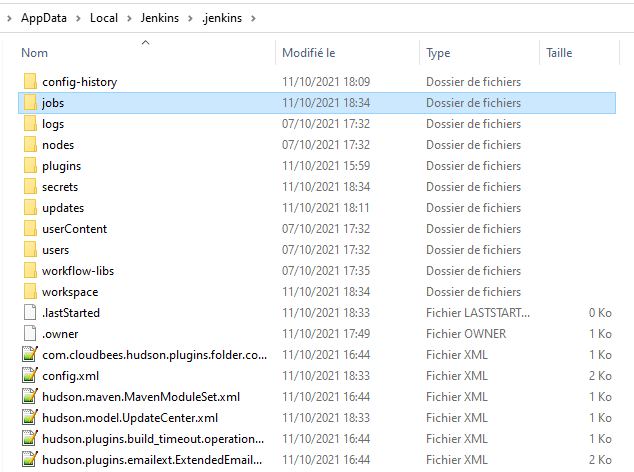
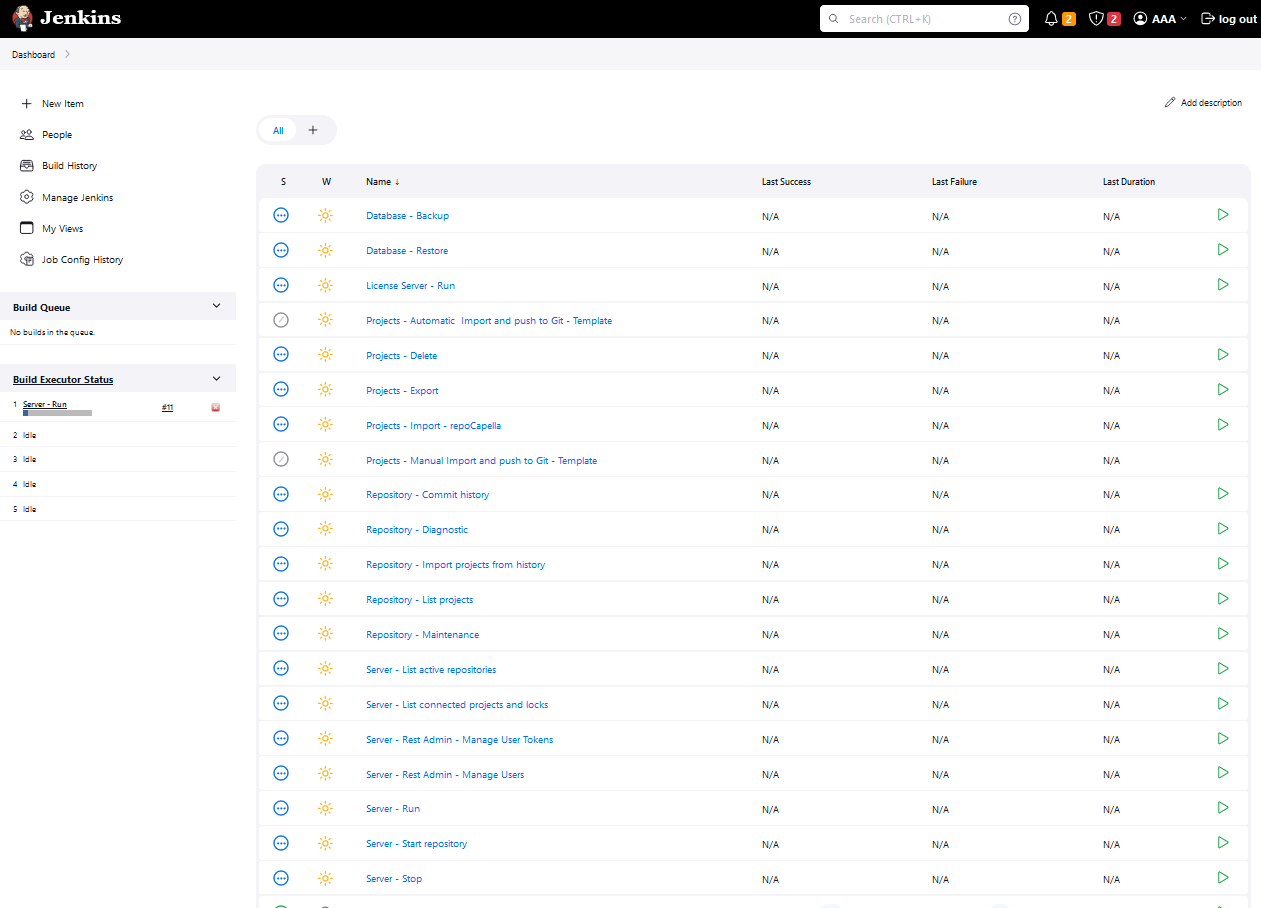
Restart Jenkins and now the dashboard will present all the Team for Capella applications.
|
These jobs executes Team for Capella applications, therefore Jenkins requires a global environment variable referencing the location of your team for Capella installation:
|
Finally, as there are many jobs, it will be easier to manage by grouping these applications by tabs:
-
On the Jenkins dashboard, you can simply press the + button next to the default tab named All.
-
On the next page, name your tab, select List view.
-
On the final page, select the jobs that you want on this tab.
-
On the same page, you can change the order of the columns.
-
We recommend to move the Build Button just after the Name column.
-
This way it is easier to trigger a job.
-
As an example, you can order your tabs as follows:
-
Server Management: Importer – Clear credentials, Importer – Store credentials, License Server – Start, Server – List connected projects and locks on model, Server – Start and Server – Stop.
-
Backup and Restore: Database – Backup, Database – Restore, Projects – Import and User profile – Import model
-
Diagnostic and Repair: Repository – Diagnostic and Repository – Maintenance
-
Templates: Projects – Automatic Import and push to Git – Template and Projects – Manual Import and push to Git – Template
Additional configuration steps are recommended, see Executors, Locale, Default view and Display Job Description in miscellaneous settings section.
3. Miscellaneous settings
3.1. Executors
-
By default Jenkins provides two build executors. This means that two applications can run at the same time. However, the CDO server and the License server are applications that keeps running. Therefore, they will block any other application. We recommend to change that in order to have five executor. There are two ways to change this:
-
Click on the Build Executor Status (Bottom left on the Jenkins Dashboard). Then, on the entry presenting the computer, click on the Configure button. On this executors configuration page, set the number of executors to 5.

-
Go to Manage Jenkins > Configure system, in the category Maven Project Configuration set the variable # of executors to 5.
-
3.2. Locale
-
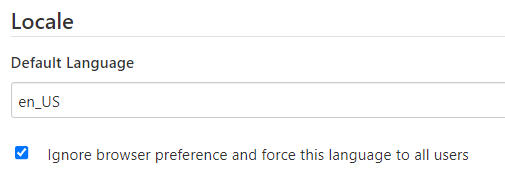
By default Jenkins will be presented with the language of the user’s system. However, it is possible to force displaying it in a certain language. Go the Manage Jenkins > Configure System. You then need to locate the Locale area, set the chosen language and check the Ignore browser preference and force this language to all users checkbox. You can choose the language (for instance fr for French) but also the region (for instance en_US for American English).
3.3. Default view
-
As the applications are sorted by views, you can choose a default view (the one shown when you click on the Dashboard) by going to Manage Jenkins > Configure System, under Default view you can choose which one you want to see as default.
3.4. Display Job Description
-
By default Jenkins will display the job’s description as plain text. However the provided jobs have an HTML description. Jenkins configuration can be changed to correclty display such descriptions:
-
Go to Manage Jenkins > Configure Global Security > , change the Markup Formatter from Plain Text to Safe HTML.
-
3.5. Change the Port Used by Jenkins
3.5.1. Windows
Go to the directory where you installed Jenkins (by default, it’s under Program Files/Jenkins), edit jenkins.xml , then update the value of --httpPort in the <arguments> tag of of the service definition:
<executable>java</executable>
<arguments> -some -arguments --httpPort=8036 -some -other - arguments</arguments>
Finally, go to Windows service, and restart the Jenkins service (or restart the Jenkins server if you launched it manually).
Change the name and id of the Jenkins service
Go to the directory where you installed Jenkins (by default, it’s under Program Files/Jenkins), edit jenkins.xml , then update the value of the <id> and <name> tags of of the service definition:
  <id>TeamForCapellaScheduler</id>
  <name>Team For Capella Scheduler</name>
Open a Command Prompt as administrator in this folder and execute the following commands
  sc stop jenkins
  sc delete jenkins
  jenkins.exe install
  jenkins.exe start
Finally, go to Windows service, and check that
-
the Jenkins service is no more present.
-
a new service is present with the id and name of your choice.
3.5.2. Linux
The configuration file after a standard installation is located in:
-
/etc/default/jenkins: for most of the Linux distributions. -
/etc/sysconfig/jenkins: for RedHat/CentOS distribution.
By default, the port is 8080:
HTTP_PORT=8080
The service has to be restarted after the port modification:
systemctl restart jenkins
3.6. Set specific folders for Jenkins
3.6.1. Windows
It is possible to force Jenkins to use some specific folders. Go to the directory where you installed Jenkins (by default, it’s under Program Files/Jenkins), edit jenkins.xml, then complete the <arguments> tag of the service definition:
-
Set the Java temp folder to use in Jenkins:
-Djava.io.tmpdir=%JENKINS_HOME%\temp -
Use a specific folder to extract the Jenkins war content:
--extractedFilesFolder="%JENKINS_HOME%\temp"
Finally, go to Windows service, and restart the Jenkins service (or restart the Jenkins server if you launched it manually).
3.6.2. Linux
Open the jenkins configuration file (see the previous Change the Port Used by Jenkins paragraph for the configuration file location)
-
Set the Java temp folder to use in Jenkins:
JAVA_ARGS="-Djava.io.tmpdir=$JENKINS_HOME/temp" -
Use a specific folder to extract the Jenkins war content by adding the following argument in
JENKINS_ARGSvariable:--extractedFilesFolder=$JENKINS_HOME/temp"
4. Updates
It is recommended to check for updates. On the top-right area, Jenkins will show notifications if there are some updates or issues identified. Furthermore, when you select the Manage Jenkins menu, the top area will present updates or corrections that can be applied to Jenkins or its plugins. Depending on the importance it will be presented in different colors (red>yellow>blue). Most of the time, it is notifications about new updates but in any case, it is a good practice to check this page once in a while and follow what is presented.
5. Uninstall Jenkins
The Jenkins service can be stopped and deleted using the following commands in a Windows Command Prompt:
  sc stop jenkins
  sc delete jenkins
The id of the service is jenkins by default but you might have changed it as described in Change the name and id of the Jenkins service section.
Jenkins can be completely removed from your system with the use of its Windows Installer.