Server Administration
1. Administration Views
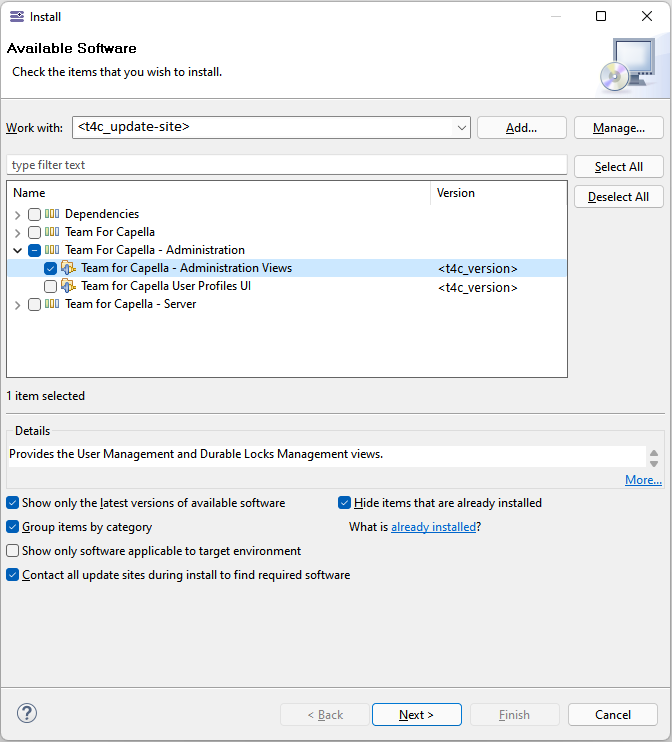
The Team for Capella client comes with two views useful to perform some administrative tasks: The Durable Locks Management view, and the User Management view. To access to these features, you must install the Team for Capella - Administration Views feature from the Team for Capella update site.
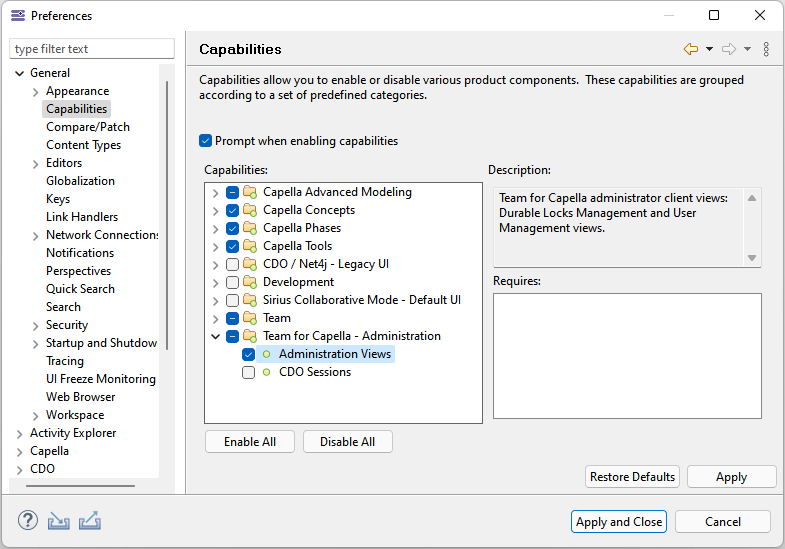
After restarting your T4C client, go to Preferences > General > Capabilities to enable the Administration Views capability.
1.1. Durable Locks Management View
|
Important: The durable locking is deactivated by default since Team For Capella 1.1.4 and 1.2.1. |
1.1.1. Activate the durable locking
The durable locking mechanism allows to configure the explicit locks manually taken by a user as persistent locks. If a user takes explicit locks and then terminates his connection to the remote model (by closing his shared project or exiting the Team for Capella client), his explicit locks are not released and he will retrieve them on the next connection to the repository.
The durable locking can be activated by a client by adding the following option in the plugin_customization.ini file:
fr.obeo.dsl.viewpoint.collab/PREF_ENABLE_DURABLE_LOCKING=true
If the plugin_customization.ini file is not present, you need
-
to create it in
capella/ -
to reference it from the
capella/capella.ini: before-vmargs, add:
-pluginCustomization
plugin_customization.ini
Note that the activation or deactivation of durable locking will have no effect on existing connection projects. The client have to remove the local connection project and to connect to the remote project again.
The following sections describe the case where the durable locking is activated.
1.1.2. Use the View
Team for Capella provides the Durable Locks Management view to list existing locking sessions and delete them if needed.
-
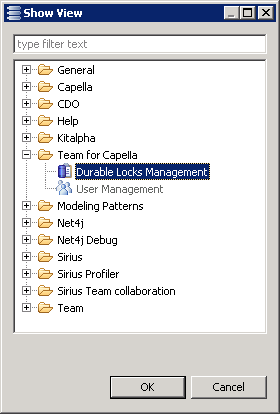
To open this view in a Team for Capella client, click on Window / Show View / Other… and select Team for Capella / Durable Locks Management:
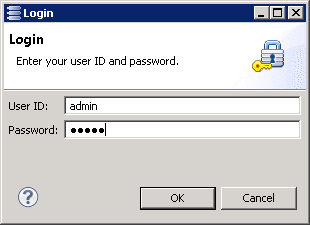
When doing the first operation with this view, you will be asked to logon with the following dialog:
-
Click on the
 button to list existing locking sessions (object locked by these locking sessions, if any):

-
Use the contextual menu on a Locking Session to remove it:

|
It is allowed to remove Locking Sessions only if the corresponding user is not connected. |
1.1.3. Additional information on Locking Sessions
The Durable Locks Management view displays all locking sessions existing on the repository and the locks created by these locking sessions (if any).
A locking session is created whenever a team project is created on a client (Capella Connected Project). So if a user creates several team projects, he can have several locking sessions (as user1 in the screenshot above). Each locking session has a unique ID stored in the local .aird file.
Locks are owned by a locking session, so if the same user has two locking sessions (⇔ 2 team projects) and he locks an element in the first locking sessions, this element will appear with a red lock in the second locking session.
1.1.4. Remove Locking Sessions
As explained above, using the Durable Locks Management view, locking session can be removed (this action is available by all users but should be done by the administrator only). A locking session can be removed only if nobody is connected using it.
All locks hold by the locking session are removed with it.
If a user tries to connect to the repository using an existing connection project referencing a removed Locking Session ID, an error dialog is displayed (see below) and a new locking session is created. The ID of this new locking session will replace the old one in the local .aird file on the next save action.

1.2. User Management View
Team for Capella provides the User Management view to manage users on the Team for Capella Server.
|
The Durable Locks Management view is useful only if the Team for Capella Server is configured to work with the access control "Identification". |
-
To open this view in a Team for Capella client, click on Window / Show View / Other… and select Team for Capella / User Management.
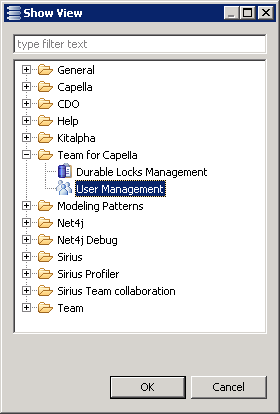
The view is shown.

When doing the first operation with this view, you will be asked to logon with the following dialog:

-
Click on the
 button to list already registered users:
-
Click on the "+" button to add a new user:
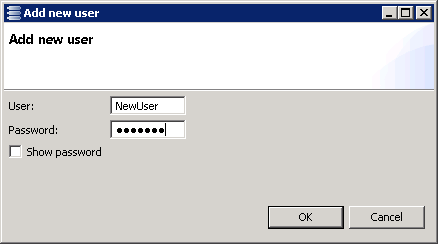
-
Use the contextual menu on a user to remove it:

2. Administration Tools
2.1. Repository maintenance application
The repository might have some inconsistent data and might need to be maintained.
The Repository maintenance application will look for the following inconsistencies:
-
Broken links between Representation Descriptor and their representation(a Diagram, a table or a tree).
This link might be broken if the representation has been deleted or if the internal index of the Representation Descriptor list is incorrect. That can cause some troubles for the different users connected to the project.
-
Stale references (Orphan references): Some references in the model might be linked to a missing element in the database. That might cause the importer failure. The diagnostic job will list them in the console log. If the repair is activated, stale references will be removed.
The application aims to delete orphan Representation Descriptors and stale references in the repository (both graphical and semantic models).
Once done the application will close the server.
| This application requires that no user is connected to the repository. |
2.2. Job configuration
There are two jobs available for maintenance in the Scheduler:
-
Start repository diagnostic will only run the diagnostic part. The diagnostic result is logged in the console output of the job. It is also kept as an artifact of the job result.
-
Start repository maintenance will run the diagnostic and then launch the maintenance tasks if some managed issues are detected: it will backup the server with capella_db command, perform the required changes on the database and close the server. The steps are logged in the console output of the job and the corresponding log file is kept as an artifact of the job result.
The application needs credentials to connect to the CDO server if the server has been started with authentication or user profile.
Credentials can be provided using -repositoryCredentials parameter.
Here is a list of arguments that can be passed to the application or using the job (in maintenance.bat or the job config):
| Arguments | Description |
|---|---|
-repositoryCredentials |
Login and password can be provided using a credentials file. To use this property file
aLogin:aPassword |
-hostname |
defines the team server hostname (default: localhost). |
-port |
defines the team server port (default: 2036). |
-repoName |
defines the team server repository name (default: repoCapella). |
-connectionType |
The connection kind can be set to tcp or ssl (keep it in low case) (default: tcp) |
-diagnosticOnly |
Allowed values are true or false. If true, only the diagnostic is done. The database will be unchanged. (default: false) |
-launchBackup |
Allowed values are true or false. If true, the capella_db backup is done before any change is done on the database. (default: true) |
-archiveFolder |
Indicates where the backup zip will be stored. |
-httpLogin |
Backup and Maintenance are triggered by an Http request. This argument allows to give a login to identify with on the Jetty server. |
-httpPassword |
Backup and Maintenance are triggered by an Http request. This argument allows to give a password to authenticate with on the Jetty server. |
-httpPort |
Backup and Maintenance are triggered by an Http request. This argument allows to give a port to communicate with on the Jetty server. |
-httpsConnection |
Backup and Maintenance are triggered by an Http request. This boolean argument specifies if the connection should be Https or Http. |
2.3. REST Admin Server
An administration feature through WebServices is available for the Team for Capella Server: it brings users and repositories management capabilities through REST API and exposes an OpenAPI description:
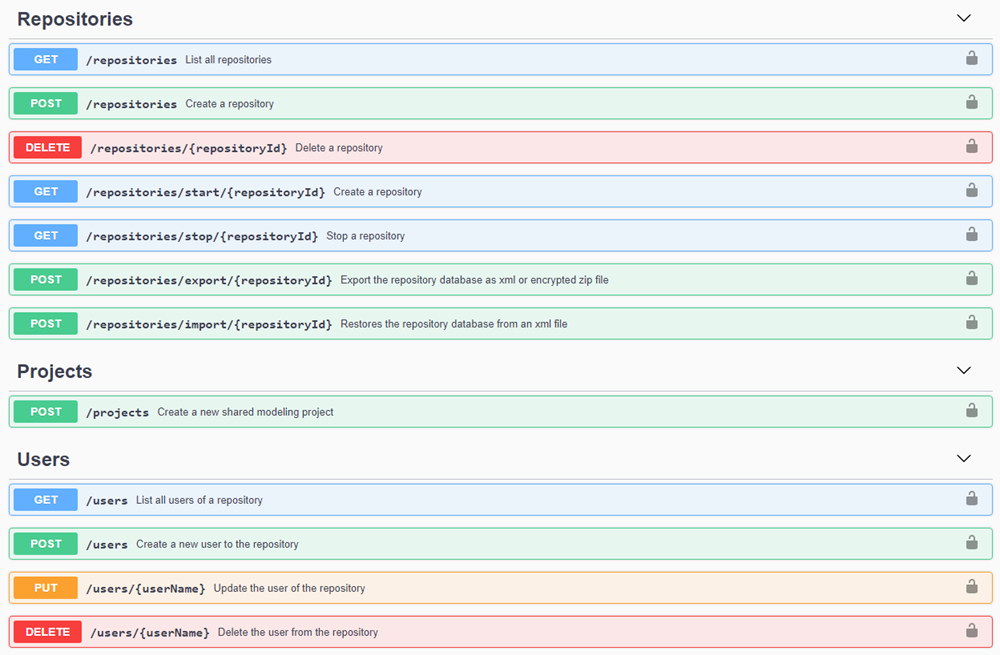
Refer to documentation available in the folder server/dynamic to discover how to install and enable it.