Export/Import to/from the Team for Capella Server
-
Export is the action to put a model in file format on the Team for Capella Server
-
This model in file format may come from SCM tool (like Git). In that case, it should be a specific baseline.
-
-
Import is the action to get a model in file format from the Team for Capella Server
-
It is necessary to push back a model in the SCM tool (a baseline can be put if a milestone has been passed).
-
-
Dump To local is the action to save the already loaded resource of an opened connected project.
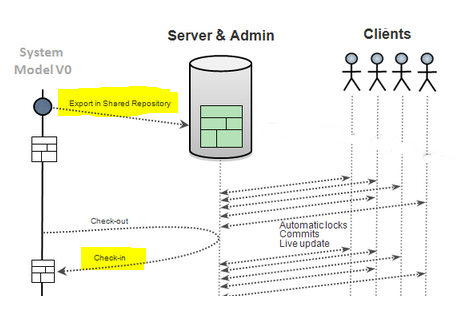
1. Export
Import a file-based model in a workspace. The model can be indifferently fragmented or not.
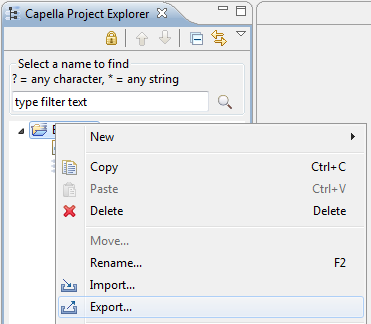
On the Capella Project containing the model, use the contextual menu to launch the Export wizard.
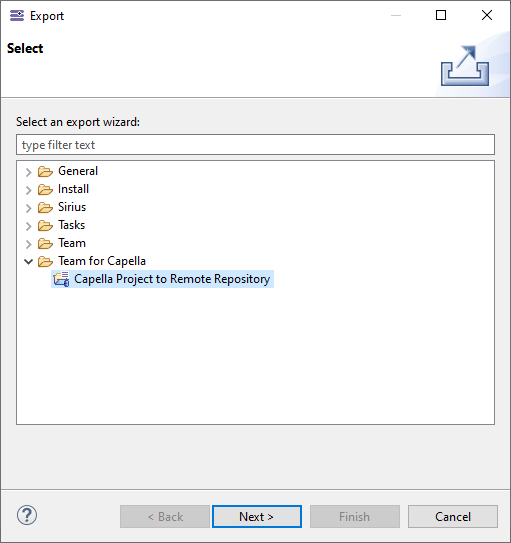
Choose "Capella Project to Remote Repository"
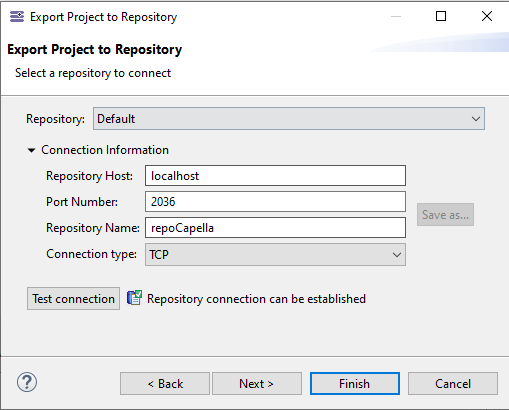
The "Export model to repository" wizard opens. The repository information is initialized with the default settings defined in the Preferences.
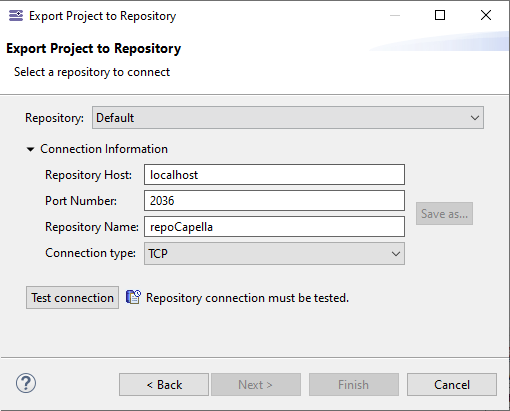
Before continuing, the server information has to be verified. To do so, click on "Test connection"
A login dialog pops up. Enter valid login and password (see Server Administration for more information about User management).
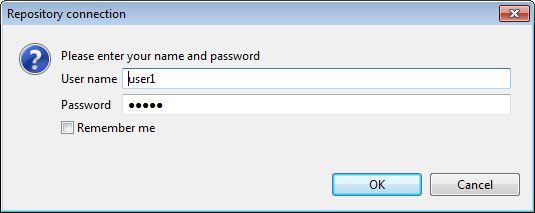
If the identification is successful, the "Finish" button becomes active.
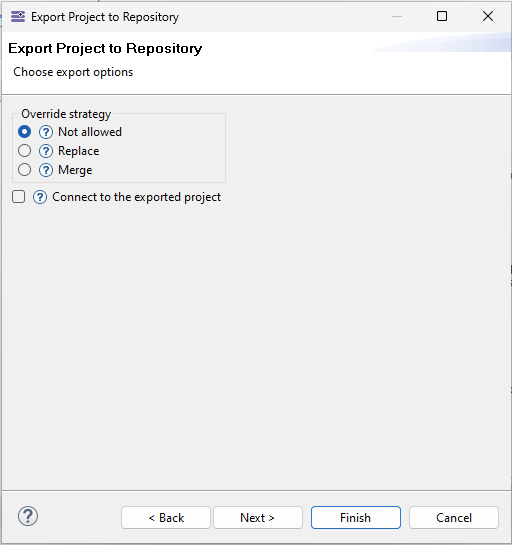
If you do not click on "Finish" but on "Next", the following options are available:
-
Override strategy:
-
Not allowed: Default choice. Display an error if the repository already contains the same resources.
-
Replace: if the repository already contains the same resources, they will be overridden. This is done only if there is no other connected session and if it is not a library project. The remote project is deleted and replaced by a new export.
-
Merge: to use Diff/Merge to compare a local project and an existing remote project in order to commit only computed deltas. It keeps model elements identity and commit history.
-
Note that with the system property "-Dfr.obeo.dsl.viewpoint.collab.api.export.without.check=true" it is possible to override without checks.
-
-
Connect to the exported project: this option causes to directly launch the connection wizard after the export wizard. This option is unchecked by default.
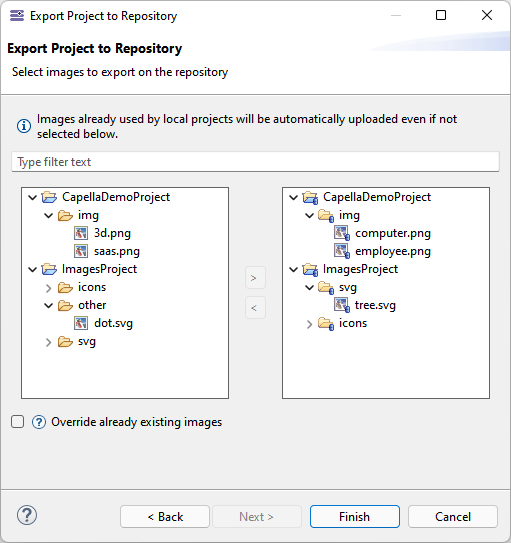
If you click "Next" again, you will be able to choose the images you want to export to the repository in this new wizard page.
Refer to Export images to the server when exporting the project for more details.
Then, after having clicked Finish, a progress bar is displayed.

When the export is completed, a dialog shows the result of the process by listing the newly created or overridden resources, as well as the not found resources, already existing resources, or the non-discovered resources.
Note that the "discover" mode is not yet implemented, but this dialog allows informing the user about what has been done during the export.
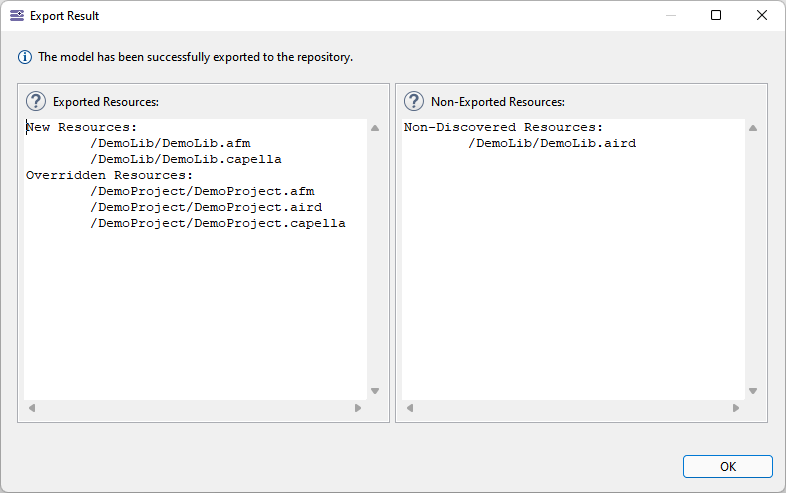
|
The CDO framework can only handle one version of a metamodel. If you shared a Capella project of one version (for instance Capella 6.1), you will not be able to export on the same repository a Capella project of a different version (for instance Capella 7.0). You will need to clear the repository or export on a new one. There is the same limitation with Capella Addons that extend the Capella Metamodel. Note that there are some corner cases where it works, for instance if the new metamodel version only adds new metaclasses, but in general it should be assumed that a new version of a metamodel should be deployed on a new repository. |
2. Import
In the Capella Project Explorer, use the contextual menu to launch the Import wizard.
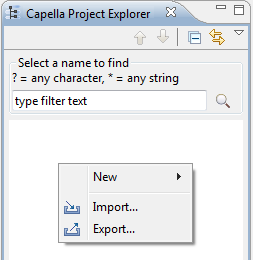
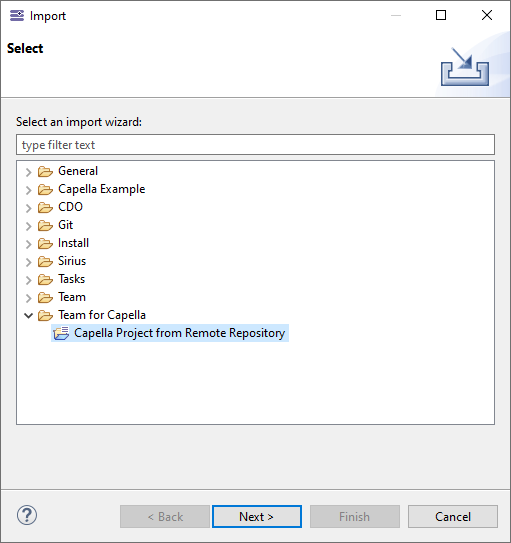
Choose "Capella Project from Remote Repository"
A wizard opens. The repository information is initialized with the settings defined in the Preferences. These information can be overridden. Before continuing, the server information has to be verified. To do so, click on "Test connection". Follow the login instructions as when login to Export the model. When the test is successful, the "Next" button becomes active.
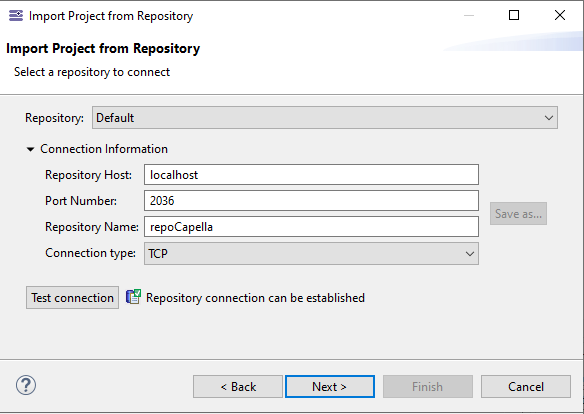
A second Wizard page proposes to choose the model to Import (a Shared Repository can hold several models).
Optionally change the name of the Capella Project going to be created.
The behavior of the wizard can be configured with the following options:
-
Override strategy:
-
Not allowed: Default choice. Display an error if a resource to import already exists in the workspace or on the file system.
-
Replace: The local project is emptied, and its content is replaced by the remote project.
-
Override: Override local content with their remote equivalent, files which have no equivalent in the remote are untouched.
-
-
Use default location: when unchecked, the location field allows selecting a folder on the file system which can be different from the current workspace. This option is checked by default.
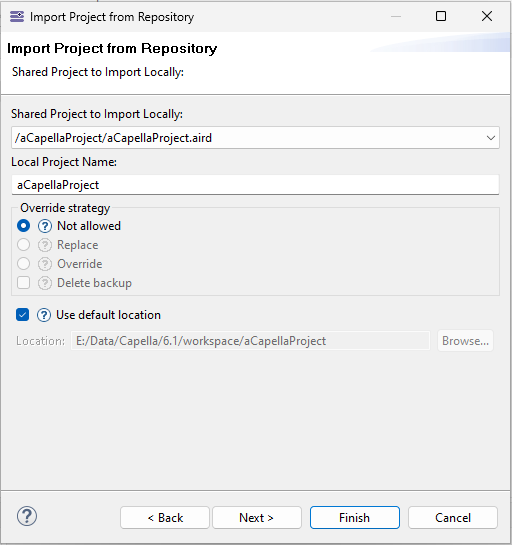
If you click on Next, you will be able to choose options about which images will be imported.
Refer to Import images from the server when importing the project for more details.
| Images that already exist in the workspace will be overridden automatically. |
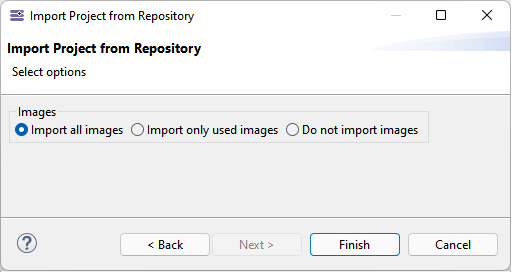
A progress bar appears.

When the import is completed, a dialog shows the result of the process by listing the newly created or overridden resources, as well as the not found resources, already existing resources, or the non-discovered resources.
Note that the "discover" mode is not yet implemented, but this dialog allows informing the user about what has been done during the import.
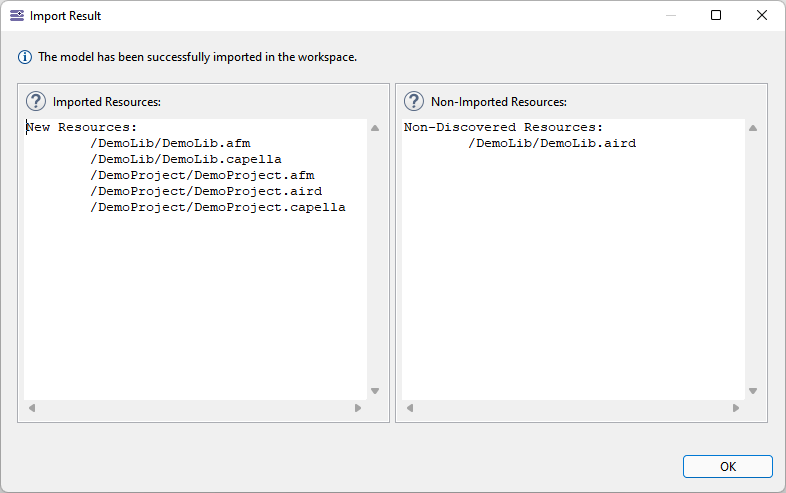
Once the import is finished, the imported model is automatically opened.
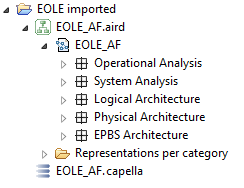
The model files can then be pushed back to Git if necessary.

3. Dump to local
This command will dump the connected project into a new local Capella project. The local project will contain only the already loaded representations.
It is available in the contextual menu on aird file of an opened connected project.

This command is useful if you encounter a Save fail issue. You can then use the tool to have a new Capella project, compare it with the project on server and make some merge.