Model management
1. Create a new model
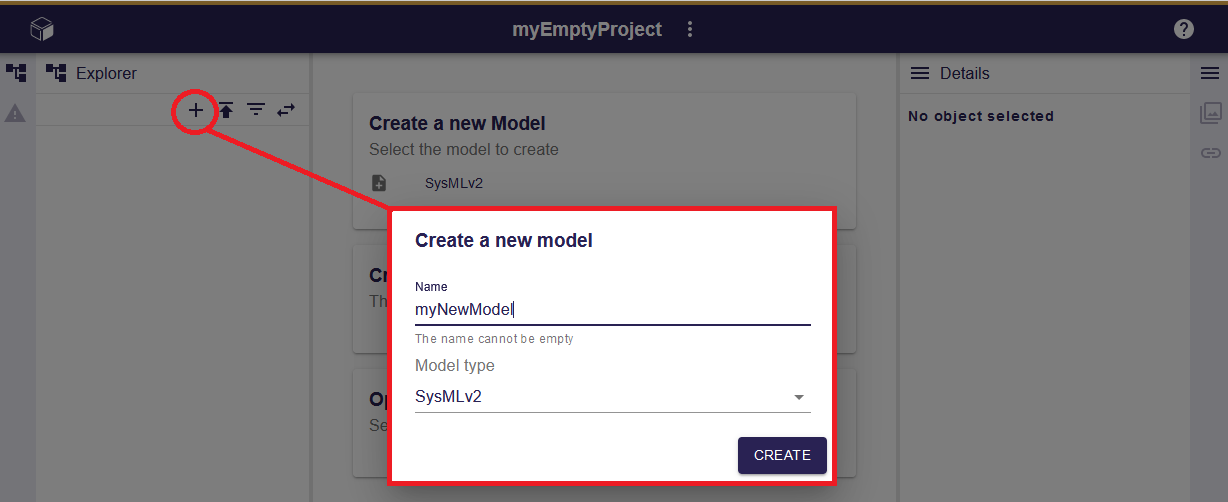
To create a model, follow these steps from the toolbar of the Explorer View:
-
Click the
New modelaction in the explorer toolbar. -
Complete the model name.
-
Choose the model type.
-
Click the
Createbutton.
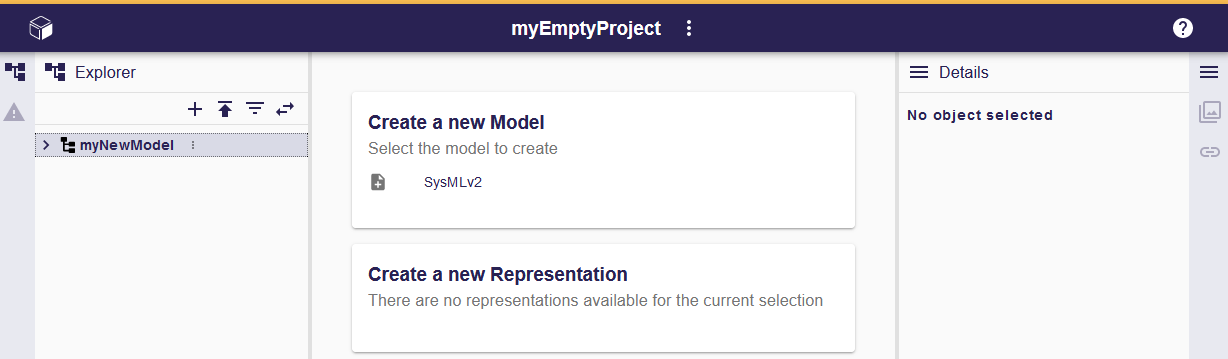
Upon creation, the new model appears in the Explorer View.
2. Upload a model
Sirius Web supports the upload of XMI and JSON files.
|
For JSON models, only models exported in the specific JSON format recognized by Sirius Web can be re-uploaded by using the upload action. Ensure that your models are exported using the Download Model action to enable successful re-uploading to Sirius Web. |
To upload a model from a file previously exported, follow these steps:
-
Go to the Project Workbench.
-
Open the Explorer View.
-
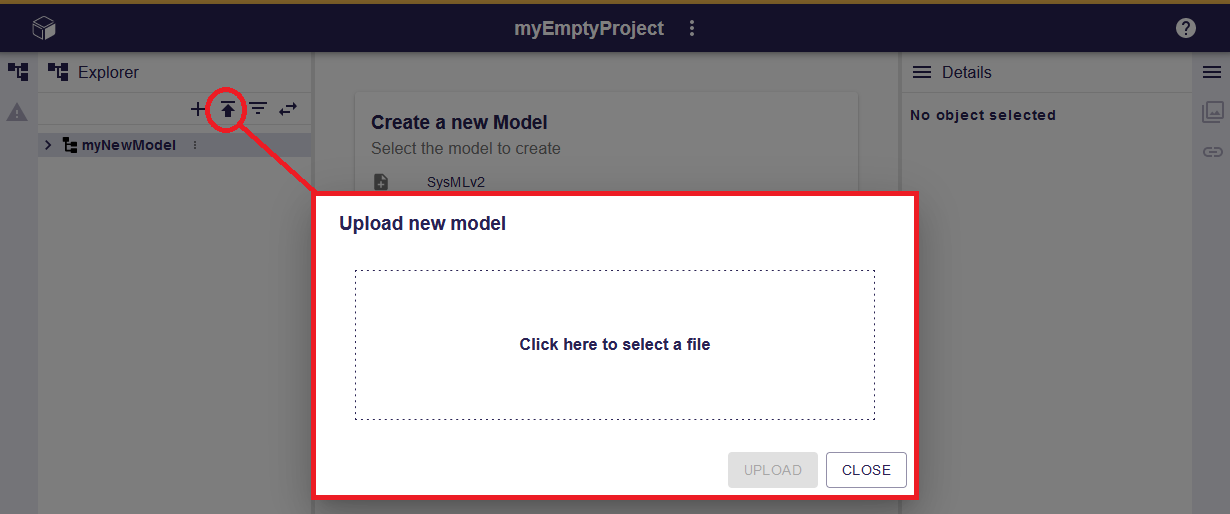
Click the
Uploadbutton at the top of the Explorer View in the toolbar. -
It opens the
Upload Modelmodal. -
Select a model from your file system.
-
The uploaded model is automatically created and opened.
3. Rename a model
You can update the model name from the Explorer View:
-
Click the Explorer Contextual Menu next to the model in the Explorer View.
-
Select the
Renameoption. -
Update the name in the editable field.
-
Click
Rename.
4. Delete a model
|
Deleting a model and its content is a significant action, and it’s important to note that the entire model, along with its contents, is permanently removed. This includes all associated semantic elements, representations, and any other data within the model. Exercise caution when performing this operation, as it can’t be reversed. |
|
The deletion affects everyone. |
To delete a model, follow these steps:
-
Select the model in the Explorer View.
-
Open the Explorer Contextual Menu next to the model.
-
Click
Delete.
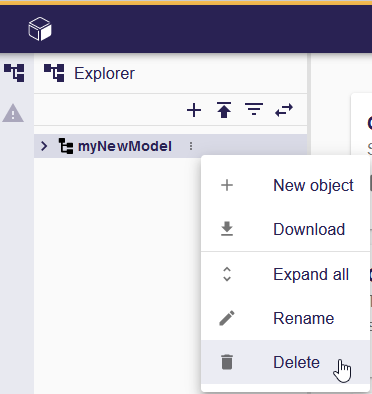
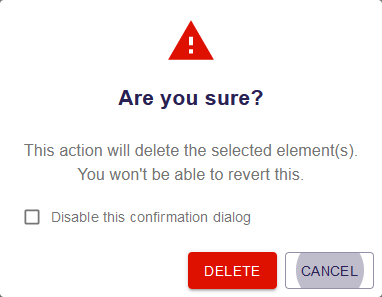
A confirmation dialog appears when the model is deleted via the Model Explorer. This behavior can be disabled by checking the "Disable this confirmation dialog" checkbox in the dialog.
|
This preference is stored in the local storage of the browser. You can reset it using the settings page of the project or by clearing the Sirius Web data in the local storage of your browser. |
5. Download a model
You can download a model from the Explorer View:
-
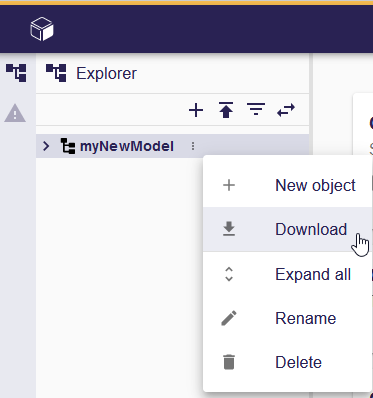
Click the Explorer Contextual Menu next to the model in the Explorer View.
-
Select the
Downloadoption.
|
The model is downloaded in JSON format. The JSON format used by Sirius Web is specific to the tool. |
6. Create a new element
The process to create a new element in a model involves the following steps:
-
Open the Explorer Contextual Menu next to the parent element.
-
Click
New object. -
Select the desired type of object to create.
-
Click
Create.
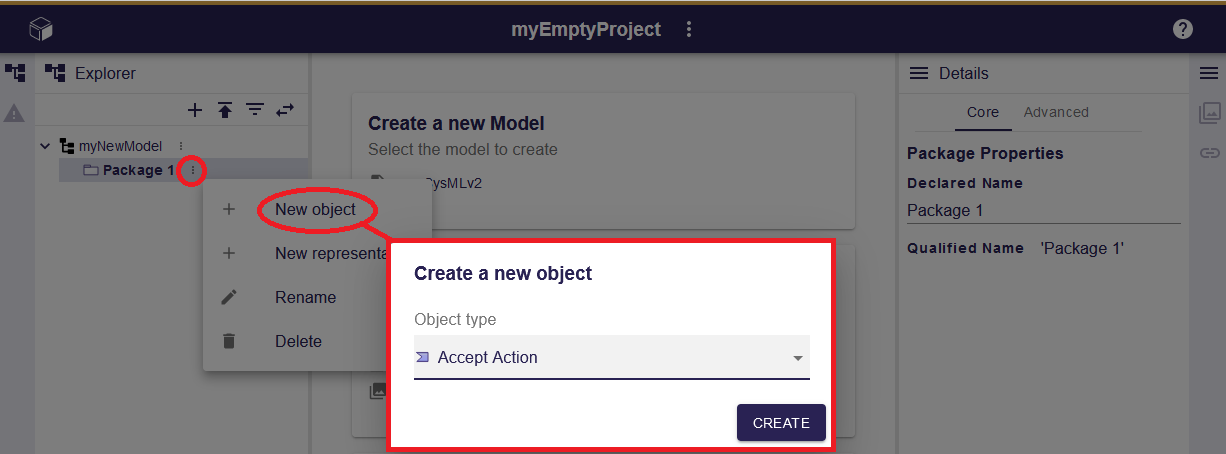
Upon completion, the newly created element is automatically selected in the Explorer View.
7. Read an element
-
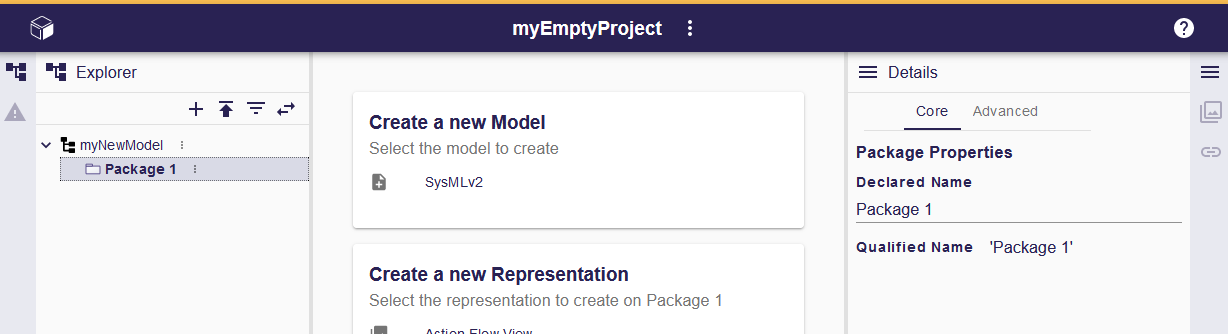
To navigate through the details of a semantic element, use the Explorer View to navigate through the model and locate the needed element.
-
Select the element in the Explorer View.
-
On the right panel, access the Details View. This view presents all the available properties for the selected element, providing a comprehensive overview of its characteristics.
8. Rename an element
It’s possible to rename an element either from the Explorer View, the Details View or a representation.
8.1. From the Explorer View
You can update the element name from the Explorer View:
-
Click the Explorer Contextual Menu next to the element in the Explorer View.
-
Select the
Renameoption. -
Update the name in the editable field.
-
Click
Rename.
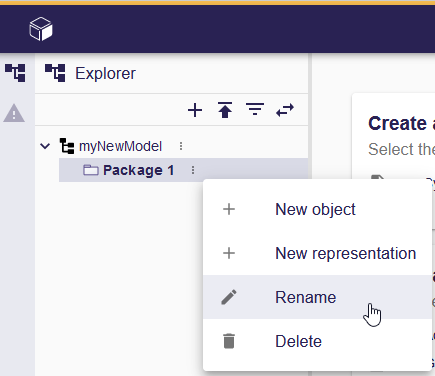
Alternatively, cancel the operation by pressing the ESC key.
8.2. From the Details View
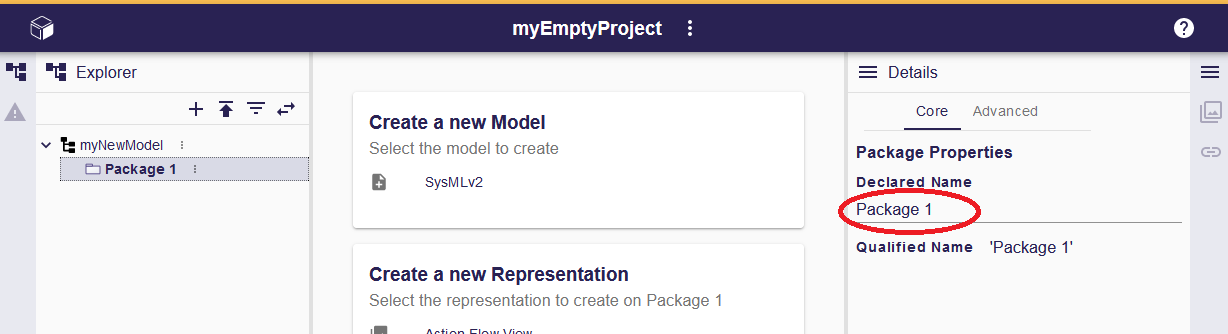
You can update the element properties from the Details View:
-
Select the property in the Details View.
-
Update the value in the editable field.
-
Validate the changes by pressing the
RETURNkey or clicking anywhere.
8.3. From a representation
You can update the element name from a representation (diagram…):
-
Select the element in the representation.
-
Select the
Edittool in the Diagram Contextual Palette. -
Validate the changes by pressing the
RETURNkey or clicking elsewhere.
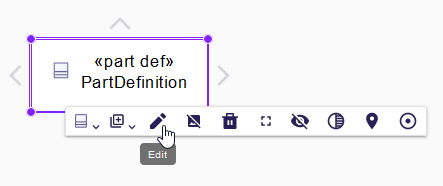
Alternatively, cancel the operation by pressing the ESC key.
|
Instead of using the tool in the toolbar, you can press |
9. Update an element
It’s possible to update element properties either from the Details View or a representation.
9.1. From the Details View
You can update the element properties from the Details View:
-
Select the property in the Details View.
-
Update the value in the editable field.
-
Validate the changes by pressing the
RETURNkey or clicking anywhere.
9.2. From a representation
You can update the element name from a representation (diagram…):
-
Select the element in the representation.
-
Select the
Edittool in the Diagram Contextual Palette. -
Validate the changes by pressing the
RETURNkey or clicking anywhere.
|
Instead of using the tool in the toolbar, you can press |
10. Delete an element
|
This operation is irreversible, once done there is no mean to get the element back. The element and its children - semantic element and representations - are deleted. |
|
The deletion affects everyone. |
To delete an element, follow these steps:
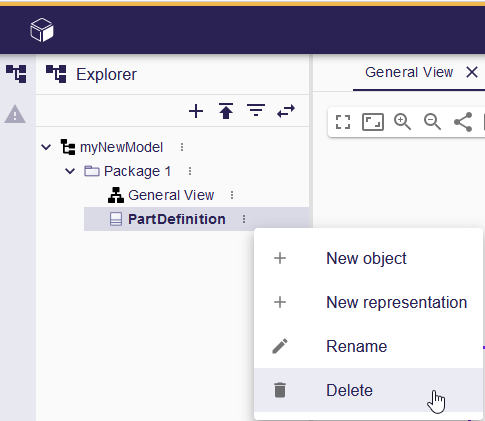
10.1. From the Explorer View
-
Open the Explorer Contextual Menu next to the element.
-
Click
Delete.
10.2. From a representation
-
Select the element in the representation.
-
Click the
Deletetool in the Diagram Contextual Palette or press theDELkey on your keyboard.
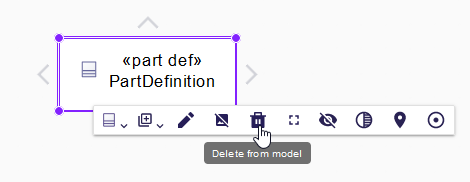
Use the DEL key cautiously, as it’s a direct shortcut for the delete operation.
|
A confirmation dialog appears when an element is deleted via the Delete from model tool in the palette or via the Explorer Contextual Menu. This behavior can be disabled by checking the "Disable this confirmation dialog" checkbox in the dialog.
|
This preference is stored in the local storage of the browser. You can reset it using the settings page of the project or by clearing the Sirius Web data in the local storage of your browser. |